Create an emulator for testing in Android Studio
This article is intended for users of Foxit Quick PDF Library for Android.
The Android Virtual Device (AVD) is an emulator configuration that lets you model an actual device by defining hardware and software options to be emulated by the Android Emulator. It comes as an optional download when you install Android Studio.
Please note: Android Emulator’s can be quite slow to load and performance is lower than what you get if you test directly on a physical device. However, it gives you the opportunity to test a variety of different device form factors and phone/tablet models.
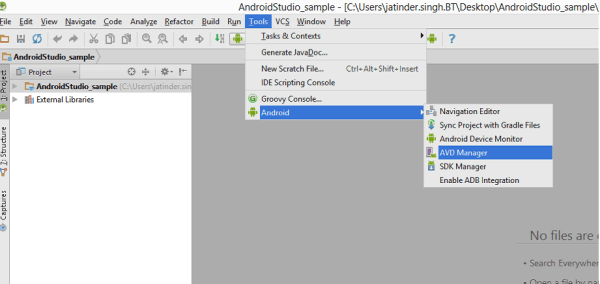
- In Android Studio go to “Tools (Menu Bar) >Android > AVD Manager.

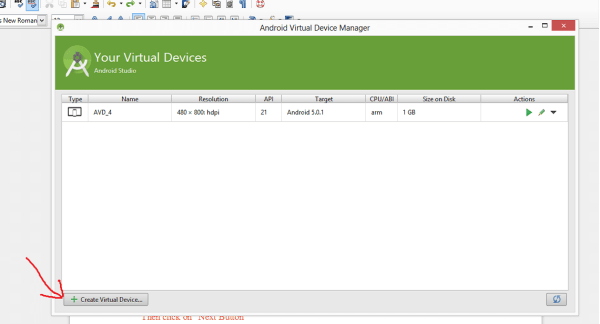
- Click on the “Create Virtual Device” button.

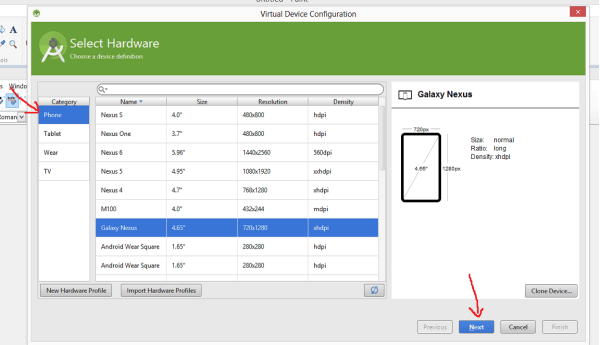
- Select “Phone” or “Tablet” as Category and select the device which you want to use to make a Virtual Device. Then click on the “Next” button. Note: select a small screen device for better emulator performance. Devices with a large screen will have a longer launch time (Nexus 4, Nexus 5 etc).

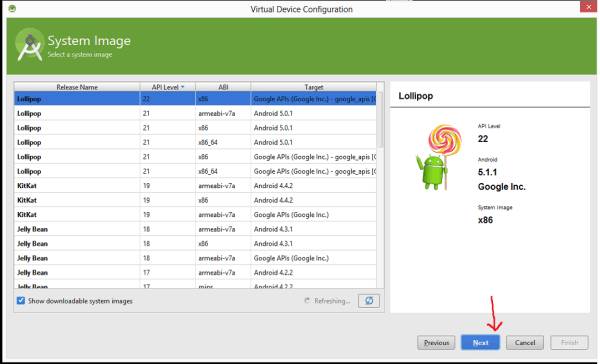
- Select the System Image i.e. the API level of Android OS (KitKat, Lollipop etc). Foxit Quick PDF Library for Android requires an API level of 15 or higher.

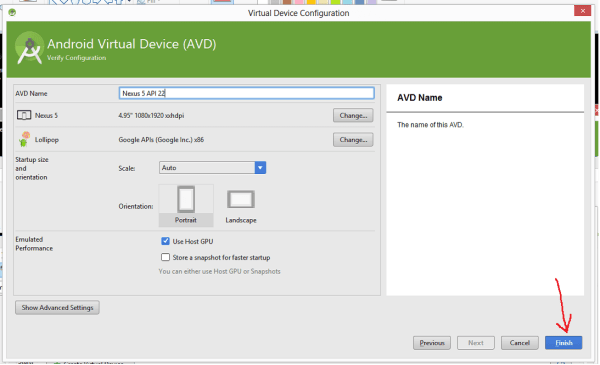
- Now you will see options to verify the Emulator Settings otherwise you may change the settings according to your requirement from this dialog as well and then click on the “Finish” button.

- Now you will see the newly created Emulator in the list of available Android Virtual Devices.

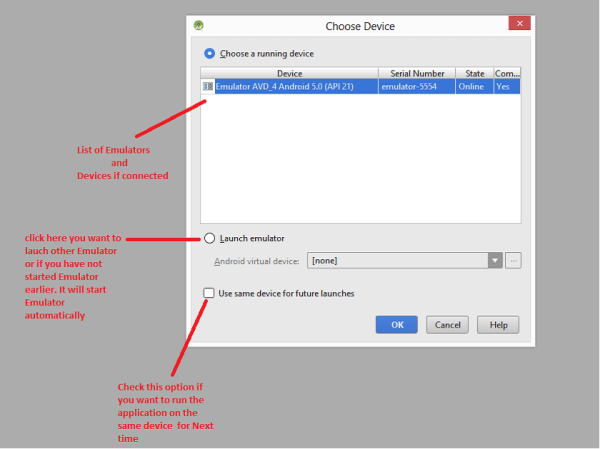
- After launching the Emulator (by double-click on the Emulator option that you want to use as show in the screenshot above), wait for the “Home Screen” to load on the Android Virtual Device and then run the application. It’s important that the Virtual Device has finished loading before you try to run the application otherwise it won’t be recognized by Android Studio and you will be prompted to launch the Emulator again which can cause issues. Once the Virtual Device has loaded and you have run the application the dialog below will appear and you can select the Android device that you wish to use.

- Finally you should now see your application running in the Android Emulator.

Notes:
- Android Studio can be a bit sensitive with the Emulators. If you find the Emulator isn’t working (when it has previously worked) check the task manager and remove any loaded Emulator processes. If that doesn’t work try rebooting. This can be an issue in step 7 if you try loading the same Emulator twice you will find that it a) doesn’t let you and b) causes ongoing issues until you have resolved the conflict (as already mentioned, rebooting helps but is not the most efficient).
- We suggest launching the Emulator first from the ADV Manager and waiting for the Emulator to fully load the device (i.e. homescreen is shown) before trying to run the app on the Emulator. If the Emulator has not fully loaded then it will not be shown in the Choose Device screenshot shown in step 7 when you try running the app and then it will give you the option to launch the Emulator again and this will just result in frustrating Emulator conflict issues. Refer to note #1.
This article refers to a deprecated product. If you are looking for support for Foxit PDF SDK, please click here.
Updated on May 16, 2022