How to Implement Foxit PDF SDK iOS using React Native plugin
React Native is a mobile development framework for building native apps using JavaScript and React. The ‘react-native-foxitpdf‘ plugin is one of the mobile framework plugins provided by us to use with Foxit PDF SDK for iOS. By utilizing the React Native framework, it enables you to achieve powerful PDF viewing functions. You can preview any PDF file including PDF 2.0 compliant files, XFA documents, and RMS protected documents, as well as commenting and editing PDF documents with this plugin.
This section will help you get started with Foxit PDF SDK for iOS and the React Native plugin.
Contents
System Requirements
- NPM
- React Native
- iOS 9 or higher
- Xcode 9 or higher
- Foxit PDF SDK For iOS
Note: The version of Foxit PDF SDK for iOS should match the version of the ‘react-native-foxitpdf‘ plugin. You can specify the plugin version when installing it. If you don’t, the latest version will be installed.
Install React Native Command Line Interface
To build React Native app for iOS, you will need Node, Watchman, the React Native command line interface, and Xcode.
Please refer to the official getting started guide on setting up React Native CLI and setting up Android development environment to install React Native command line interface.
Build a React Native project using Foxit PDF SDK for iOS
Create a React Native project
Navigate to the directory where you wish to create your project and type react-native init . For example, open a command prompt or terminal, go to “D:\react-native”, and type the command below to create a React Native project called “testRN“:
react-native init testRN
Install ‘react-native-foxitpdf‘ plugin
Download the plugin from npm and install it inside the project folder:
To install a specific plugin version, for example, the 6.2.1 version
cd testRN
npm install @foxitsoftware/[email protected] –save
Install the latest plugin version (by not specifying the version)
cd testRN
npm install @foxitsoftware/react-native-foxitpdf –save
Link the project to the plugin:
react-native link @foxitsoftware/react-native-foxitpdf
Note: All the subsequent commands are executed in the project directory.
Integrate Foxit PDF SDK for iOS
Download the Foxit PDF SDK for iOS package and extract it. Then, follow the steps below:
- Copy “libs” folder from the extracted package to “D:\react-native\testRN\ios” directory.
- Double-click “testRN.xcodeproj” found in the “testRN/ios” folder to open the React Native project in Xcode.
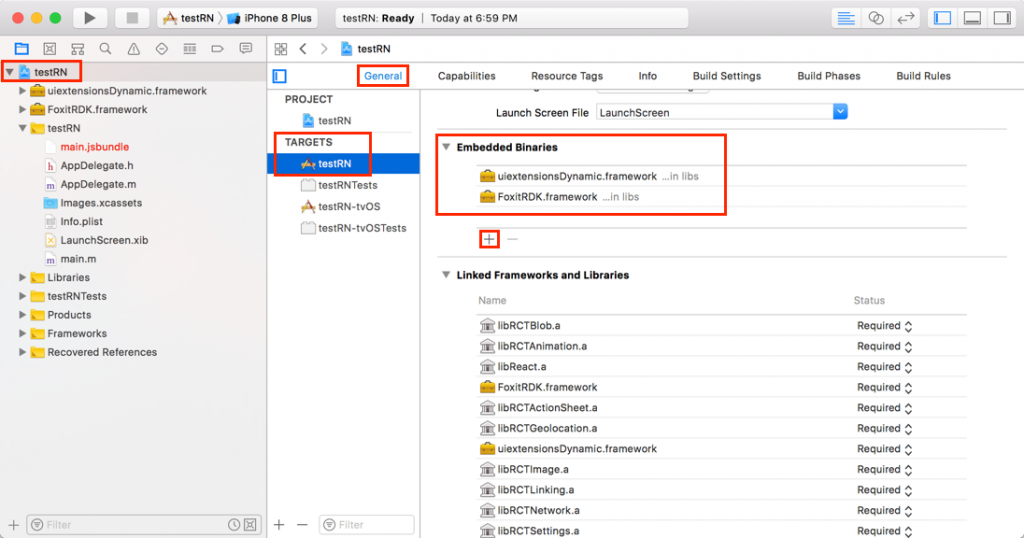
- Add the dynamic framework FoxitRDK.framework and uiextensionsDynamic.framework in the “testRN/ios/libs” folder to Xcode’s Embedded Binaries.
- Left-click the project, find TARGETS -> General -> Embedded Binaries, press on the + button and choose the two frameworks to add (See Figure 1-1).
Figure 1-1
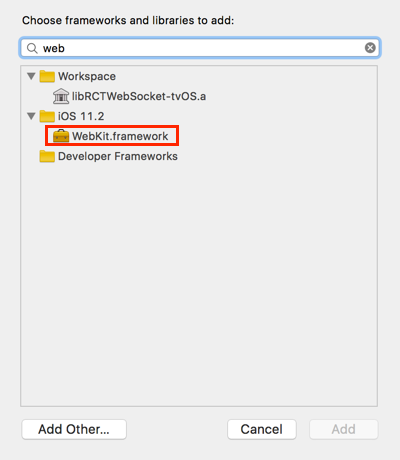
- Add “WebKit.framework” to Xcode’s Linked Frameworks and Libraries.
Left-click the project, find TARGETS -> General -> Linked Frameworks and Libraries, press on the + button and type “web” into the search box to faster find “WebKit.framework” (See Figure 1-2), select it and click Add.
Figure 1-2
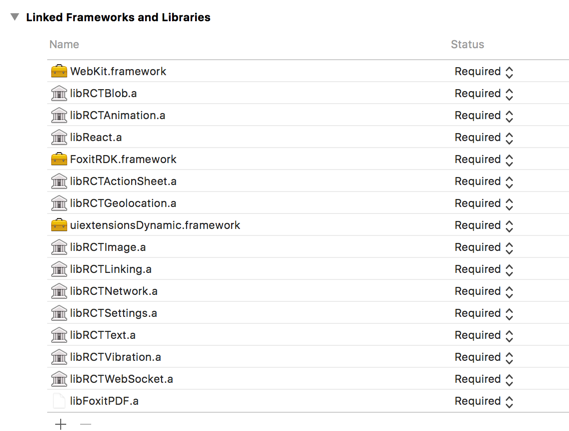
Then, the Linked Frameworks and Libraries will be as they are in Figure 1-3.
Figure 1-3
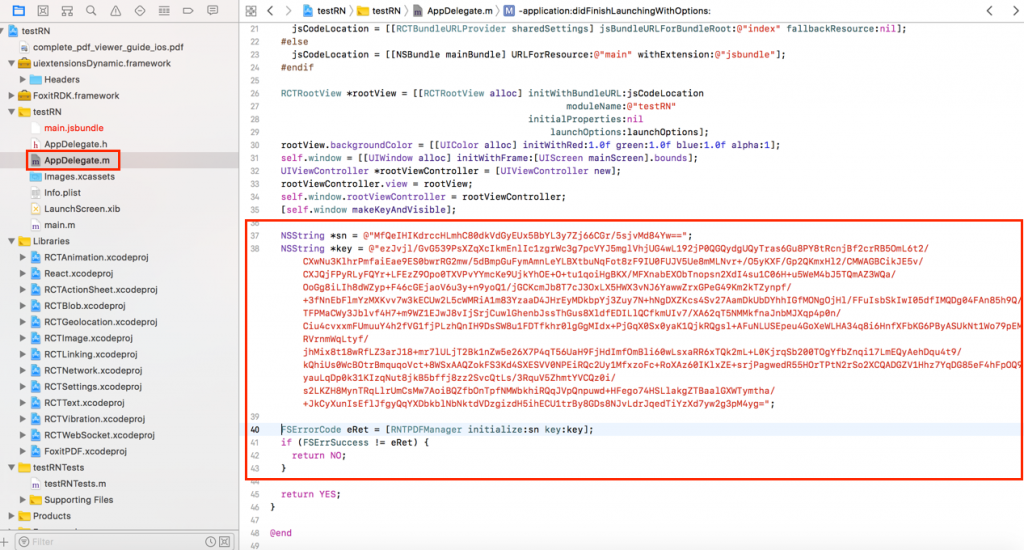
- In “AppDelegate.m” file, add the following code:
Import the required header file:
#import
Initialize the Foxit PDF SDK libraries with the license, add the code below to the end of the didFinishLaunchingWithOptions function (See Figure 1-4):
NSString *sn = @" ";
NSString *key = @" ";
FSErrorCode eRet = [RNTPDFManager initialize:sn key:key];
if (FSErrSuccess != eRet) {
   return NO;
}
The value of “sn” and “key” can be found in the “rdk_sn.txt” and “rdk_key.txt” files under the “libs” folder of Foxit PDF SDK for iOS package.
Figure 1-4
Note: When adding the code to “AppDelegate.m” file, if you encounter some errors like “cannot find “, don’t worry about it. It will disappear after you build the project.
Plugin Usage
After completing the integration of Foxit PDF SDK, you can use the plugin to open a PDF document.
In the “testRN\App.js” file, you can import the plugin using the following code:
import FoxitPDF from '@foxitsoftware/react-native-foxitpdf';
Then, call the function below to open a PDF document:
FoxitPDF.openPDF('a PDF file path');
Note: Here, we assume that you have pushed the “complete_pdf_viewer_guide_android.pdf” document into the “FoxitSDK” folder of the Android device or emulator that will be used to run this project. Obviously, you can change the file path to whatever you are using.
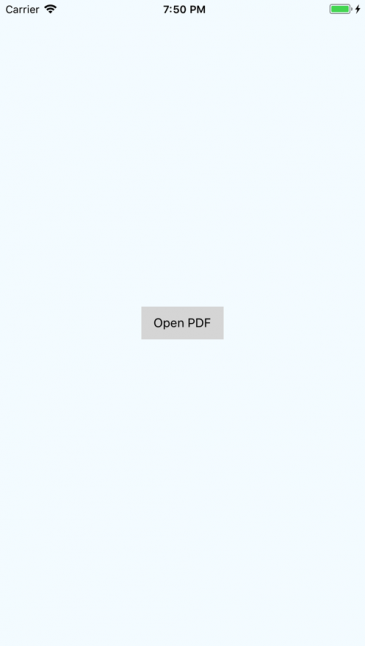
Update the “App.js” file as below, which adds a button to open a PDF document:
import React, { Component } from 'react';
import { Platform, StyleSheet, Text, View, TouchableOpacity } from 'react-native';
import FoxitPDF from '@foxitsoftware/react-native-foxitpdf';

const instructions = Platform.select({
  ios: 'Press Cmd+R to reload,\n' + 'Cmd+D or shake for dev menu',
  android:
    'Double tap R on your keyboard to reload,\n' +
    'Shake or press menu button for dev menu',
});
type Props = {};
export default class App extends Component {
  onPress() {
    FoxitPDF.openPDF('mnt/sdcard/FoxitSDK/complete_pdf_viewer_guide_ios.pdf');
  }

  render() {
    return (

           Open PDF
    );
  }
}

const styles = StyleSheet.create({
  container: {
    flex: 1,
    justifyContent: 'center',
    alignItems: 'center',
    backgroundColor: '#F5FCFF',
  },
  button: {
    alignItems: 'center',
    backgroundColor: '#DDDDDD',
    padding: 10
  },
});
Run the project
To run the project, you can use the following command or run it in Xcode directly.
react-native run-ios
Note: The above command will automatically run the project on the iOS Simulator by default. If you want to run the project on an actual physical iOS device, please refer to these instructions.
After running the project successfully, click the “Open PDF” button. The “complete_pdf_viewer_guide_ios.pdf” document will be displayed as shown in Figure 1-5:
Customizing the UI
To customize the UI for your project, please go to our articles on the UIExtensions project:
- How to Implement the UIExtensions project in Foxit PDF SDK for iOS
- ‘Customizing the UI with UIExtensions using Foxit PDF SDK for iOS.”
All the instructions on how to set up and customize your project will be provided there.
Updated on January 28, 2019
