How to modify UIExtensions source code with Foxit PDF SDK for iOS
If you do not want to use the ready-made UI framework, you can redesign it through modifying the source code of the UI Extensions Component.
There is one thing to take note of. The source code of the UI Extensions Component is written in Objective-C, so you need to use Objective-C to modify the UI layout. If you are a Swift developer and not already familiar with Objective-C, you might only be able to customize the UI appearance that does not need writing code, such as icons and other UI resources.
To customize the UI implementation, you need to follow these steps:
First, add the following files into your app.
- FoxitRDK.framework – The framework that includes the Foxit PDF SDK for iOS dynamic library and associated header files. It can be found in the “libs” folder.
- uiextensions project – It is an open source library that contains some ready-to-use UI module implementations, which can help developers rapidly embed a fully functional PDF reader into their iOS app. Of course, developers are not forced to use the default UI, they can freely customize and design the UI for their specific apps through the “uiextensions” project. It can be found in the “libs/uiextensions_src” folder.
Tip: The built-in UI customization can be done in the uiextensions project, and then you can add the new uiextensionsDynamic.framework generated by the modified uiextensions project to your app instead of the whole uiextensions project.
Second, find the specific code or images related to the UI that you want to customize in the uiextensions project, then modify them based on your requirements.
Now, for your convenience, we will show you how to customize the UI implementation in the “viewer_ctrl_demo” project found in the “samples” folder.
UI Customization Example
Step 1: Add the uiextensions project into the demo.
Note: We will add the uiextensions project to the demo which is convenient for us to see the custom results. The demo already includes FoxitRDK.framework, so we just need to add the uiextensions project.
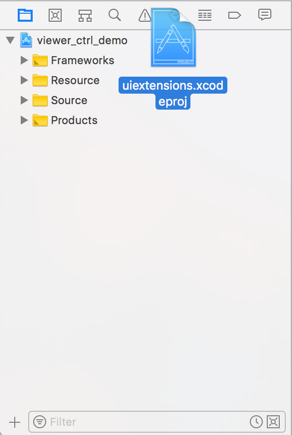
Load the “viewer_ctrl_demo” in XCode. Drag-and-drop “uiextensions.xcodeproj” found in the “libs/uiextensions_src” of the download package into the “viewer_ctrl_demo” project as shown in Figure 4-6.
Figure 4-6
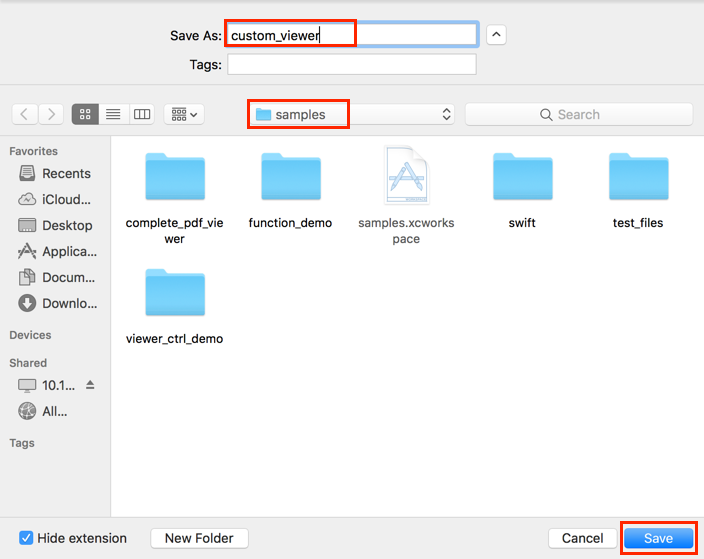
Then, it will pop up a dialog box which prompts you whether to save the project in a new workspace as shown in Figure 4-7. Click Save.
Figure 4-7
Save the workspace to the “samples” folder, and name “custom_viewer” as shown in Figure 4-8. Click Save.
Figure 4-8
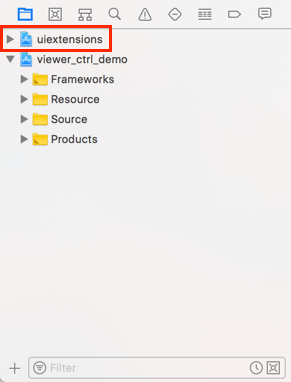
Now, the workspace looks like the Figure 4-9.
Figure 4-9
Congratulations! You have completed the first step
Step 2: Find and modify the code or images related to the UI that you want to customize.
Tip: If you just want to change the icons of the UI elements, you can do it in the uiextensionsDynamic.framework directly instead of importing the source code of uiextensions project. But the same is that you also need to find the icon’s name.
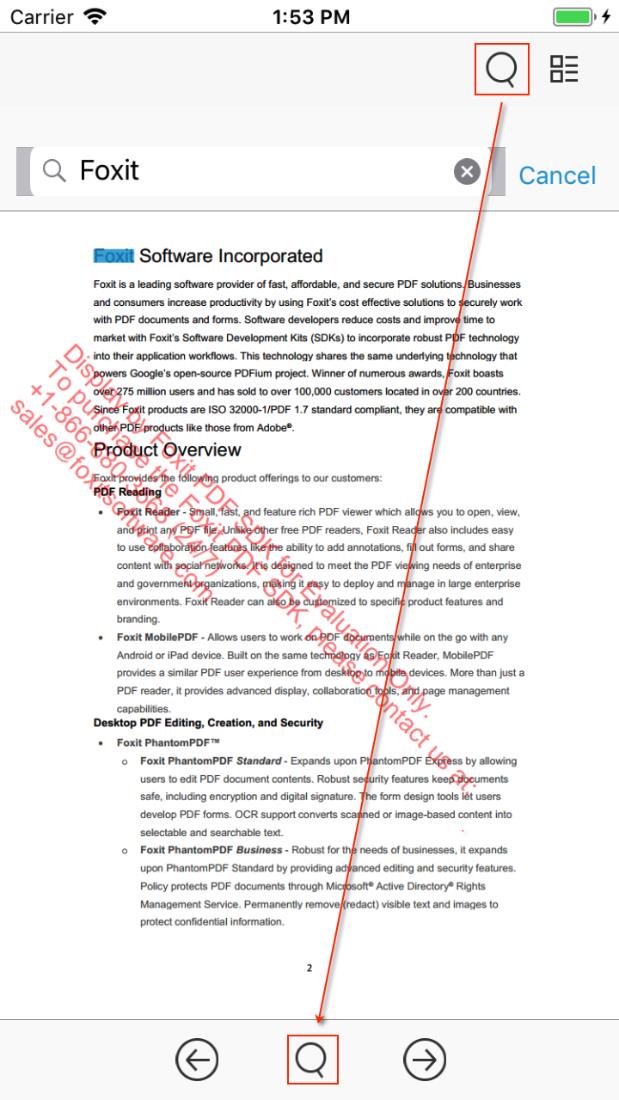
Now we will show you a simple example that changes one button’s icon in the search panel as shown in Figure 4-10.
Figure 4-10
To replace the icon we only need to find the place which stores the icon for this button, then use another icon with the same name to replace it.
Note: Foxit PDF SDK for iOS provides three sets of icons for different devices to make sure that your apps can run smoothly on every device. There are three folders used to store the image resources as follows:
- Image: used for older devices with non-Retina display (e.g. iPad 2).
- Image2x: used for iPhone 4/4s/5/5s/6/6s/7/7s/8.
- Image3x: used for iPhone 6/6s/7/7s/8 Plus, which has the highest resolution.
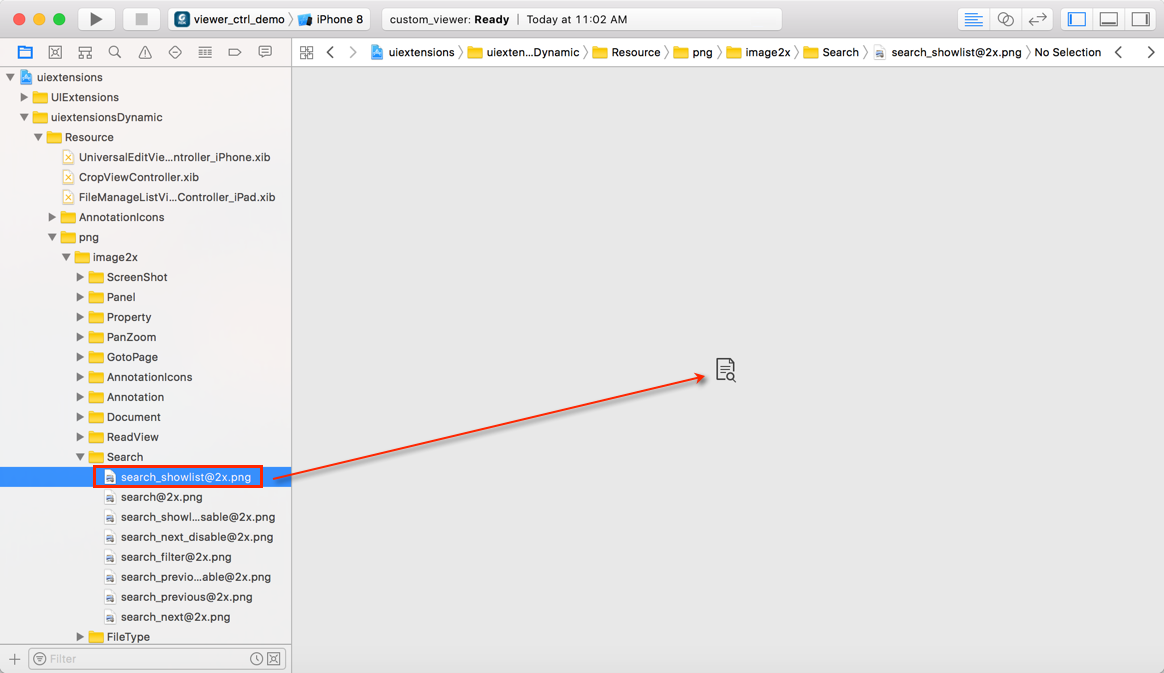
An iPhone 8 Simulator will be used as an example to run the demo. In the uiextensions project, click “uiextensionsDynamic -> Resource -> png -> image2x -> Search” as shown in Figure 4 11. It’s easy to find the image that we want to replace. The resource files are stored according to the features, so you can locate the related code through the icon’s name.
Figure 4-11
Right now, just replace “[email protected]” with your own icon in the “libs/uiextensions_src/uiextensions/Resource/png/image2x” folder. For example, we use the icon of the top search button ([email protected]) to replace it.
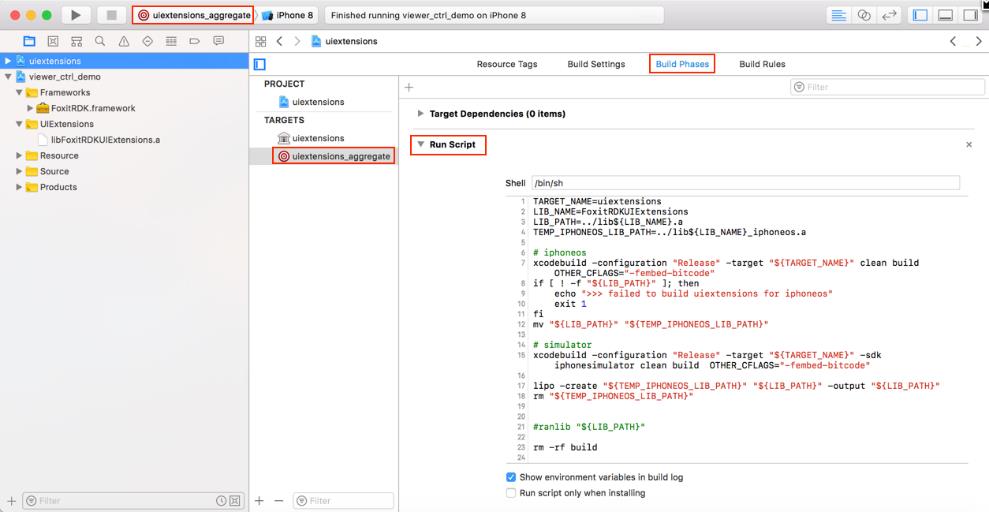
After replacing, firstly build and run the uiextensionsDynamic_aggregate project as shown in Figure 4-12.
Figure 4-12
Note: The uiextensions project can generate a universal “.a” library through building uiextensions_aggregate, or generate a universal framework through building uiextensionsDynamic_aggregate, which can be used for both simulator and iOS device. In this section, we build uiextensionsDynamic_aggregate. The scripts used for generating the universal framework in the uiextension project is shown in Figure 4 12.
The uiextensionsDynamic.framework in the “libs” folder of the download package will be overwritten after building the uiextensionsDynamic_aggregate project successfully.
Then build and run the “viewer_ctrl_demo” project. After building successfully, try the search feature and we can see that the icon of the bottom search button has changed as shown in Figure 4 13.
Figure 4-13
This is just a simple example to show how to customize the UI implementation. You can refer to it and feel free to customize and design the UI for your specific apps through the uiextensions project.
Please note: Modifying the UIExtensions source code directly comes with the risk of issues on upgrading to new versions of Foxit PDF SDK for iOS.
Updated on May 21, 2019
