Setup Android Studio and Foxit Quick PDF Library
This tutorial demonstrates how to use Foxit Quick PDF Library to create an Android app using Android Studio. If you haven’t already downloaded the Android trial then you can do that from the trial here.
Contents
Setup Android Studio project with Foxit Quick PDF Library
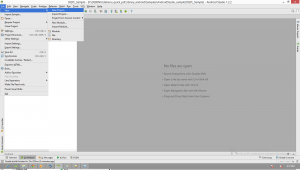
- Open Android Studio. If Quick Start window is displayed then click on “Start a new Android Project” or if not displayed go to “File > New > New Project” and then you will be shown the below window.
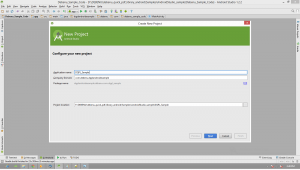
- Give your application a name, modify the company domain if necessary and choose the project location. Click the “Next” button.
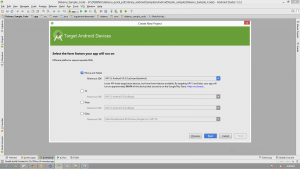
- The “Target Android Devices” window will be shown, choose which platforms you want to target. In this case we will target “Phone and Tablet”. The Minimum SDK required for Foxit Quick PDF Library is Android API 15. Click the “Next” button.
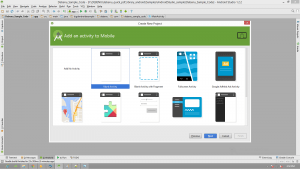
- The wizard will now ask you to “Add an activity to Mobile”, for this tutorial we will choose the “Blank Activity” option, now click on the “Next” button.

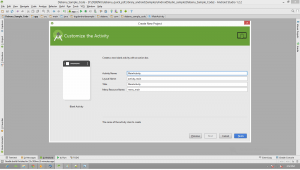
- You can change the name of launcher Activity of your application here, however, it is optional and you can just use the default name if you wish i.e. MainActivity. Click on the “Finish” button. The project will now be created.
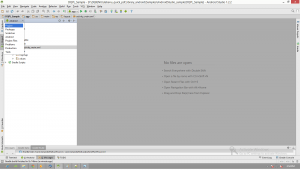
- After clicking on the “Finish” button the Android application will be created and the application hierarchy will be shown as below.
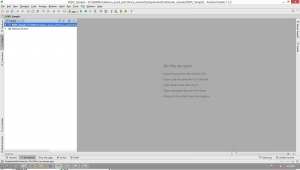
- Now select €œProject” option from the drop down menu in top corner of the left pane. See screenshot below for precise location.
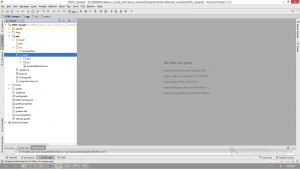
- The project hierarchy will now be changed as below.
- Now lets explore the project by going to “your_project_name > app > src > main”.
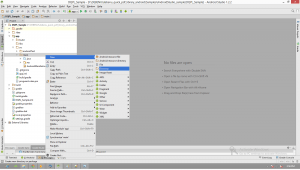
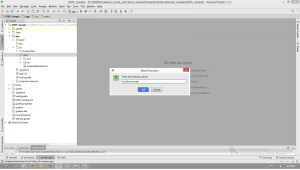
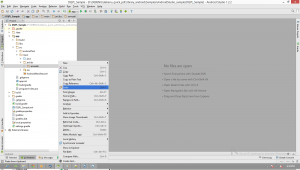
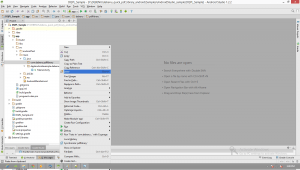
- Right-click on “main” directory and then click on the “New” option from popup menu then select “Directory” option.
- Create a directory with name of “jniLibs\armeabi”.
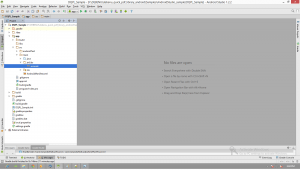
- Two new directories will be created as shown below.
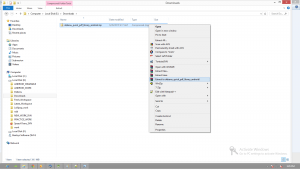
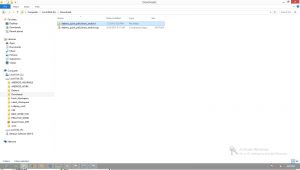
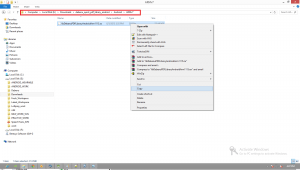
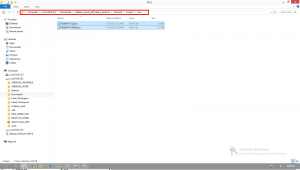
- If you haven’t already, download Foxit Quick PDF Library for Android, and then go to the folder where the library has been downloaded to (in this case we have placed the ZIP file for the library here: E:\download). Right-click on the “debenu_quick_pdf_library_android.zip” file and extract its contents to a new folder as shown below.
- Now go to “debenu_quick_pdf_library_android > Android > ARMv7” then copy the “libDebenuPDFLibraryAndroidArm1115.so” file. This file is required in the Android application because it contains the actual implementation of all the native methods which are declared in the JNI Classes (for JNI classes please check with Step 18).
- Paste the “libDebenuPDFLibraryAndroidArm1115.so” file into the “jniLibs\armeabi” directory as shown below.
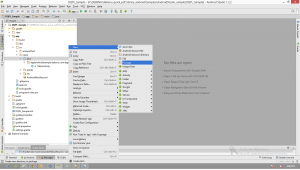
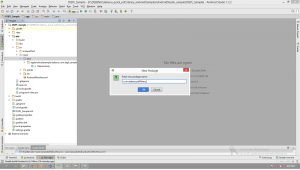
- Now right-click on the “java” directory select the “New” option then select “Package” as shown in the following screen.
- Now enter the package name as “com.debenu.pdflibrary”, the same as shown below and click on the “OK” button to create the package under the “java” directory. Note: the package name should be the same as shown in following screen so the application can map the native methods from the .so file according to this package name. This package contains all of the required JNI files and the JNI files are the files that act as an intermediator for calling native methods.
- Now go back to the location where you downloaded the Foxit Quick PDF Library for Android ZIP file as discussed in step 14. Navigate to the “java” folder located here “debenu_quick_pdf_library_android\Android\Import\Java” and copy all files located in this directory.
- Back in Android Studio, paste the files in the newly created package “com.debenu.pdflibrary” as shown below.
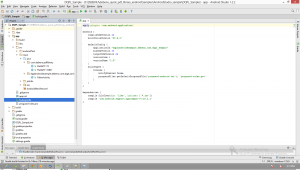
- Now under the “app” directory open the build.gradle file.
- Add the highlighted lines of code in the build.gradle file. The script will create the .jar file and make it available to the Android application at run-time.
The code for the two areas in the above screenshot that need to be updated are here:
task nativeLibsToJar(type: Zip) {
    destinationDir file("$buildDir/native-libs")
    baseName 'native-libs'
    extension 'jar'
    from fileTree(dir: 'libs', include: '**/*.so')
    into 'lib/'
}

tasks.withType(JavaCompile) {
    compileTask -> compileTask.dependsOn(nativeLibsToJar)
}
compile fileTree(dir: "$buildDir/native-libs", include: 'native-libs.jar')
- Good job! Now you are ready to start using Foxit Quick PDF Library for Android to start adding PDF functionality to your app.


How to use Foxit Quick PDF Library for the first time
Now that we’ve setup Foxit Quick PDF Library in an Android Studio project lets do something with the library to demonstrate that it is working.
- In the MainActivity.java file for your app (app > src > main > java > com.debenu > name of your app > MainActivity) copy and paste this code in. Replacing everything except for the package line at the very top.
package com.debenu.debenutestapp; // Don't replace your version of this, it needs to match your project import android.app.Activity; import android.content.Context; import android.graphics.Bitmap; import android.graphics.BitmapFactory; import android.os.Environment; import android.os.Bundle; import android.util.Log; import android.view.View; import android.widget.Button; import android.widget.ImageView; import android.widget.Toast; import com.debenu.pdflibrary.FlatAPI1115; import java.io.File; import java.io.IOException; public class MainActivity extends Activity { static { // Load Foxit Quick PDF Library System.loadLibrary("DebenuPDFLibraryAndroidArm1115"); } private int mDQPL = 0; private int mUnlocked = 0; private String mPath; private Button btnCreatePdf = null; private ImageView imgText = null; @Override protected void onCreate(Bundle savedInstanceState) { super.onCreate(savedInstanceState); setContentView(R.layout.activity_main); try { // Fetch id of the imageView imgText = (ImageView) findViewById(R.id.imgText); btnCreatePdf = (Button) findViewById(R.id.btnCreatePDF); // Initialize Foxit Quick PDF Library openDQPL(this); btnCreatePdf.setOnClickListener(new View.OnClickListener() { @Override public void onClick(View v) { // Set the bitmap path mPath = Environment.getExternalStorageDirectory().toString(); mPath += File.separator; mPath += "test.bmp"; // Time to create the PDF and draw // some text on it // When Foxit Quick PDF Library is initialized // a blank document is automatically added into memory // and page 1 is selected by default // Specify top left corner of page for // where 0,0 coordinates should start from FlatAPI1115.DPLSetOrigin(mDQPL, 1); // Text to be drawn on the page String txt = "Hello World...!!!"; // Draw the text onto the page, left edge of // text will be drawn 25 points from left of page // and 25 points down from top of page FlatAPI1115.DPLDrawTextA(mDQPL, 25, 25, txt); showPage(1); } }); } catch (IOException e) { e.printStackTrace(); Toast.makeText(this, "Error! " + e.getMessage(), Toast.LENGTH_SHORT).show(); return; } } /** * Create the Foxit Quick PDF Library instance and * unlock it. * * If you don't unlock then all of the functions will * appear to work except the functions that have an * output such as SaveToFile, RenderPageToFile, GetPageText, etc. */ private void openDQPL(Context context) throws IOException { try { //mPath = context.getCacheDir().toString(); //mPath += "/test.bmp"; mDQPL = FlatAPI1115.DPLCreateLibrary(); String key = "...license_key_goes_here..."; // Insert your trial or commercial license key here mUnlocked = FlatAPI1115.DPLUnlockKeyA(mDQPL, key); Log.i("DQPL", "mUnlocked: " + mUnlocked); if (mUnlocked == 0) Log.e("ERROR", "Could not open DQPL"); } catch (Exception e) { Log.e("ERROR", "Could not open DQPL", e); } } /** * Show the page created at index * @param index */ private void showPage(int index) { if (mUnlocked == 0){ return; } try { FlatAPI1115.DPLRenderPageToFileA(mDQPL, 72, index, 0, mPath); Bitmap bitmap = BitmapFactory.decodeFile(mPath); imgText.setImageBitmap(bitmap); } catch (Exception e) { Log.e("ERROR", "Could not render page",e); } } } - Now we need to update visual layout to include a button and an imageView. Replace the contents of the activity_main.xml file (app > src > main > res > layout > activity_main.xml) with the code from below:
- Now we need to update the Android manifest file (app > src > main > AndroidManifest.xml) to give the app some read/write privileges. Add this after the section:
- Finally, we’re ready to test our new app using the Android Studio Emulator. You can of course also test this directly on a device. Once the emulator has fired up and the homescreen is being seen, then you can run your app.
- That’s all! You should be up and running now, if you have any questions please .
This article refers to a deprecated product. If you are looking for support for Foxit PDF SDK, please click here.
Updated on May 16, 2022