How to add an iOS PDF Viewer SDK to the iOS PDF library with Swift
This is the second article in a series on how to build a PDF library app in iOS with Swift 5.0 and Xcode 11. In the first article, we created an iOS application by modifying a FoodTracker application, a sample application of the article “Start Developing iOS Apps (Swift)“. In this article, we are going to extend the application to create a PDF Viewer within the application. This means you do not need to leave the app to view the content of a PDF file.
In order to provide an in-app PDF viewing experience, we needs an iOS PDF SDK. In this article, we use Foxit PDF SDK for iOS 7.1. Before you continue, we suggest you download a free trial here.
This article was written with the following tools:
- Xcode 11
- Swift 5.0
- Foxit PDF SDK 7.1
Below shows the step-by-step guide to add a PDF viewer to the iOS PDF Library app.
A. Embed in-app PDF Viewer
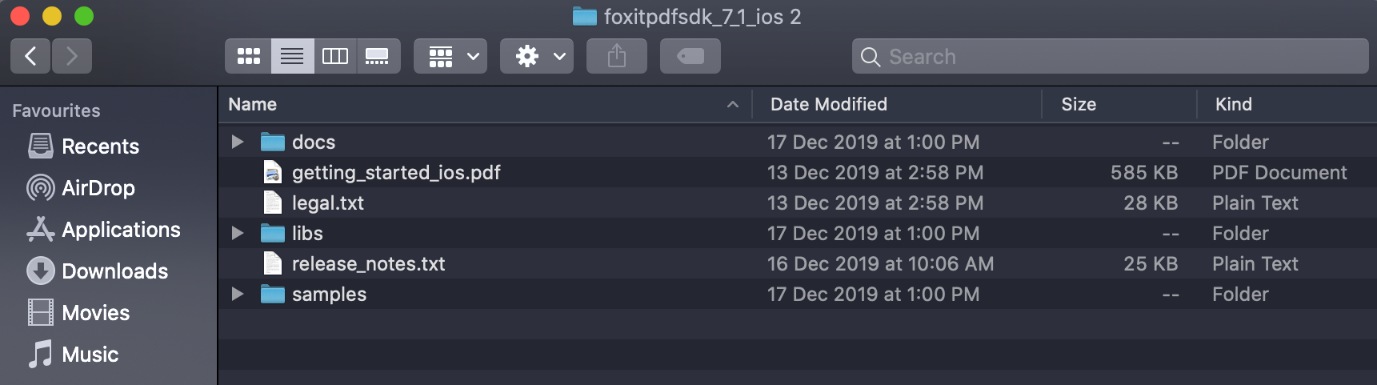
1) Download Foxit iOS PDF SDK.
2) In Xcode, right-click the FoodTracker project and select “Add Files to Food”
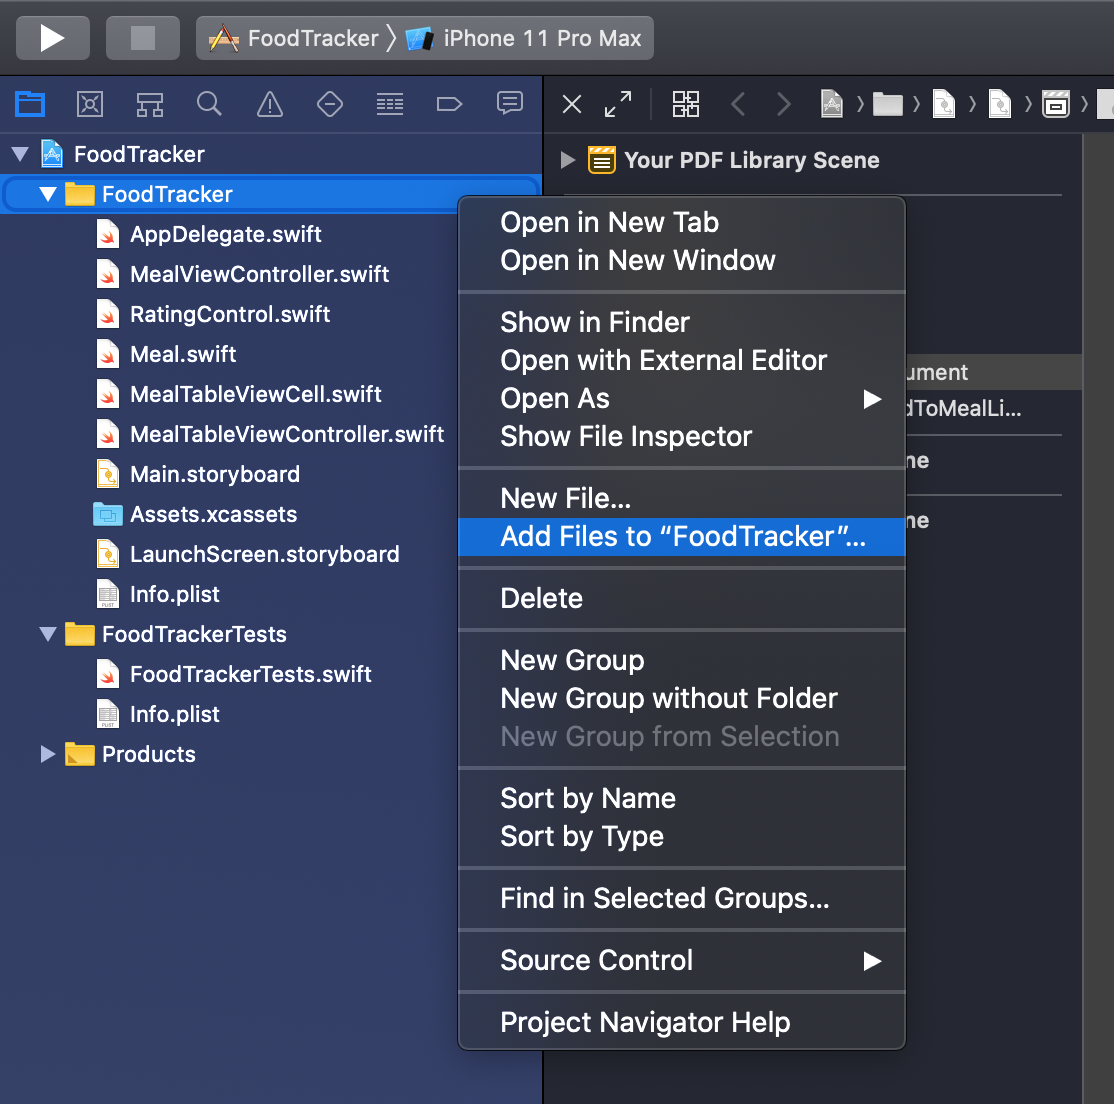
3) Browse and select the folder lib > FoxitRDK.framework from the downloaded Foxit iOS PDF SDK content. Select the option “Copy items if needed”. Then click the “Add” button.
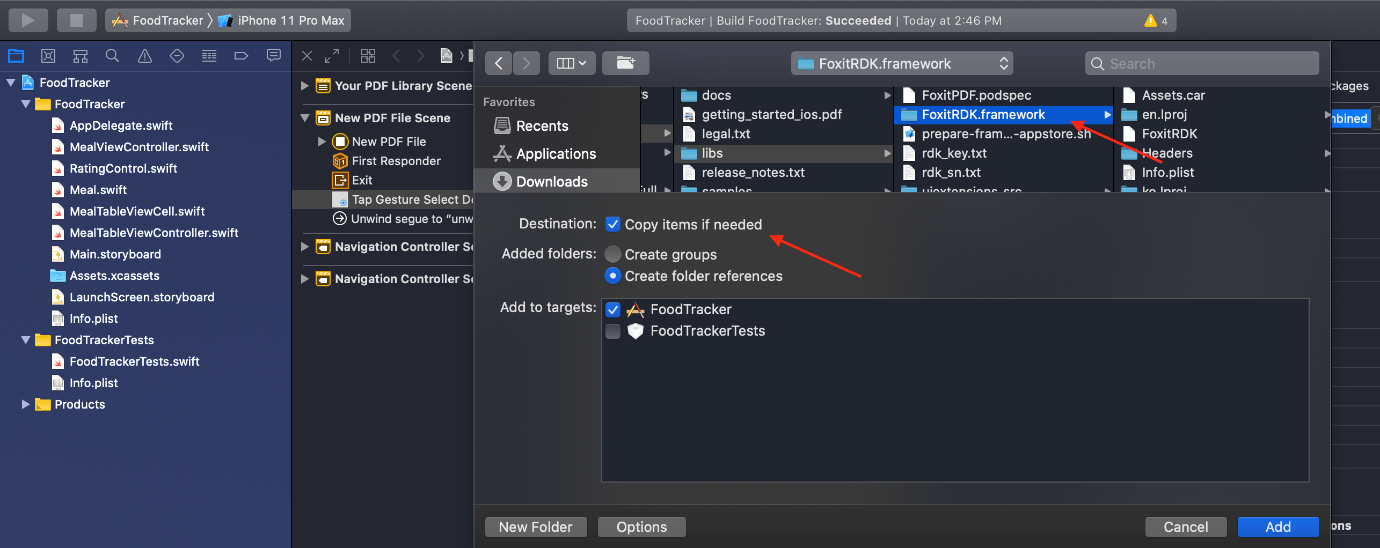
4) The FoodTracker project should look as follows:
![]()
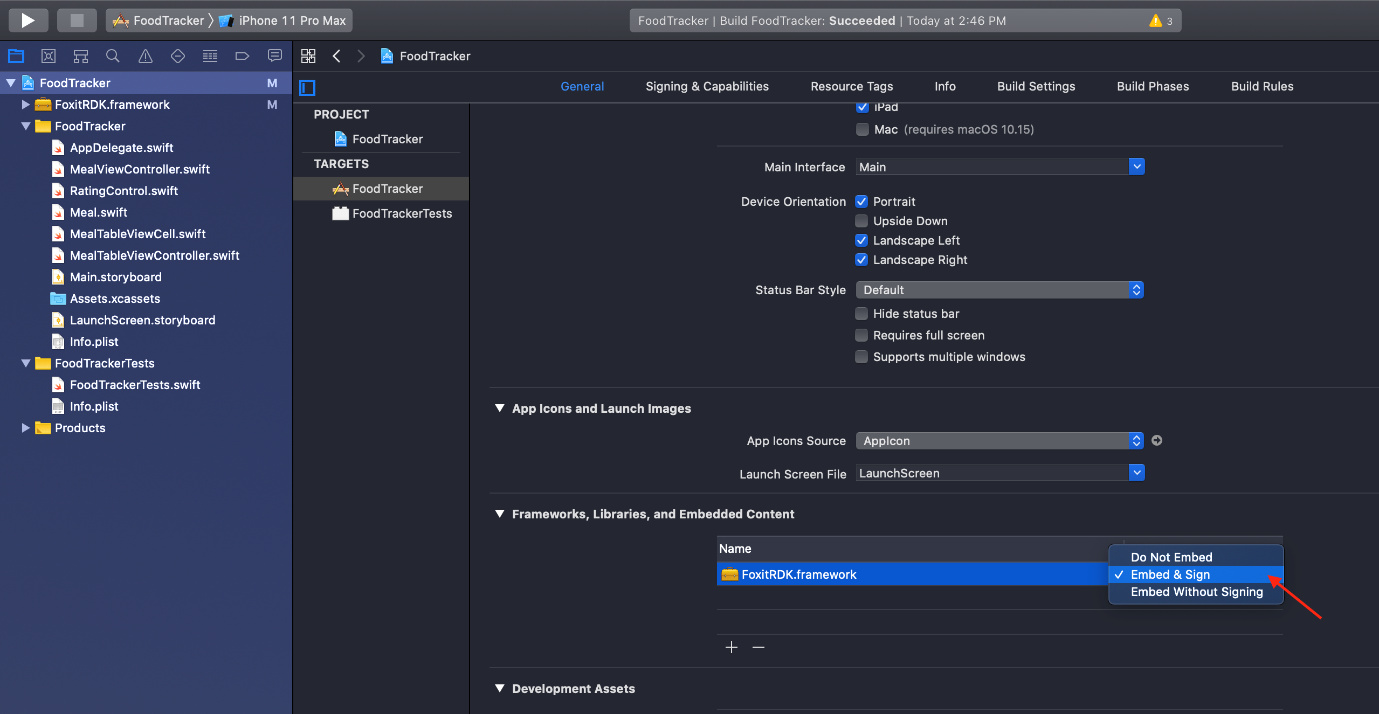
5) Click on the FoodTracker project in the Project Navigator to show the project properties. In the “General” tab, select TARGETS > FoodTracker on the left hand side. Look for the section “Frameworks, Libraries and Embedded Content”. You should see the newly added “FoxitRDK.framework”. Change the option to “Embed & Sign”.
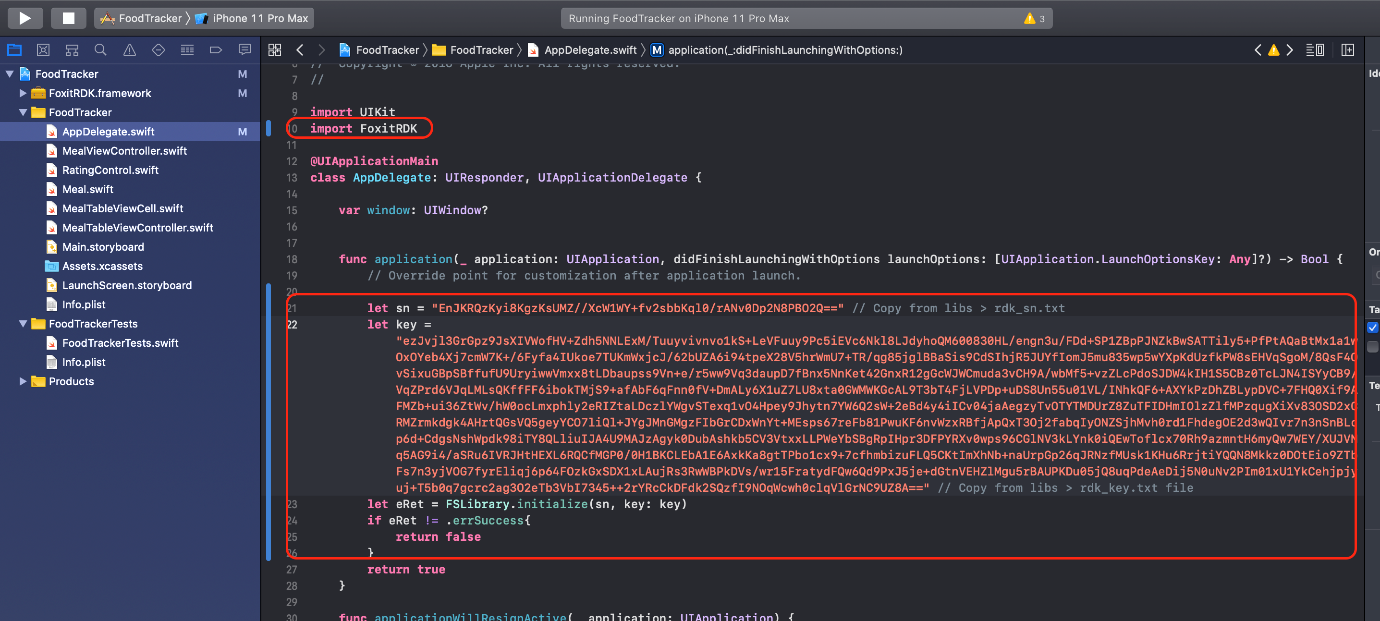
6) Next we are going to add the source code to initialize the library. Click on AppDelegate.swift in Project Navigator. Add the following code.
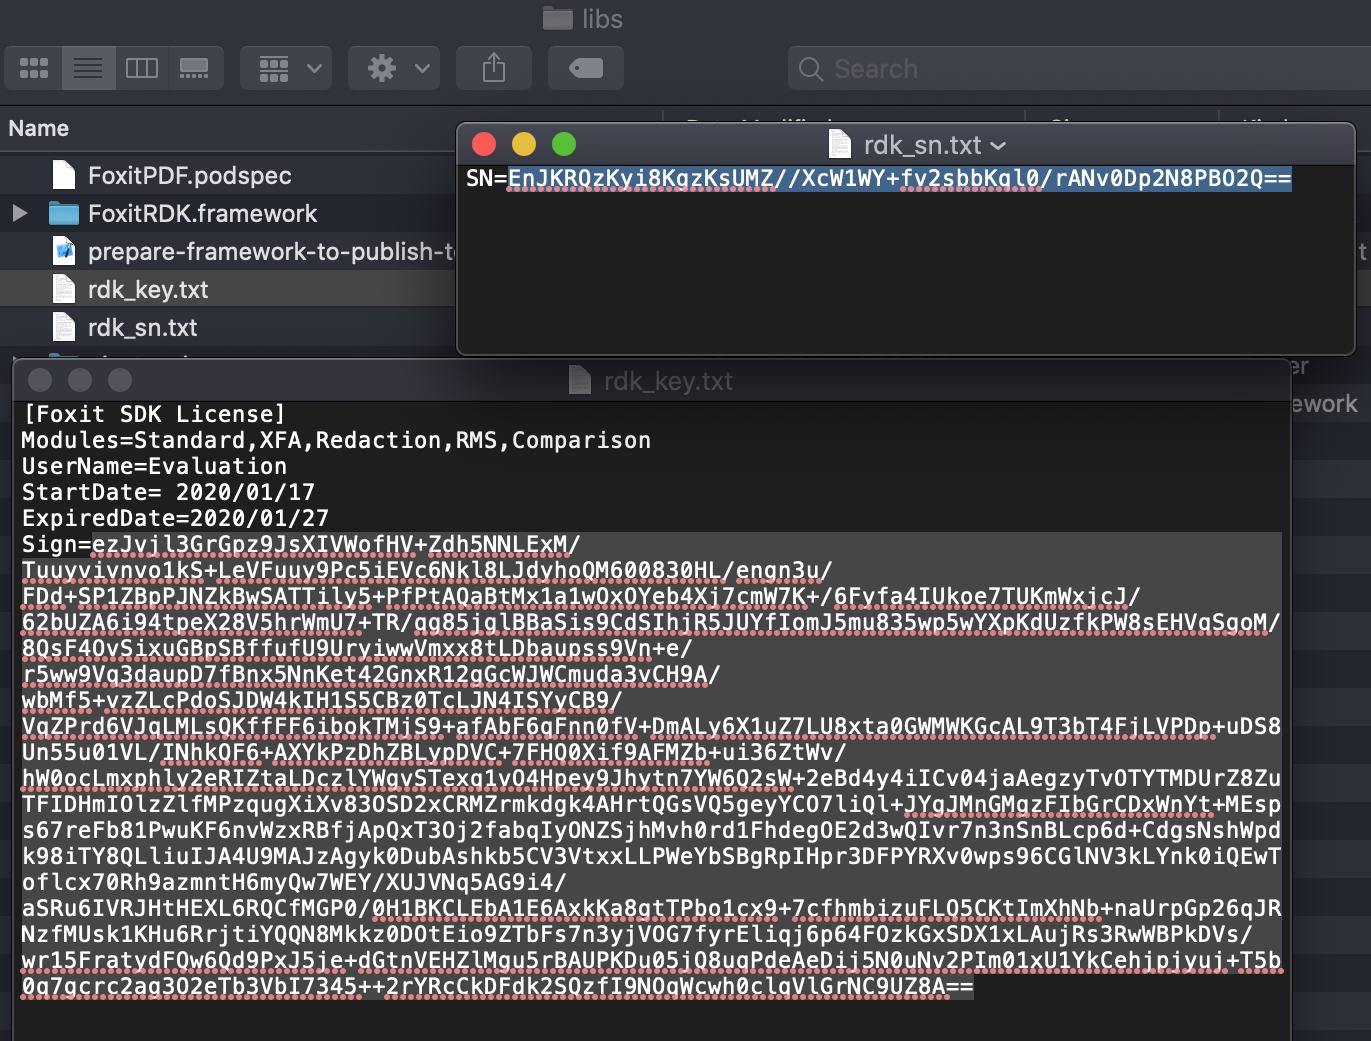
For the value of the “sn” variable, please look into the content of the libs > rdk_sn.txt file from the downloaded Foxit iOS PDF SDK content (or a licensed sn you purchased from Foxit) and copy the content after “SN=”.
For the value of the “key” variable, please look into the content of the libs > rdk_key.txt file and copy the content after “Sign=”.
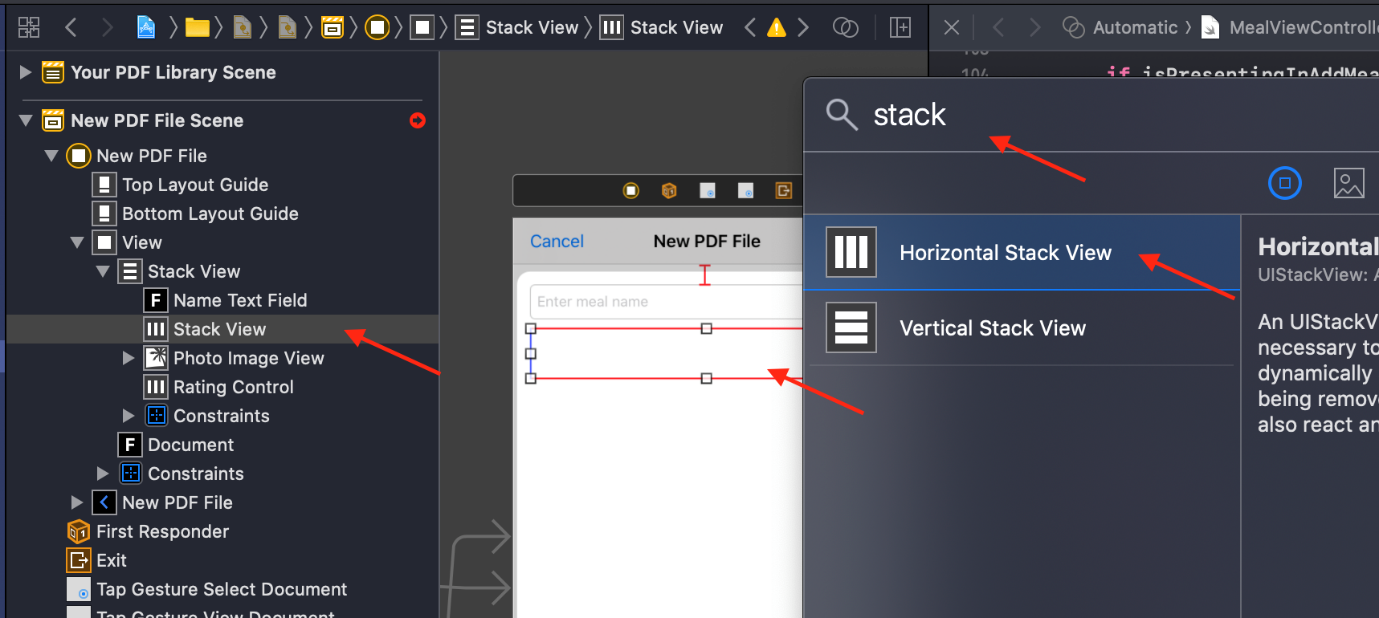
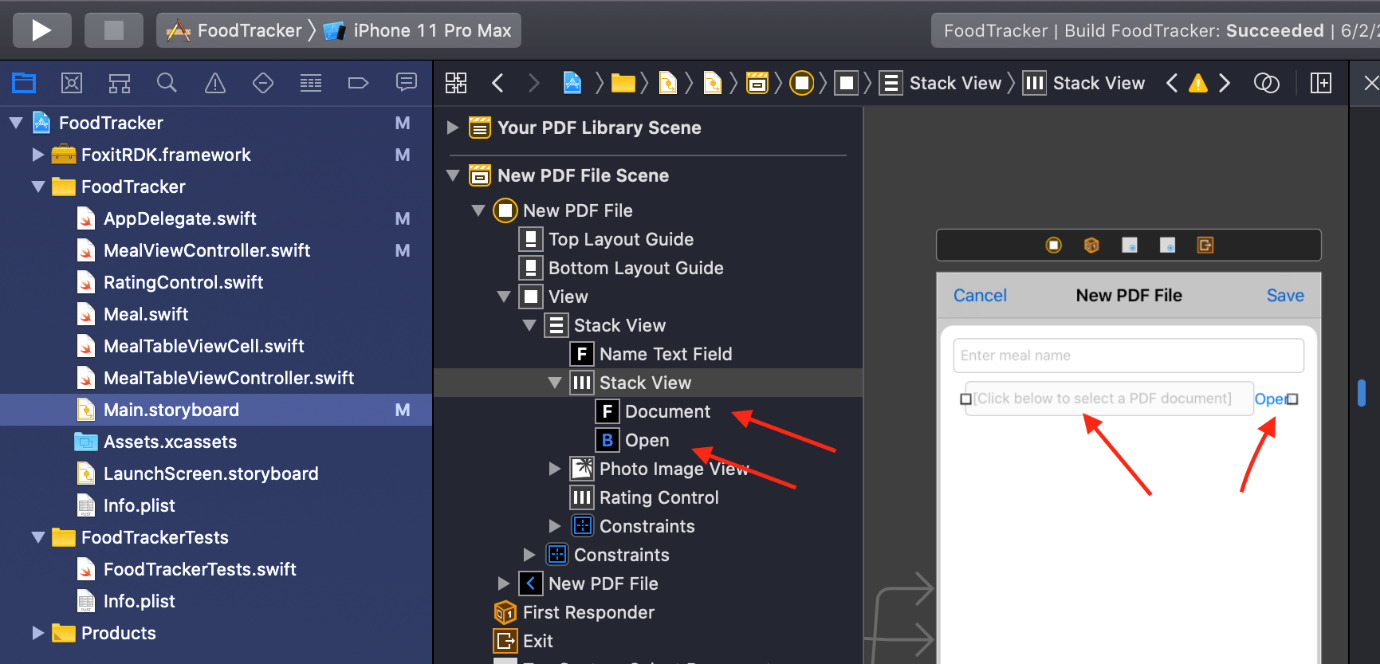
7) With the Interface Builder selected, click Command+Shift+L to open the Object Library. Type “stack” to quick search and locate the Horizontal Stack View. Then drag it onto the Interface Builder below the Name Text Field.
8) In the first article, we added a text field to store the document name. Let’s add a new Horizontal Stack View and move the Document Text Field inside it. Then, add a button next to the Document Text Field for opening the PDF file. Use the Object Library to search a Button and add it next to the Document Text Field. For the new Button, we set the Title as “Open”.
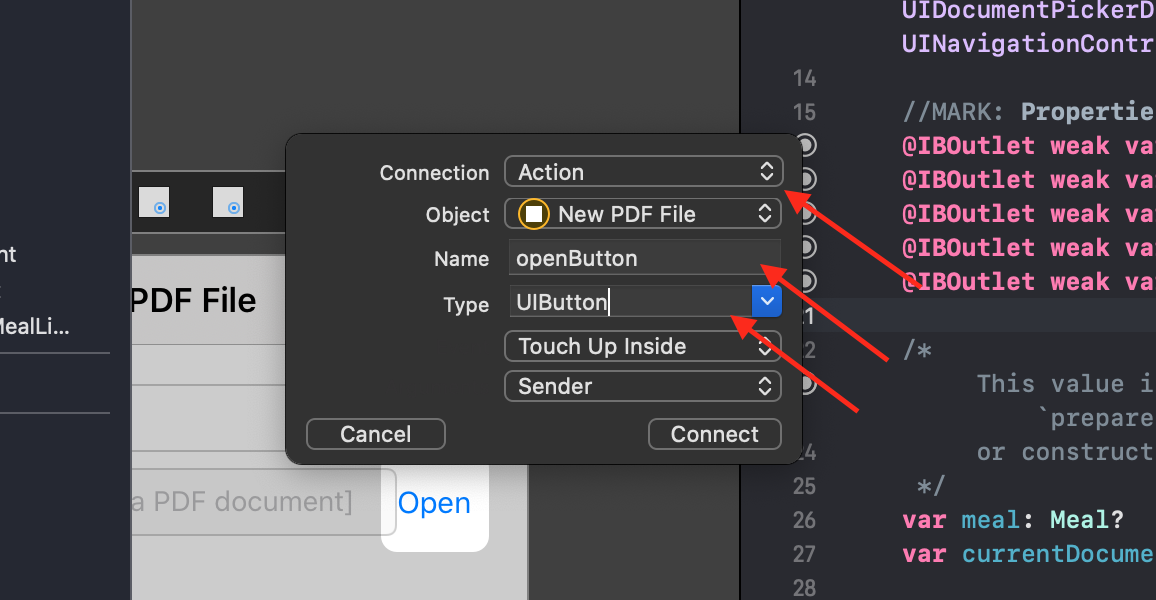
9) In this step, we are going to add an Action for the Open Button. If the Assistant Editor is not showing, click Editor in Xcode menu and select Assistant. Control-drag from the Open Button on your canvas to the code display in the Assistant editor on the right, stopping the drag at the line below the Properties declarations on top of the MealViewController class in MealViewController.swift. In the dialog that appears, select Action for Connection, type openButton for Name and select UIButton for Type. Click the “Connect” button to close the dialog.
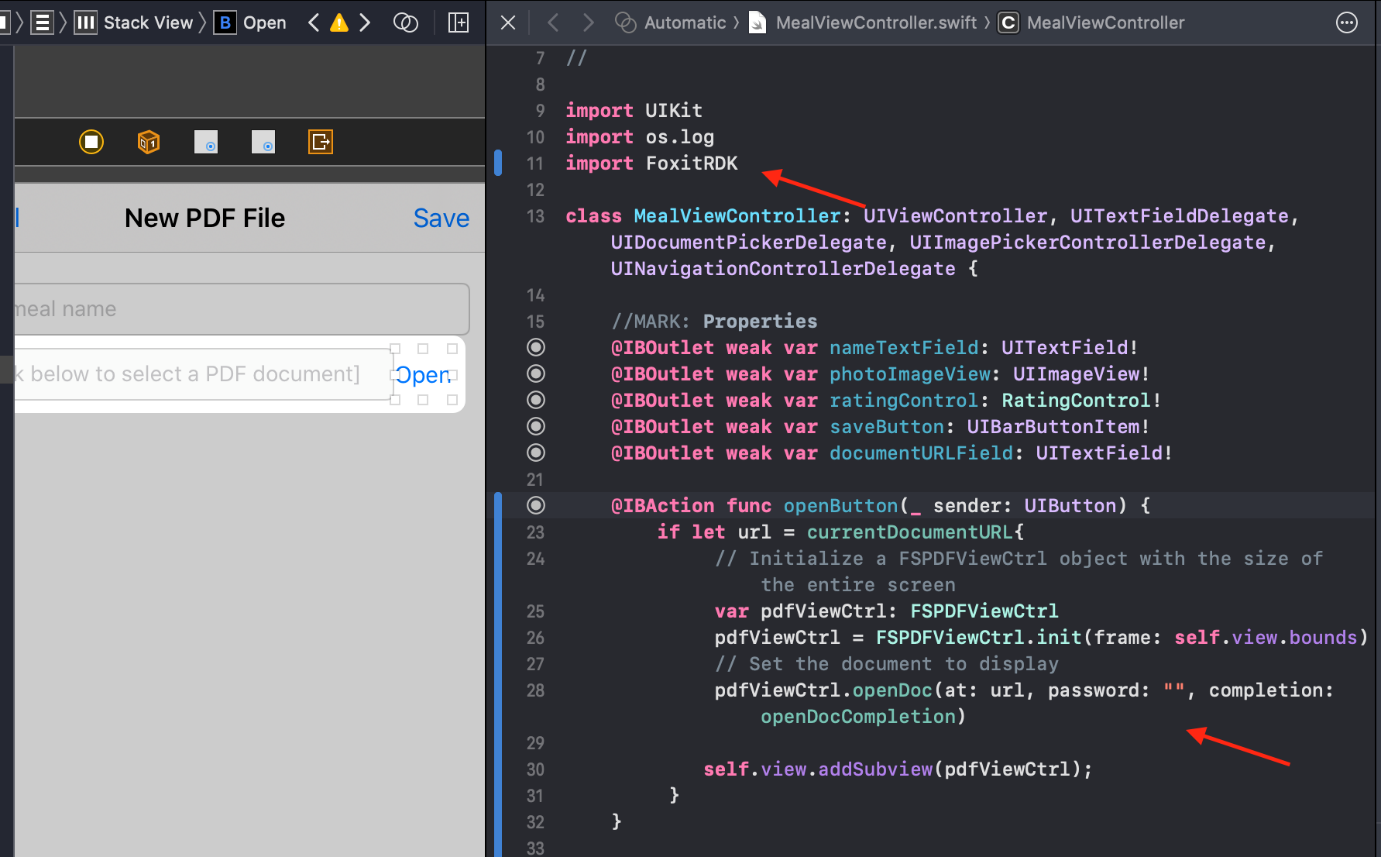
10) On the top of the MealViewController class, import FoxitRDK. In the generated openButton function, input the following code:
  @IBAction func openButton(_ sender: UIButton) {

 if let url = currentDocumentURL{

 // Initialize a FSPDFViewCtrl object with the size of the entire screen

 var pdfViewCtrl: FSPDFViewCtrl

 pdfViewCtrl = FSPDFViewCtrl.init(frame: self.view.bounds)

 // Set the document to display

 pdfViewCtrl.openDoc(at: url, password: "", completion: openDocCompletion)


 self.view.addSubview(pdfViewCtrl);

 }
}
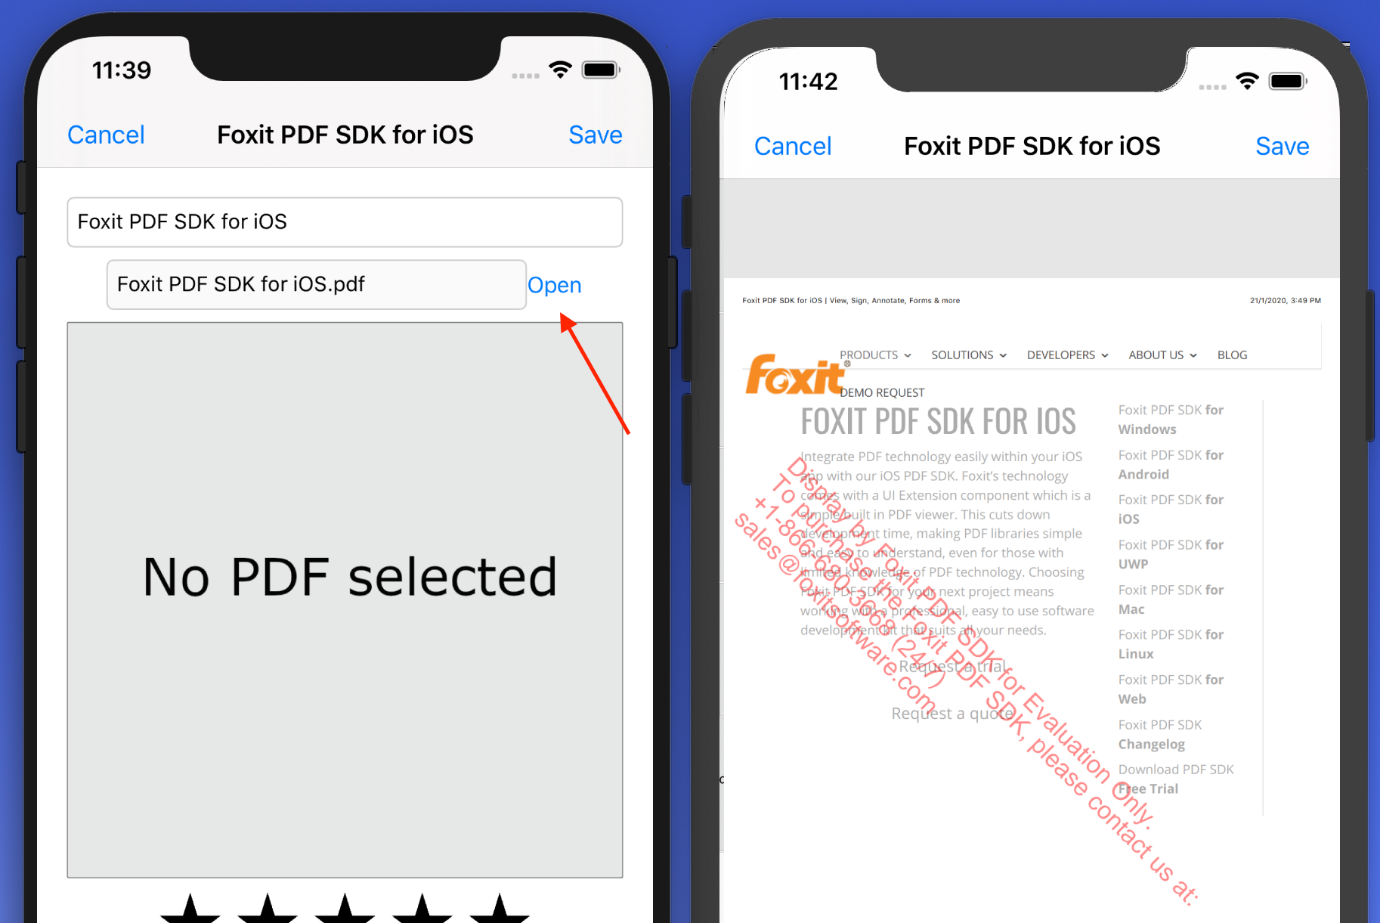
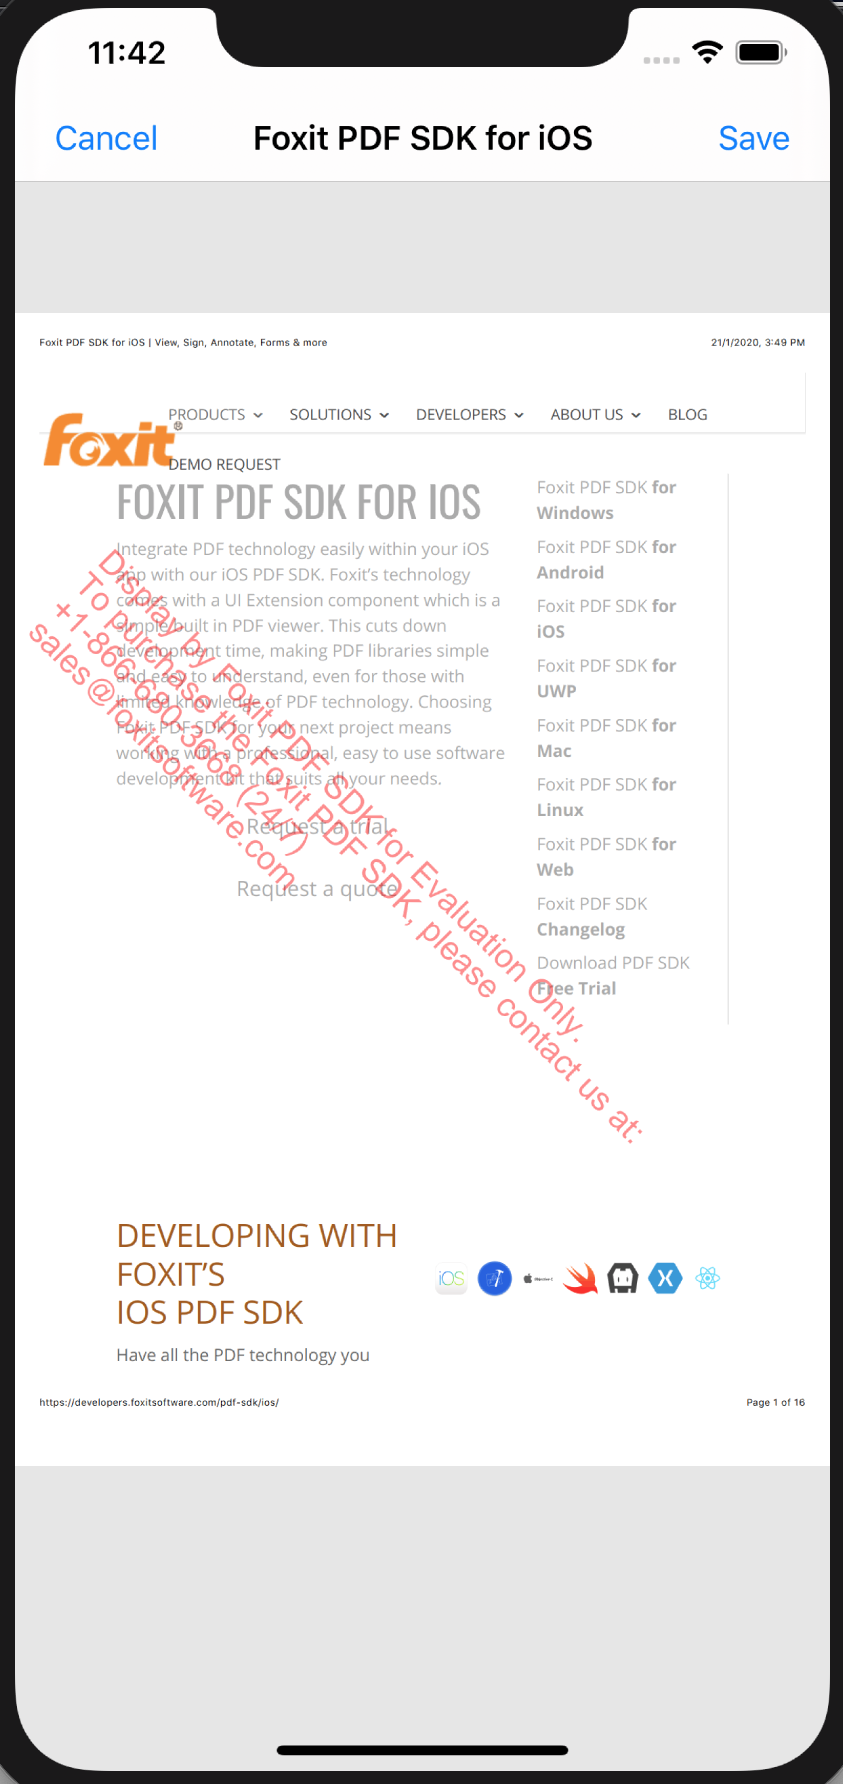
The above code is to initialize a FSPDFViewCtrl object and call the openDoc function to open and display the PDF document. The result should looks like this:
B. Running the resulting PDF Library application
1) Now hit command+R to run the iOS application.
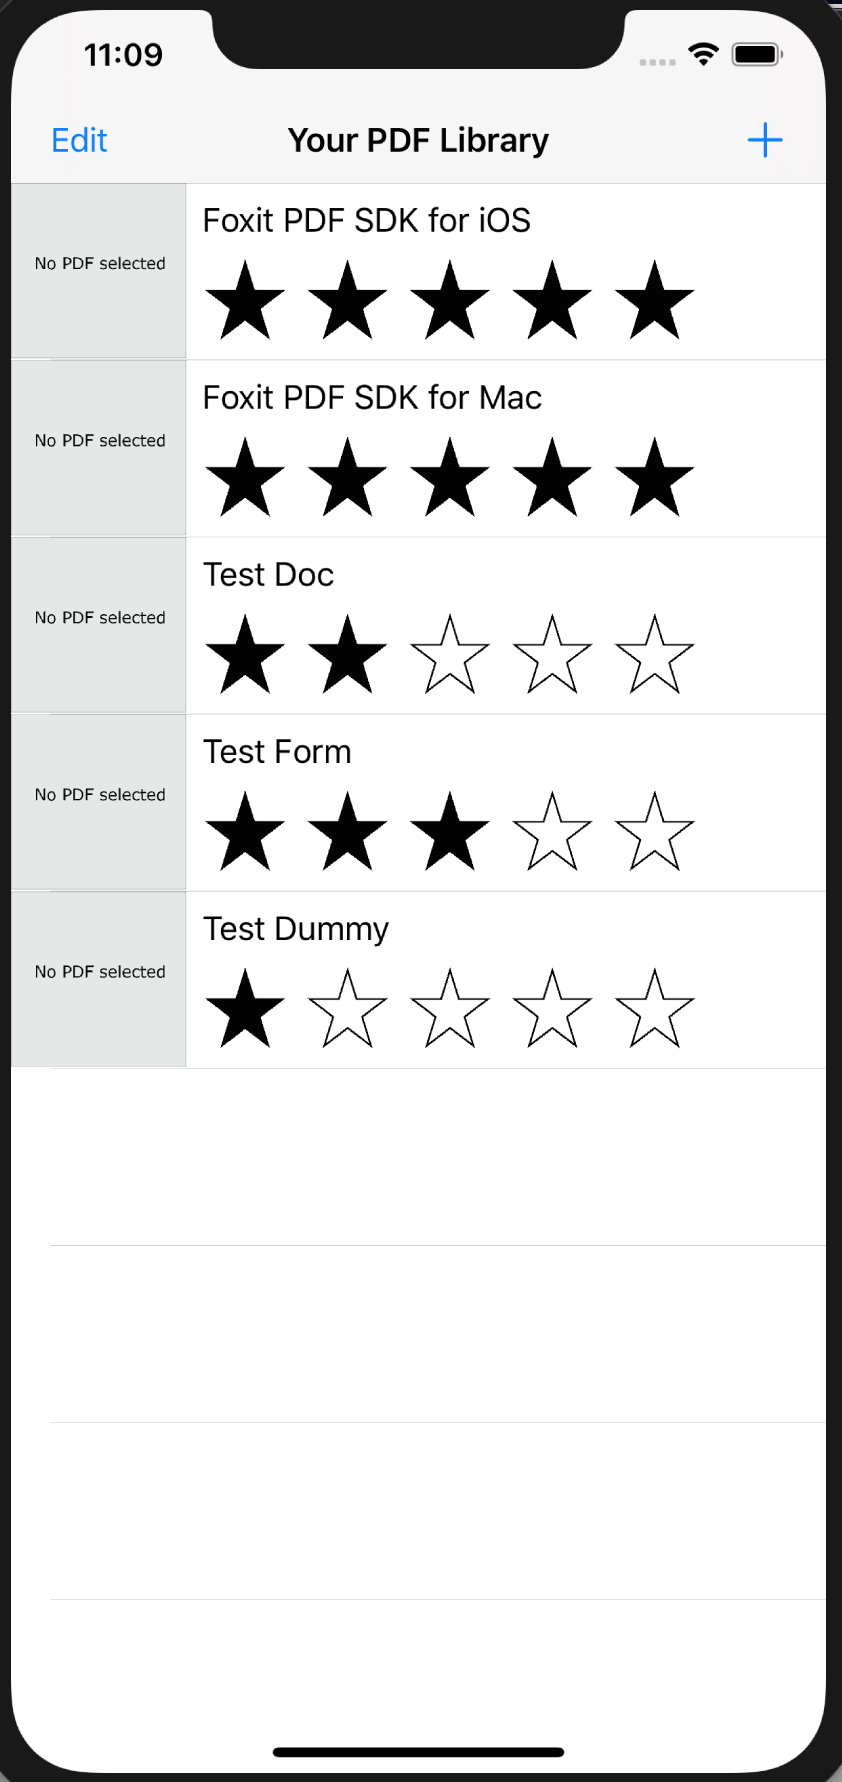
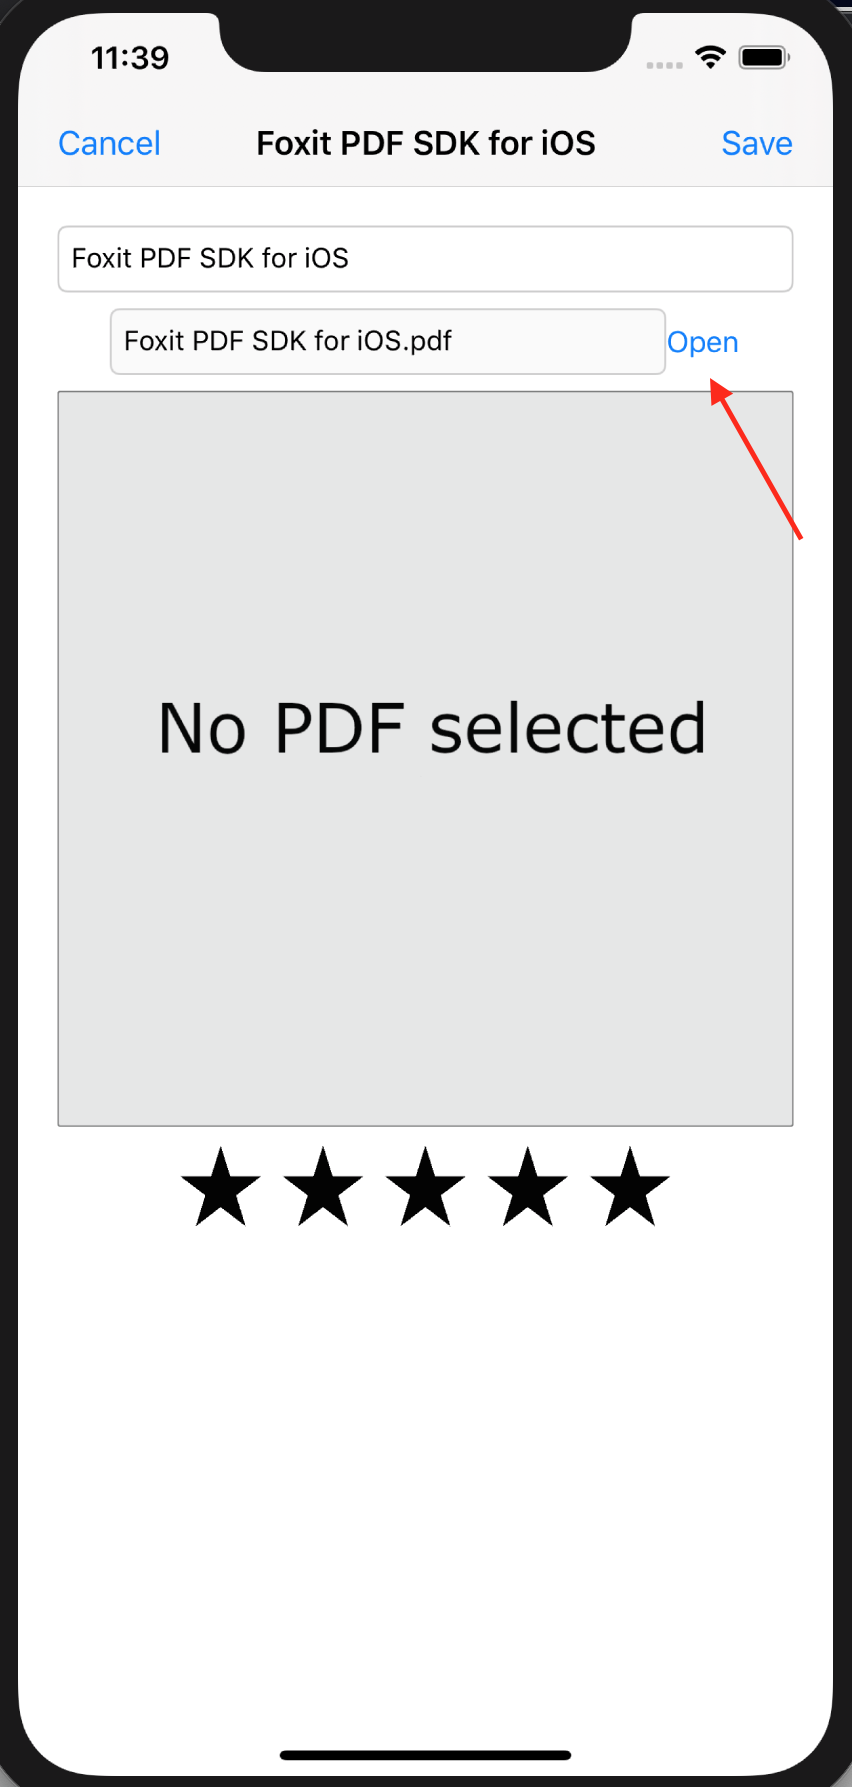
2) Click on the first PDF file in the library to enter the New PDF File Scene. You can now see the Open button.
3) Click on the Open button. Will show you the content of the PDF being rendered.
In this article, we showed you how easy to integrate a PDF viewer into our PDF Library iOS app we created in the article “Create a PDF Library app in iOS with Swift“. The PDF library iOS app is now able to render PDF content with the help of Foxit iOS SDK components, which are downloadable from here. We added an Open button and used the Foxit iOS ViewerCtrl to render the PDF file inside the iOS app. In the next article, we are going to move the PDF document viewer as a separate scene instead of a subView added to the current scene.
Updated on July 21, 2021