Creating a Dynamic Labor Contract as a PDF
A labor contract, like many other types of corporate communication, is an essential document that can grow and change as a company grows. This is especially the case with dynamic contracts, in which terms may regularly change in response to external business data. As more companies embrace remote work, they need the ability to modify, sign, and store such contracts electronically. The Foxit SDK allows you to do just that.
Foxit SDK PDFs can be modified and securely stored as needed, providing companies with a helpful, reliable way to sign and update employee contracts.
In this article, you’ll learn how to use the Foxit SDK to create a dynamic labor contract PDF. You can follow along or check the GitHub repo here.
Contents
About the Foxit SDK
Foxit offers a flexible cross-platform SDK for changing components in your documents. It provides an effective user experience and easily integrates into mobile, desktop, and web applications.
Here’s a sample of what Foxit lets you do:
* You can make changes and add stamps to PDF forms, add and edit text, adjust page sizes, and search within text.
* You can merge pages from existing PDF files, add them again, and create a new PDF.
* You can sign an employment contract.
* You can generate secure PDFs with encryption/decryption or integrated with a customized Digital Rights Management (DRM) or Information Rights Management (IRM) security solution.
* You can create PDFs from images or convert them to images. You can also create PDFs from HTML or convert them to HTML or a MS Office Excel/Word document.
Following are some specific use cases.
Digital Signatures
Digital signatures are a legal authentication method for an electronic environment. A digital signature confirms the integrity of the information, ensuring its acceptance and protecting against cyberattacks.
These signatures, which can be anything from a handwritten annotation to an image or a certificate-based authentication object inside your PDF, offer different levels of security and compliance. The Foxit SDK can provide all of the above. With the Foxit SDK, you can use typed “handwriting” or an image of your signature.
Redaction
The redaction plugin searches for and blocks access to sensitive employee or security information. It changes blacked-out sections into images that can’t be read, thus maintaining GDPR compliance.
Redaction can be done directly in the .NET Core SDK or in the Web SDK. To learn how to redact documents programmatically using .NET Core, read this article.
Collaboration
When multiple colleagues need to complete the same document, you can share it with your colleagues and synchronize data. This saves time, especially if your team works remotely.
After you generate the dynamic labor contract, you can load the file on the Foxit PDF SDK online demo to collaborate in real-time.
Dynamic Labor Contracts
A labor contract describes the expectations between an employee and employer, including such details as the definition of the work, how the work will be completed, the duration and place of work, the amount of pay, and the method of pay. Both parties must accept the terms of the contract before signing it.
A dynamic labor contract can undergo more changes and more regular changes than a standard, more static contract, as it’s designed to cover specific projects or needs. The department overseeing the contract (HR, corporate management, or employee) should be able to modify it based on a change in situation or project. That can be achieved with the Foxit SDK.
Set Up the App and Configure the SDK
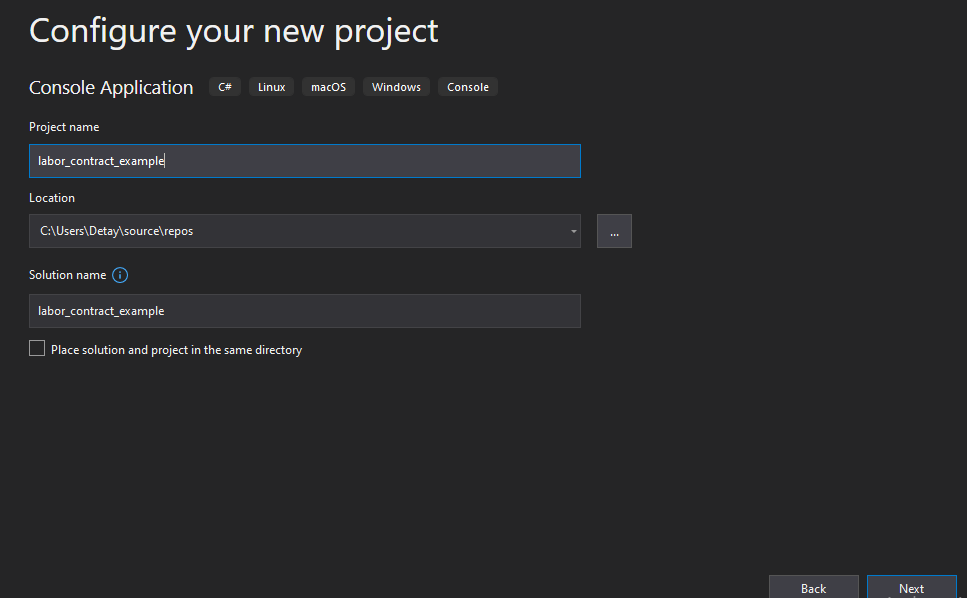
To begin using the Foxit SDK, first create a new .NET Core 3.1 console application.
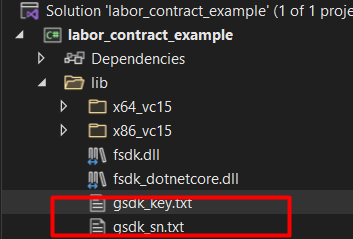
You can access the DLL files in the lib folder in the Foxit PDF SDK for Windows (.NET Core Library), a 30-day trial version that you can download here.
Add your fsdk_dotnetcore.dll file to labor_contract_example.

Copy the lib file directly into the project. You can access the required license passwords.
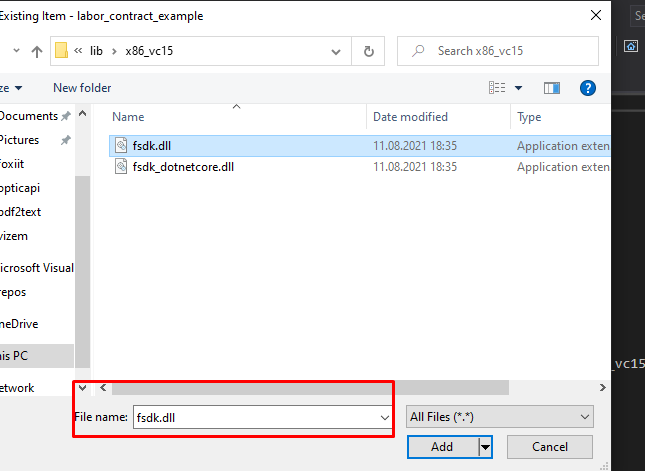
Adding the fsdk.dll file, right-click on the project and select Existing Item. Add the fsdk.dll specific to your computer (32 or 64 bit) from the lib file.

Configure the debug platform before running the application.
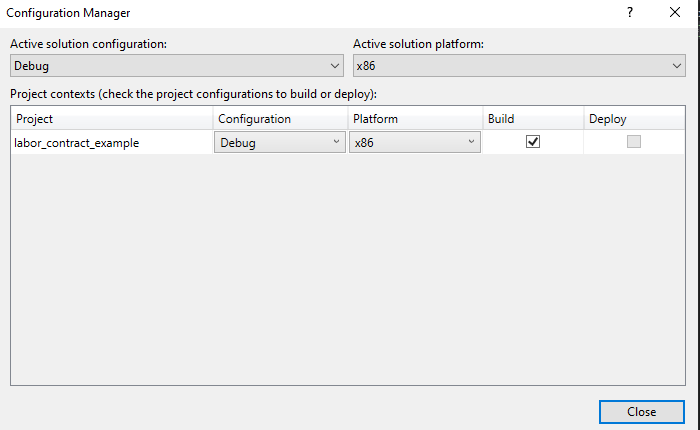
Your project file should look like this:
<Project Sdk="Microsoft.NET.Sdk">

  <PropertyGroup>
    <OutputType>Exe</OutputType>
    <TargetFramework>netcoreapp3.1</TargetFramework>
    <Platforms>AnyCPU;x86</Platforms>
  </PropertyGroup>

  <ItemGroup>
    <PackageReference Include="System.Drawing.Common" Version="5.0.2" />
  </ItemGroup>

  <ItemGroup>
    <Reference Include="fsdk_dotnetcore">
      <HintPath>..\..\..\..\Downloads\foxitpdfsdk_8_1_win_dotnetcore\lib\x86_vc15\fsdk_dotnetcore.dll</HintPath>
    </Reference>
  </ItemGroup>
    <ItemGroup>
        <None Update="fsdk.dll">
            <CopyToOutputDirectory>PreserveNewest</CopyToOutputDirectory>
        </None>
    </ItemGroup>

</Project>
Create a PDF Form
Download the .NET Core Library to run the app. You’ll need the trial version. Applications must initialize the Foxit PDF SDK using a license before calling any API. Trial license files can be found in the lib folder.
Add license keys to the application Program.cs file.

using System;
using System.Drawing;

using foxit.common;
using foxit.common.fxcrt;
using foxit.pdf;
using foxit.pdf.annots;
using foxit.pdf.interform;

namespace labor_contract_example
{
    class Program
    {
        static void Main(string[] args)
        {
            // The value of "sn" can be obtained from "gsdk_sn.txt" (the string after "SN=").
            // The value of "key" can be obtained from "gsdk_key.txt" (the string after "Sign=").
            string sn = "";
            string key = "";
            ErrorCode error_code = Library.Initialize(sn, key);
            if (error_code != ErrorCode.e_ErrSuccess)
            {
                return;
            }
Now create a form and PDFDoc using the Foxit SDK. Open labor_contract_example Program.cs:
            try
            {
                using (PDFDoc doc = new PDFDoc())
                using (Form form = new Form(doc))
                {
                    // Create a blank new page and add some form fields.
                    using (PDFPage page = doc.InsertPage(0, PDFPage.Size.e_SizeLetter))
                    {
                    //Leave a method
                    } }
            }
            catch (foxit.PDFException e)
            {
                Console.WriteLine(e.Message);

        }
        Library.Release();
        }
    }
}
Create a method called AddInteractiveForms:
 public static void AddInteractiveForms(PDFPage page,Form form)
        {
            {

                // Set default appearance
                using (DefaultAppearance default_ap = new DefaultAppearance())
                {

                    default_ap.flags = (int)(DefaultAppearance.DefAPFlags.e_FlagFont | DefaultAppearance.DefAPFlags.e_FlagFontSize | DefaultAppearance.DefAPFlags.e_FlagTextColor);
                    using (default_ap.font = new foxit.common.Font(foxit.common.Font.StandardID.e_StdIDHelveticaB))
                    {
                        default_ap.text_size = 12.0f;
                        default_ap.text_color = 0x000000;
                        form.SetDefaultAppearance(default_ap);
                    }

                }
            }
}
Add a text field for input and define its features in addition to Text Field:
{
    // Add text field, with flag multiline.
    using (Control control = form.AddControl(page, "Text Field3", Field.Type.e_TypeTextField, new RectF(230f, 710f, 320f, 740f)))
    using (Field field = control.GetField())
    {

        field.SetFlags((int)Field.Flags.e_FlagTextMultiline);
        field.SetValue("Labor Contract");

    }
    using (Control control = form.AddControl(page, "Text Field4", Field.Type.e_TypeTextField, new RectF(50f, 580f, 550f, 650f)))
    using (Field field = control.GetField())
    {

        field.SetFlags((int)Field.Flags.e_FlagTextMultiline);
       field.SetValue("Text fields are boxes or spaces in which the user can enter text from the keyboard.");

    }
}
Add AddInteractiveForms method inside the Main.
When you export the created form inputs to PDF and add them to the string type output_path, copy the PDF to this file path.
using (PDFPage page = doc.InsertPage(0, PDFPage.Size.e_SizeLetter))
               {
                   AddInteractiveForms(page, form);
                   string new_pdf = output_path + "labor11_contract.pdf";
                   doc.SaveAs(new_pdf, (int)PDFDoc.SaveFlags.e_SaveFlagNoOriginal);
               }
Bear in mind that Foxit is not just a PDF reader—it has multiple other features. It can save you from the troublesome old-fashioned method of “print-sign-scan-rescan-convert to pdf,” since it allows you to open the scanned document with Foxit, sign, and send it back in seconds.
Finally, run the application. When you follow the output_path path, you can access and check the PDF. To see the process in action, watch this video:
Conclusion
With Foxit, you have a time-saving method to make changes to your PDF contracts. This tutorial used the .NET Core Console Application, but you could also use a UI component.
The Foxit SDK not only simplifies forms but allows developers to incorporate powerful PDF technology into their applications such as viewing, searching for text, bookmarking, or annotating PDF documents.
For more info on what Foxit offers, check this demo.
Author: Nazlican Kurt