Creating Advanced Process Design Docs as PDFs with Foxit

If you’ve ever tried to generate a PDF directly, you know it’s a very complicated format to work with. You have to layout all of the content yourself, it has a weird object indexing system, and it has a special format for everything you add. Adobe’s PDF format reference is almost a thousand pages long!
The Foxit SDK takes care of most of these details for you. It allows you to easily combine, generate, and annotate PDFs. You can load PDFs, edit them, digitally sign them, and save the result when you’re done. It has support for a lot of platforms, too, including .NET Core.
In this article you’ll learn how to combine multiple PDFs into a single output, generate pages with formatted text, and add a stamp with a custom image.
What Are Advanced Process Design Documents?
According to Blueprint, an advanced process design document (or digital blueprint, in their terminology) contains everything you need to define a process. It provides a single source of truth when creating a robotic process automation (RPA), and it provides context for the step that you’re automating.
You can use a process design document (PDD) as part of a formal approval process. Once everything is collected into the document, everyone involved in the process can review it. After everyone has approved the design by digitally signing the document, development can start.
Rendering Process Design Documents
In this article you will build a command line tool in .NET Core that composes multiple documents together into a single PDD. It will load every PDF in an input folder, then combine them into a single output. It will also generate a list of the input files and add an approval stamp.
> You can find the final source for this project on GitHub.
To get started, make sure you have .NET Core 5.0 setup on your system. Instructions for your platform are provided by Microsoft. You also need to download the Foxit SDK for your platform.
Project Setup
To get started, use the .NET CLI’s built in new command. Open a terminal to the directory where you want to create the project and run dotnet new pdf-builder. This creates a new directory called pdf-builder. Open that directory in your favorite editor.
To keep license values out of your repository, create a Constants.cs file and add it to your .gitignore. Use the following template for your constants file.
csharp
using System;

static class Constants
{

  public const String foxitSerial = "";
  public const String foxitKey = "";

}
Get your serial number and key from the gsdk_ files in Foxit SDK’s lib directory. Open gsdk_sn.txt and copy everything after SN= to get the serial number. Paste it in your constants file. Open gsdk_key.txt and copy everything after Sign= to get your key. Add it to your constants file.
Foxit relies on the System.Common.Drawing nuGet package. Install it from the command line using dotnet add package.
bash
dotnet add package System.Drawing.Common
Copy the Foxit SDK’s lib/ directory into your project. Next, you’ll need to tell .NET that your program will use those libraries at runtime. The process is slightly different for each platform, but Foxit provides instructions for each platform in their developer guide.
You need to add two references to your project. The first is to the Foxit DLL, the second is to the library. The DLL reference stays the same across all platforms. Add the following to your csproj file just below the ItemGroup with a PackageReference in it:
xml
<ItemGroup>
  <Reference Include="fsdk_dotnetcore">
        <HintPath>lib\fsdk_dotnetcore.dll</HintPath>
  </Reference>
</ItemGroup>
The library file is in different formats depending on the platform you’re compiling to. Most of the following configuration will stay the same—just change the Include property to point to whichever library file you have in your lib folder.
xml
<ItemGroup>
  <FSdkLibSourceFiles Include="lib\libfsdk.so" />
</ItemGroup>

<Target Name="PreBuild" BeforeTargets="PreBuildEvent">
  <Copy SourceFiles="@(FSdkLibSourceFiles)" DestinationFolder="$(OutputPath)" SkipUnchangedFiles="True" />
</Target>
Before using Foxit in your program, you’ll need to initialize it. Add a using foxit.common; to the top of Program.cs, then call Libary.initialize inside Main.
csharp
using System;
using System.IO;
using System.Text;
using foxit;
using foxit.common;
using foxit.pdf;
using System.Linq;
using foxit.pdf.annots;
using foxit.common.fxcrt;

…

static void Main(string[] args) {
    ErrorCode error_code = Library.Initialize(Constants.foxitSerial, Constants.foxitKey);
  if (error_code != ErrorCode.e_ErrSuccess)
  {
    return;
  }
}
Combining Files
To create your PDD, you’ll combine multiple PDFs into a single output. The process is very straightforward.
* Create an empty document.
* Find all of the input file names and iterate over each one.
* Load the current file and insert it into the empty document that you created.
* Once all of the files are inserted, save the original document that you created.
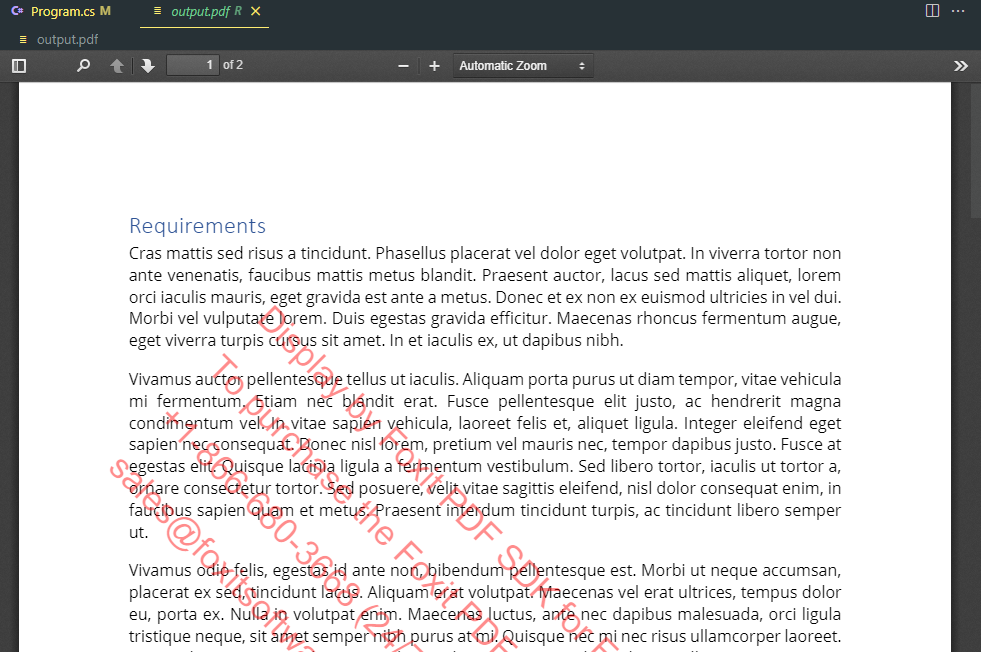
Creating and saving a document are both simple. Each operation just takes a single line of code. Add the following to your program just after initializing the library then run it. You’ll see an empty output.pdf added to your project’s root directory.
csharp
using (PDFDoc doc = new PDFDoc())
{
    doc.SaveAs("output.pdf", 0);
}
Get an ordered list of PDFs from the input directory. Add the following before doc.SaveAs.
csharp
var sources = Directory.EnumerateFiles("input", "*.pdf").OrderBy((t) => t);
Load each of those files by creating a PDFDoc instance for each. After creating the instance, you’ll load the contents of the file using the Load method. Add the following code just after creating the list of source files.
csharp
foreach (var source in sources)
{
  using (PDFDoc src = new PDFDoc(source))
  {
    src.Load(Encoding.ASCII.GetBytes(""));
  }
}
Insert the src document into the one you’re building—just insert it at the last page number. Add this code right after your call to src.Load.
csharp
var lastPage = doc.GetPageCount();
doc.InsertDocument(lastPage, src, 0);
Before testing your progress, create an input directory in the root or your project and add a few PDFs into it. Run your program again, and you’ll get a PDF with the content of all PDFs that you just added to the input directory.

Building a Source List
You may want to record which documents were used to build the final output. To do that, you’ll build a new page from scratch. To begin, define two text styles, one for the page header and one for the list of files. Add the following code just after the foreach loop iterating over your input documents.
csharp
RichTextStyle headerStyle = new RichTextStyle(
    new foxit.common.Font(foxit.common.Font.StandardID.e_StdIDHelvetica),
    text_size: 24.0f,
    text_alignment: Alignment.e_AlignmentLeft,
    text_color: 0xA0A0A0,
    is_bold: true,
    is_italic: false,
    is_underline: false,
    is_strikethrough: false,
    mark_style: RichTextStyle.CornerMarkStyle.e_CornerMarkNone
  );

RichTextStyle bodyStyle = new RichTextStyle(
    new foxit.common.Font(foxit.common.Font.StandardID.e_StdIDHelvetica),
    text_size: 12.0f,
    text_alignment: Alignment.e_AlignmentLeft,
    text_color: 0x000000,
    is_bold: false,
    is_italic: false,
    is_underline: false,
    is_strikethrough: false,
    mark_style: RichTextStyle.CornerMarkStyle.e_CornerMarkNone
  );
Create a new page in the output document by calling InsertPage. You’ll need to specify the index of the new page and its size. Use an index of 0 to add the page to the start of the document, and use the PDFPage.Size enumeration to select a standard page size.
csharp
using (PDFPage page = doc.InsertPage(0, PDFPage.Size.e_SizeLetter))
{
}
This will create an empty page. Next, add a title to it. When you write text to a PDF with Foxit, you need to provide a rectangle where the text will be drawn. The coordinates of the rectangle are in points and start at the lower left corner of the page. The following code creates a rectangle for the header with a 0.5 inch page margin.
csharp
var pageHeight = page.GetHeight();
var pageWidth = page.GetWidth();
var headerLocation = new RectF(
      left1: 36f,
      bottom1: pageHeight - 50f,
      right1: pageWidth - 36f,
      top1: pageHeight - 36f
);
Now that everything is set up, add the header.
csharp
page.AddText("Sources", headerLocation, headerStyle);
Write the list of sources to the page using the bodyStyle that you already created.
csharp
var sourceList = new StringBuilder()
  .AppendJoin("\n", sources)
  .ToString();

var sourceLocation = new RectF(36f, 36f, pageWidth - 36f, pageHeight - 64f);
page.AddText(sourceList, sourceLocation, bodyStyle);
Now tell Foxit to write the content you just added to the PDF. Call the GenerateContent method on your page instance to do that.
csharp
page.GenerateContent();
Run the program again. You’ll see a new first page with a list of the files you’ve added.
Adding a Stamp of Approval
The last thing you need to do with the PDF is to mark it as approved. To do that, you’ll add a stamp annotation with a custom image.
To add an annotation to the page, call page.AddAnnot just after your call to GenerateContent() and provide the type of annotation and its location.
csharp
using (var annot = page.AddAnnot(Annot.Type.e_Stamp, new RectF(36, 36, 200, 200)))
{
}
Create a Stamp instance, passing in the annotation you just created.
csharp
var stamp = new Stamp(annot);
Find an image to use in the stamp. FreeSVG has a nice approved stamp. Download the PNG to your input folder and name it approved.png.
Now you just need to load the image, modify your stamp to use it, and update the stamp’s appearance.
csharp
Image image = new Image("input/approved.png");
stamp.SetImage(image, 0, 0);
stamp.ResetAppearanceStream();
Run the program again and scroll down to the bottom of the first page. You’ll see a big, red approved stamp!

Conclusion
Congratulations, you just created an approved process design document. Along the way, you saw how to create a new PDF, load an existing PDF, insert one document into another, create pages, add formatted text, and add a stamp with a custom image.
That’s a lot, but you were able to get it done with just around a hundred lines of code with the Foxit SDK. If you need to generate a PDF programmatically, Foxit has many features beyond what was covered—you can even digitally sign PDFs!
Foxit is an industry leader in PDF manipulation. Its core has been around for years and is both efficient and feature-rich. They also support many different platforms, so you can learn their SDK once and reuse that knowledge on other projects without much effort.
Author: Ben Force