How to Add Form Fields to Scanned PDFs using Automatic Form Recognition
Most people are accustomed to PDF files as they are one of the most common formats used to share all sorts of documentation, including many of the forms people use daily. You’re probably familiar with the typical workflow involved in filling out a PDF form:
* Receiving an email with a PDF file attached
* Printing the PDF file
* Filling in the printed form
* Scanning the filled-in form
* Emailing the filled-in form back to the original sender
This process is slow and tedious and can introduce data capturing errors because of unclear handwriting or poor-quality scans. Programmatically embedding form fields in your PDFs that can be digitally filled-in is a much more practical method. This can have significant benefits in industries that traditionally rely on a lot of physical paperwork, such as healthcare and education.
This tutorial demonstrates how you can use the .NET Core framework, the C# programming language, and the Foxit PDF SDK to programmatically embed digitally fillable form fields in a scanned PDF file.
Contents
Why Programmatically Embed Digitally Fillable Form Fields in Scanned PDFs?
Using a program to embed digitally fillable form fields in your PDFs removes the need for printing and scanning completely and simplifies the process for the end user and the organization requesting their information. There are numerous advantages to embedding digital forms in your PDFs that many industries could benefit from.
Use Cases for Programmatically Embedding Digitally Fillable Form Fields in Scanned PDFs
As mentioned, any industry that relies heavily on documents for information exchange could benefit significantly from embedding digitally fillable form fields in PDFs. Healthcare and education are two of the most prominent examples.
From insurance forms to medical history, many important forms in the healthcare industry are still manually captured. It’s a legacy from the pre-digital era and many healthcare providers might even be using the same forms they used before the days of email and web communications. Similar to healthcare, the education systems also rely on a lot of forms, from school admission forms to absentee forms to only mention a few. However, with the use of digital devices becoming more prevalent in schools, the use of digitized tests is also becoming popular. You could easily add fields to scanned tests and make them digitally available to students.
Programmatically embedding digitally fillable fields in the PDF file gives the provider a chance to modernize and streamline their data capturing workflow. You don’t even need to redesign any of your forms. Also, because you’re programmatically embedding fillable fields, you can even hook the process into your patient or student database and pre-fill some of the fields, like patients’ names or students’ ID numbers.
Using the Foxit PDF SDK to Add Form Fields to Scanned PDFs
Foxit PDF SDK is available in many forms and programming languages, but this tutorial specifically addresses the installation of the SDK in a .NET Core project. Once you add the SDK to your project, you’ll learn how to load a PDF file and add fields using C# code and finally, saving your PDF file with its newly added fields.
Using a console application is useful, as you can use the application in a batch process or automate the process of adding fields in a workflow. The console application could also be modified to pre-populate some of the fields before adding fields to it.
The Foxit SDK has a feature called Automatic Form Recognition in their own product, the Foxit PDF Editor, but they’ve also made this feature available for use in their SDK, so that you can integrate it into your own projects. You can use this feature to update older PDFs in use by your organization, or as an end user to just make your life easier when dealing with companies that haven’t updated their PDF files with digital form fields.
Prerequisites
First, you need to download the SDK from the Foxit Developers website. You can request a free trial to download a copy of the SDK to use for this exercise.
You will need an IDE Integrated Development Environment to write your code in. You can pretty much use any IDE that can compile C# code, but for this exercise we recommend you use Visual Studio Community to write your code in. If you have the Professional or Enterprise versions of Visual Studio already, those editions will work perfectly fine. Visual Studio 2017 version 15.9 or higher will work with this version of the SDK.
You’ll need the latest .NET Framework. This might differ slightly depending on your version of Windows that you are running, but the latest stable version as of the time of writing this is version 6.0. Depending on your operating system, the framework might already be installed, but you can also install it via the
Visual Studio Installer component.
Project Setup
Open Visual Studio and create a new project. Remember to click the Next button between steps.
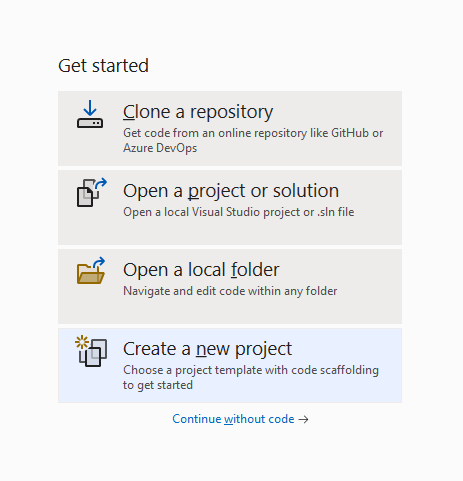
Select the Console App project. You’ll see that it mentions being usable with Windows, Linux and macOS. This project option is using the cross-platform .NET Core version of the framework, which is what we want.

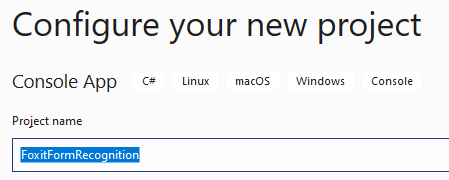
Give your new project a name:
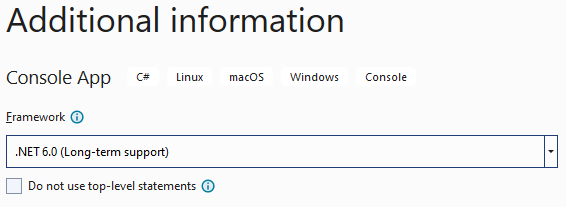
Select which version of the .NET Framework your application must target. At time of writing, the latest stable version is .NET 6.0. If you don’t see this version in the drop-down box, you still need to install the .NET Framework on your computer.
Finally, click the Create button to finish creating your project.
Now you have a clean console application that is ready to be modified.
Installing the SDK via Nuget
The easiest way to include the Foxit PDF SDK as part of your project is to install it via the NuGet package manager. Navigate to the NuGet Package Manager Console:
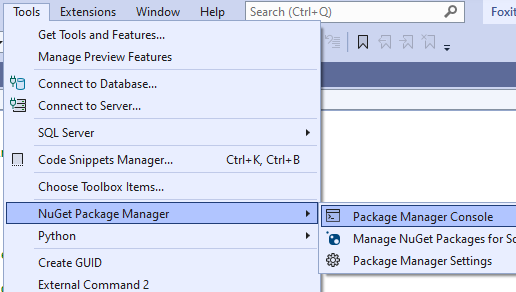
In the console window that opens at the bottom part of your IDE, input the following command:
Install-Package Foxit.SDK.Dotnet
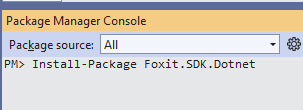
Once you’ve pressed Enter, the package will show up as part of your project in the Solution Explorer like this:
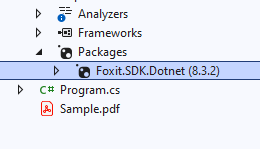
The SDK is now ready for you to use in your project.
Manually Installing the SDK
If you can’t get the NuGet method for installing the SDK to work for whatever reason, you can also install the SDK manually, by following these instructions. You can safely ignore this section if your NuGet package installation went smoothly.
When you requested the trial, you would have received a link from which you can download the SDK manually. The latest PDF SDK for Windows (.NET Core Library) version (at the time of writing this article) was version 8.3.2.
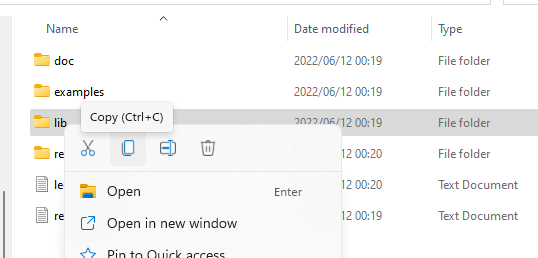
Extract the foxitpdfsdk_8_3_2_win_dotnetcore.zip that you downloaded from Foxit’s website to any location on your drive. Once it’s extracted, copy the lib folder:
Then paste the lib folder into your newly created project folder:
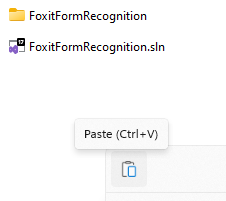
After you copy the lib folder into your project folder, you need to add the dynamic link library (DLL) to your project’s dependencies.
In the Solution Explorer, right-click the Dependencies node and click Add Project Reference:
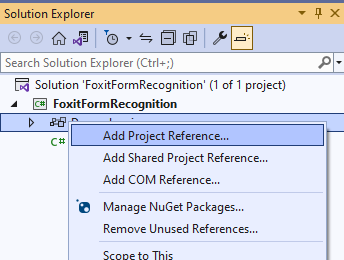
In the explorer window, navigate to the lib folder that you copied into your project folder and, once there, choose either the x86_vc15 or the x64_vc15 folder, depending on your operating system. Most modern operating systems today are 64-bit, so the x64_vc15 folder is probably what you need. Once inside that folder, select the fsdk_dotnetcore.dll file and click the Add button:

In the Reference Manager window, the DLL file will now be listed. Click OK on this window to add the selected DLL file as a dependency to your project:

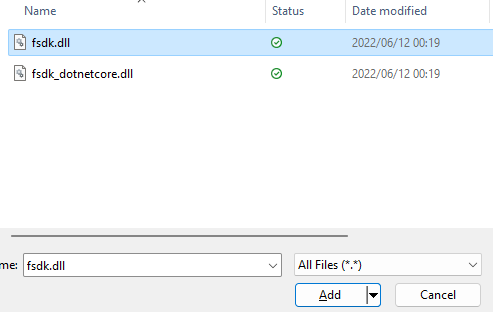
Now you need to add the fsdk.dll file to your project. Right-click on your project name, and go to Add and then Existing Item:

An Explorer window will open, and using that window you must navigate to the same lib directory where you added the previous DLL file from. Remember to select the All Files option; otherwise, the DLL file will not be displayed:
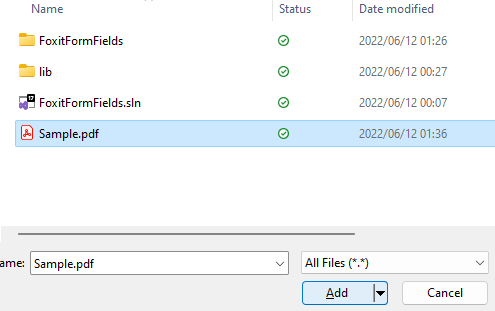
Finally, add Sample.pdf to your project using the same Add Existing Item method you used for the previous file. You can download this sample file from here.
Once you’ve uploaded the PDF file, your Solution Explorer should look like this:
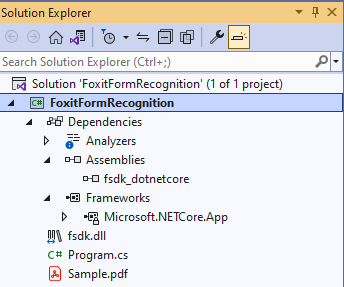
The Solution Explorer should contain all the DLLs, packages, and the Sample.pdf file that you’ve added to your project.
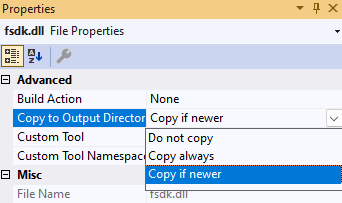
You need to edit the properties of Sample.pdf and fsdk.dll to make sure they are included in the output directory when you build the application. Select each file in turn, and view the Properties section under the Solution Explorer. Under Copy to Output Directory, select the option Copy if newer:
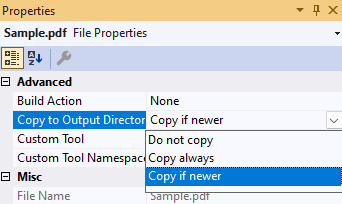
Do the same for Sample.pdf:
If you edit your project’s .csproj file, you can confirm that everything is okay, if it looks like this:
xml
<Project Sdk="Microsoft.NET.Sdk">
<PropertyGroup>
<OutputType>Exe</OutputType>
<TargetFramework>net6.0</TargetFramework>
<ImplicitUsings>enable</ImplicitUsings>
<Nullable>enable</Nullable>
</PropertyGroup>
<ItemGroup>
<Reference Include="fsdk_dotnetcore">
<HintPath>..\lib\x64_vc15\fsdk_dotnetcore.dll</HintPath>
</Reference>
</ItemGroup>
<ItemGroup>
<None Update="fsdk.dll">
<CopyToOutputDirectory>PreserveNewest</CopyToOutputDirectory>
</None>
<None Update="Sample.pdf">
<CopyToOutputDirectory>PreserveNewest</CopyToOutputDirectory>
</None>
</ItemGroup>
</Project>
At this point, your project is set up and you can start writing your program to add fields to the PDF file.
Keep in mind that your console application is relatively basic and does not need to draw anything to the screen. If you’re planning on creating an application that will interact with PDF files visually, like your own PDF editor of sorts, you’ll will need to add common libraries like System.Drawing to your project. However, for this tutorial, you don’t need to add anything else.
Initializing the Library
Add the following using statements:
cs
using foxit.common;
using foxit.pdf;
This allows you to use the SDK in your code. Next, you initialize the library:
cs
string sn = " ";
string key = " ";
ErrorCode error_code = Library.Initialize(sn, key);
if (error_code != ErrorCode.e_ErrSuccess)
{
Library.Release();
return;
}
You would normally add your serial number and license key to the sn and key variables if you have bought a license for the SDK. If you’re using the trial version, you can find the values for sn and key in the lib folder, in the files called gsdk_sn.txt and gsdk_key.txt, respectively. From those files, copy the value after the string SN in gsdk_sn.txt and the value after Sign in gsdk_key.txt as values for the sn and key variables.
cs
string sn = "<value_from_gsdk_sn.txt>";
string key = "<value_from_gsdk_key.txt>";ErrorCode error_code = Library.Initialize(sn, key);
if (error_code != ErrorCode.e_ErrSuccess)
{
Library.Release();
return;
}
Load the Sample PDF file
Load the sample PDF file from your project:
cs
// load our Sample.pdf file
PDFDoc doc = new PDFDoc("Sample.pdf");
error_code = doc.Load(null);
if (error_code != ErrorCode.e_ErrSuccess)
{
Library.Release();
return;
}
Adding Fields
Now you’re ready to scan the document for any fields that can be added automatically using the form recognition engine of the SDK.
Because you’re now dealing with forms in a PDF file, you need to add the following at the bottom of your using section:
cs
using foxit.pdf.interform;
This using statement will allow your code to work with Form objects in your code. Now you can start the form recognition engine to try and detect fields that it can automatically add to the PDF.
Take note, that the form recognition engine relies heavily on fields with borders for detecting fields that can be added.
cs
// create a form object that will contain automatically added fields
using (Form form = new Form(doc))
{
if (form.GetFieldCount("") == 0)
{//
the progressive class is used for long running tasks like loading documents,
// parsing pages and in this case, automatic field recognition
// start the Form Recognition Engine
Progressive pro = doc.StartRecognizeForm(null);
Progressive.State state = Progressive.State.e_ToBeContinued;
// keep looping while the engine is running
while (state == Progressive.State.e_ToBeContinued)
{s
tate = pro.Continue();
}}
} //
Save the modified PDF to a new file
string newPdf = "Sample_With_Fields.pdf";
doc.SaveAs(newPdf, (int)PDFDoc.SaveFlags.e_SaveFlagNoOriginal);
// good practice to release the library when everything is done
Library.Release();
Depending on the complexity of your PDF, this may take a while. Remember that the form recognition engine works better with fields contained within clearly defined borders.
Breaking down what you’ve done step-by-step:
1. You load your Sample.pdf file using PDFDoc.
2. The page doesn’t have a form object, so you create one.
3. You use the Progressive class and doc.StartRecognizeForm() to initialize the Form Recognition engine.
4. You loop through the process until it has completed.
5. Finally, you use SaveAs to save your modified PDF file to the filename specified by newPDF.
Open the debug directory in <your_project_name>\bin\Debug\net6.0, and you will find your newly saved Sample_With_Fields.pdf file. Open it with any PDF viewer to see the fields you’ve added:
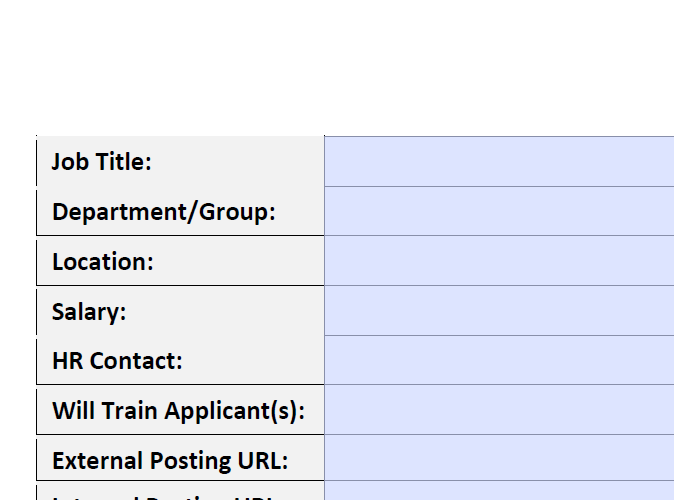
If you’re using the trial version of the SDK, your PDF file will have a watermark. However, a watermark will not be included on generated PDFs if you purchase a license.
The fields you added can be filled by simply typing in them:
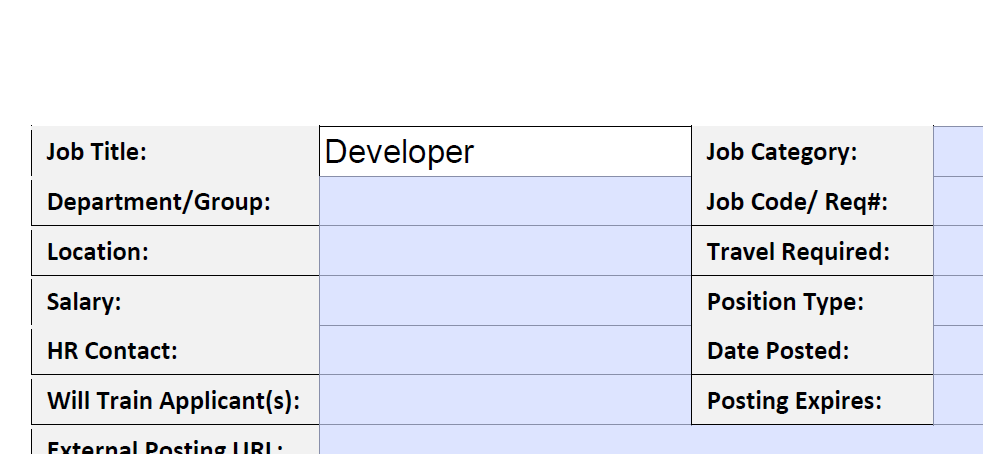
After you fill in the field, you can use Save As to save the file under a different name, and then you can send the file with any requested information neatly filled in.
The automatic form recognition makes it really easy to add fields to any scanned PDF file. You might have some issues with PDFs where the field borders aren’t well defined, but for most well designed (non-digital) forms, the engine should work pretty well.
Conclusion
This article showed you how to use the Foxit PDF SDK to modify a scanned PDF file to automatically add fields that a user can fill in themselves; no printing, writing, or scanning necessary.
The Foxit PDF SDK has a wide range of other uses that could broaden your perspective on interacting with PDFs. If you want to learn more, please refer to their documentation.
The code samples for this article are available here on Github.
Author: Thinus Swart