How to Perform Full-Text Search in PDF using JavaScript

Sometimes, Ctrl-F just doesn’t cut it. If you’re working with a large collection of documents, trying to find specific phrases or locate sources in metadata can be a nightmare. Thankfully, full-text search is a feature that scans an entire collection and provides detailed results.
If you’re working with PDFs, you can use the Foxit PDF SDK as your tool for full-text searches. In this article, we will show you how to integrate Foxit with your system to perform accurate full-text search on a PDF document.
Contents
Why Does Full-Text Search on PDFs Often Fail?
PDF files are made to retain the original formatting of a document, like layouts, fonts, and graphics. You can view a PDF file on any computer or device that has PDF support and it will retain its original formatting. So for a full-text search to be successful, the text needs first to be extracted from the PDF.
What Is Foxit?

Foxit is software that offers various PDF solutions; it can be used to create, edit, sign, merge, annotate, protect, and scan PDF files. Foxit also provides easy-to-use collaboration features for filling out forms and sharing information with friends and colleagues. It renders PDF files relatively quickly, no matter how large the file is, and uses very little memory when doing so.
The company also provides SDKs and plug-ins for developers to plug into various apps. Foxit is available on almost all platforms. Visit the site to learn more.
How Does Foxit SDK Let You Search Text in a PDF?
The problem with finding text in a PDF is the way the PDF format organizes text and objects. Foxit SDK takes notes of these objects (or characters) on the basis of the location, size, or rotation angle to be displayed. It makes finding words in your document easy as the SDK lets you customize the search engine to account for common occurrences.
It applies to all text in the PDF, overcoming document encoding type and language. The software uses SQLite to check the document, which returns a quick response.
Prerequisites
To get started, first, you’ll need to have the following.
– Foxit Web SDK
– Node and NPM
Building the Example App
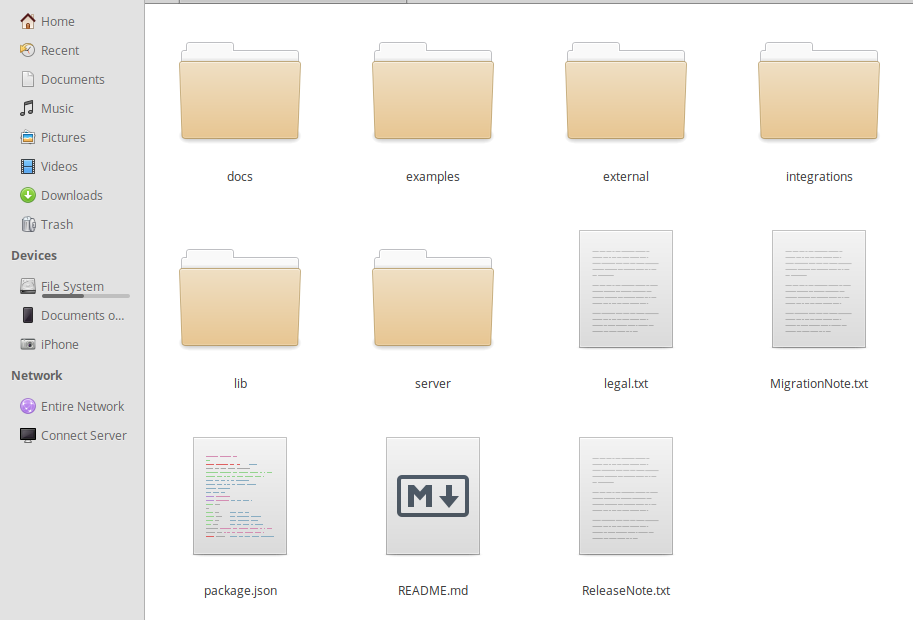
The first thing you need to do is to download the SDK in Zip format and extract it. Your folder structure should look like this.

After extracting the app, you’ll find a package.json file that contains all packages used.
Install the packages with the following command:
npm install
After installing the packages, the next step is to start the local server:
npm start
To access the server, use the following address.
– Complete web viewer: http://localhost:8080/examples/UIExtension/complete_webViewer/
– Basic web viewer: http://localhost:8080/examples/UIExtension/basic_webViewer/
Setting up a New JavaScript Web App With Foxit
We will be using the Foxit PDF SDK to build a web app that has a full-PDF viewer feature.
Follow the instructions below to get started:
– Create a new folder for the project
– From the SDK you downloaded earlier, copy the lib, server, and external folders and the package.json file into the new folder you created. (Only copy the external folder if you want to use font resources).
– Add a PDF file to the new folder also (this is for test purposes).
– Lastly, create an index.html file in the new folder.
Now, this is what your file structure should look like:
newFolder
+-- lib (copied from the Foxit_PDF_SDK)
+-- server (copied from the Foxit_PDF_SDK)
+-- package.json (copied from the Foxit_PDF_SDK)
+-- index.html (You created this file)
+-- youOwn.pdf (sample pdf you added to the folder)
+-- external (optional file from Foxit_PDF_SDK for font resources)
Now, open your code editor and add the following code snippet in your index.html.
<!DOCTYPE html>
<html lang="en" dir="ltr">
<head>
<meta charset="UTF-8">
<meta http-equiv="X-UA-Compatible" content="IE=edge">
<meta name="viewport" content="width=device-width, initial-scale=1.0">
<title>Foxit Web SDK Practice</title>
<style>
.fv__ui-tab-nav li span {
color: #636363;
} .f
lex-row {
display: flex;
flex-direction: row;
}
</style>
</head>
<body>
</body>
</html>
Let’s import styles from the lib file we copied. We’ll be adding it to the <head> tag.
<link rel="stylesheet" href="./lib/PDFViewCtrl.css">
Also, import the script library from the lib folder.
<script src="./lib/PDFViewCtrl.full.js" charset="utf-8"></script>
Add a <div> element between the <body> tag; this will be the web viewer container.
<div id="pdf-viewer"></div>
Initialize PDFViewer before the closing body tag.
<script>
const licenseSN = "Your license SN";
const licenseKey = "Your license Key";
const PDFViewer = PDFViewCtrl.PDFViewer;
const pdfViewer = new PDFViewer({
libPath: './lib', // the library path of Web SDK.
jr: {
licenseSN: licenseSN,
licenseKey: licenseKey,
}
});
pdfViewer.init('#pdf-viewer'); // the div (id="pdf-viewer")
</script>
You can get the trial license key and license SN from the license-key.js file in the examples folder from the SDK folder. Get the PDF document.
fetch('./JavaScript-for-Kids.pdf').then( (res) => {
//modify the path to get your pdf
res.arrayBuffer().then( (buffer) => {
pdfViewer.openPDFByFile(buffer);
})
})
These are the key settings we need to set up Foxit. The complete HTML file should look like this:
<!DOCTYPE html>
<html lang="en">
<head>
<meta charset="UTF-8">
<meta http-equiv="X-UA-Compatible" content="IE=edge">
<meta name="viewport" content="width=device-width, initial-scale=1.0">
<title>Foxit Web SDK Practice</title>
<link rel="stylesheet" href="./lib/PDFViewCtrl.css">
<script src="./lib/PDFViewCtrl.full.js" charset="utf-8"></script>
<style>
.fv__ui-tab-nav li span {
color: #636363;
}.f
lex-row {
display: flex;
flex-direction: row;
}
</style>
</head>
<body>
<div id="pdf-viewer"></div>
<script>
const licenseSN = "Your license SN";
const licenseKey = "Your license Key";
const PDFViewer = PDFViewCtrl.PDFViewer;
const pdfViewer = new PDFViewer({
libPath: './lib', // the library path of Web SDK.
jr: {licenseSN: licenseSN,
licenseKey: licenseKey,
}
});
pdfViewer.init('#pdf-viewer'); // the div (id="pdf-viewer")
fetch('./JavaScript-for-Kids.pdf').then((res) => {
// modify the path to get your pdf
res.arrayBuffer().then(function (buffer) {
pdfViewer.openPDFByFile(buffer);
})
})
</script>
</body>
</html>
Integrating the Complete Web Viewer Package
We just finished setting up the Basic package. Let’s move to the complete web-view package.
First, import the styles:
<link rel="stylesheet" href="./lib/UIExtension.css">
Next, import the script:
<script src="./lib/UIExtension.full.js" charset="utf-8"></script>
In the body tag, add a div tag:
<div id="pdf-ui"></div>
Initialize the Complete package extension:
const pdfui = new UIExtension.PDFUI({
viewerOptions: {libPath: './lib', // the library path of web sdk.
jr: {
licenseSN: licenseSN,
licenseKey: licenseKey
}
},
renderTo: '#pdf-ui' // the div (id="pdf-ui").
});
Finally, add the code to launch the PDF file:
fetch('./JavaScript-for-Kids.pdf').then((res) => {
// modify the path to get your pdf
res.arrayBuffer().then((buffer) => {
pdfui.openPDFByFile(buffer);
})
})
How to Allow Users to Search a PDF With the Web SDK
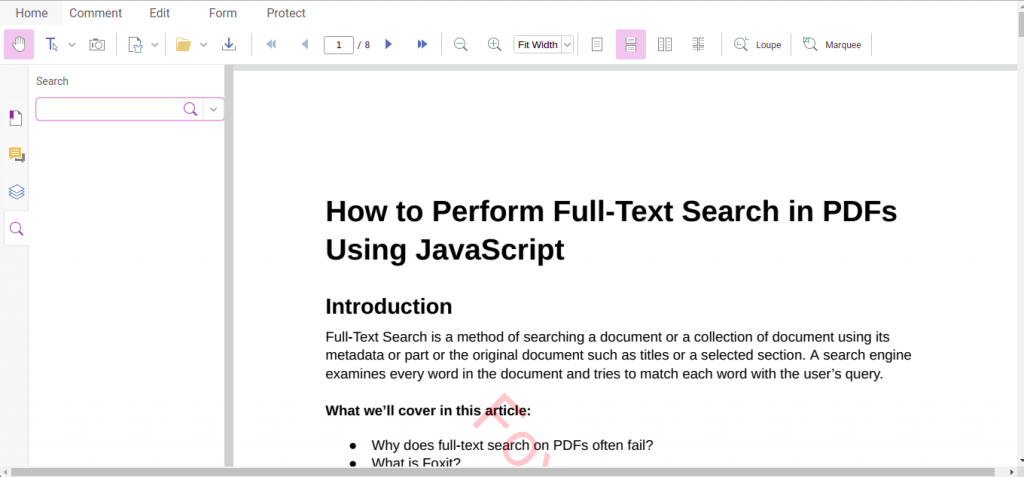
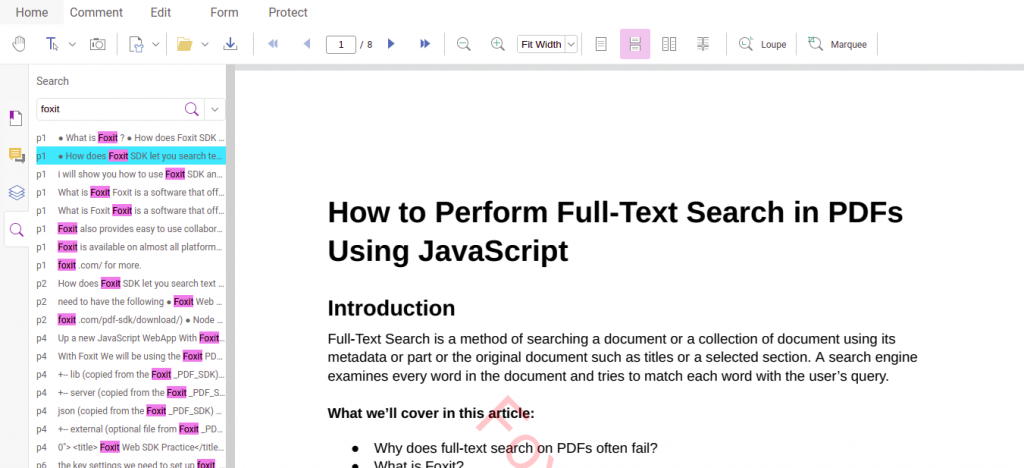
If the complete web-view SDK is integrated into your app, users can easily navigate the sidebar and find the search bar icon.


However, you can also implement custom controls for your web app; the SDK provides you with a lot of customization that you can utilize to suit your project.
Conclusion
The PDF format is one of the essential document formats when it comes to sharing and collaboration. We went through how to easily integrate and perform a full-text search on any PDF file using the Foxit SDK in this post. Hopefully you’ll be able to use this tool to perform quick and advanced searches on your PDF libraries.
For more information, consult the documentation for Foxit.
Author: Chinedu Imoh