How to Redact Data from PDFs in Java

Sharing information among various stakeholders is obviously important. And when the information is digital, it’s important to preserve its content and format. PDF files usually meet this need perfectly.
However, it’s not an uncommon scenario to need to share a PDF that happens to include some personal information. Obviously, not everyone who needs that file also needs to see all of that information, nor should they, due to various legal, security, and privacy reasons. In this case, you may need to redact or hide some of the data available in the PDF before sharing it.
In this tutorial, you’ll create a web application using Java which will accept credit card information from a customer, create a PDF file out of the information, and then redact the personal information using Foxit’s PDF SDK.
This sample application is available on GitHub.
Building the Application
Let’s begin by setting up a sample web application using Java and Eclipse IDE to accept customer data. But first, some prerequisites:
– The latest Eclipse IDE for Enterprise Java and Web developers
– Apache Tomcat 9 to host Java web applications
– The Foxit SDK, extracted in your local folder
– A workspace for the sample application in Eclipse IDE
First, divide your web application into three parts:
– HTML form to accept customer data
– An `HTTPSerlvet` to act as an interface between the HTML form and the PDF Service class
– A PDF Service class to create the PDF using the Foxit SDK
Creating a Dynamic Web Project
Let’s begin creating your web application in your Eclipse workspace. Go to File, then New Project, and open the New Project wizard. Select the Dynamic Web Project in the Web categories, and click Next.

Enter the Project name and click Next.

You’ll see the project source configuration window. Leave the settings unchanged and click Next.

Now let’s configure the project’s web module.
Select the Generate web.xml deployment descriptor checkbox. This selection will automatically create a `web.xml` file in your project, which can be used to configure the web project settings as explained later in this tutorial.
Click Finish.

Eclipse will create a dynamic web project for you. You’ll also have a file called `web.xml`, which can be used to configure the homepage of your application and the servlet configurations (demonstrated later).
Creating an HTML Form
Next, you’ll create an HTML form to accept the customer data.
Right-click on the web project you’ve created, click New from the pop-up menu, then HTML File.
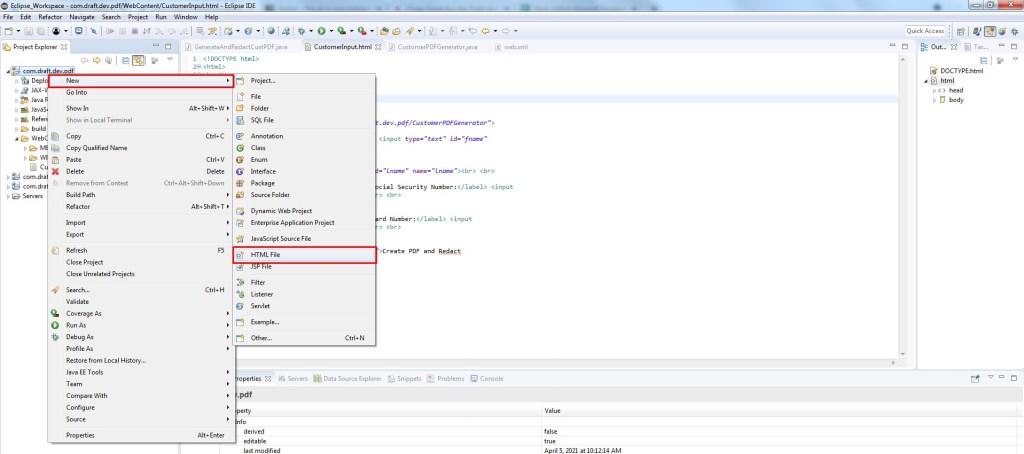
In the New HTML File window, the WebContent folder is selected by default. Enter the filename `CustomerInput.html` for your new HTML file. This will contain the code for the form data.
Click Next.

In the Select HTML Template window, select the HTML5 option. It will show the preview of the code in the preview window. Click Finish.

A new file will be created and opened with the following default content:
<!DOCTYPE html>
<html>
<head>
<meta charset="ISO-8859-1">
<title>Insert title here</title>
</head>
<body>

</body>
</html>
Update the title in the `title` tag:
<title>Customer Input Form</title>
Update the `body` tag with the following content. Note that the content has a `form` which contains four input fields to accept First Name, Last Name, Social Security Number, and Credit Card Number for the customer.
<form
    action="http://localhost:8080/com.draft.dev.pdf/PDFHelperServlet">

    <label for="fname">First name:</label> <input type="text" id="fname"
        name="fname"><br> <br>

    <label for="lname">Last
        name:</label> <input type="text" id="lname" name="lname"><br> <br>

    <label for="Social Security Number:">Social Security Number:</label> <input
        type="text" id="SSN" name="SSN"><br> <br>

    <label
        for="Credit Card Number:">Credit Card Number:</label> <input
        type="text" id="CCN" name="CCN"><br> <br>


    <button type="submit" formmethod="post">Create PDF and Redact
        Confidential Data</button>

</form>
Notes:
– The `action` attribute of the form tag has a URL, which you need to update based on the servlet you create.
– The `formmethod=”post”` attribute of the button specifies that the form is submitted using the POST method.
Next, you’ll need to set the created HTML file as the homepage of your application. Open the `web.xml` file available in the `webcontent/web-INF` folder of your application.
Update the welcome file list tag:
<welcome-file-list>
             <welcome-file>CustomerInput.html</welcome-file>
</welcome-file-list>
Use the exact filename you used while creating the HTML file (for example, `CustomerInput.html`).
The HTML file is created and set as the homepage for your application.
Configuring the Foxit SDK For PDF Creation
Now, let’s configure the Foxit PDF SDK in your Java web application.
You should have already downloaded the Foxit SDK from a link. Extract it into your local folder. You’ll find a `fsdk.jar` and the `.dll` files relevant for 32-bit and 64-bit Windows.
Copy the `jar` file and the `.dll` file relevant for your Windows bit—`fsdk_java_win32.dll` if you’re using 32-bit Windows, `fsdk_java_win64.dll` if you’re using 64-bit Windows.
Paste the copied files in the `webcontent/web-inf/lib` of your Eclipse web project.

Now let’s create the helper class that will load the Foxit SDK licenses and create and redact PDF files.
Name the helper class `GenerateAndRedactCustPDF.java`. This is available in the package `com.draft.dev.pdf` of your web application.

For the sake of this tutorial, add all the methods in the next section to `GenerateAndRedactCustPDF.java` as static methods so they can be directly accessed using the class name.
Loading the Foxit Library
First, you’ll need to load the `dll` files of the Foxit SDK to use it.
Use the following method to load the `dll` files based on your Windows architecture. It’ll automatically detect Windows type and detect the `dll` file. If you’re sure about your Windows architecture, you can directly use `System.loadLibrary(“fsdk_java_win32”);` alone.
/**
     * To load the Foxit SDK libraries based on your Windows.
     */
    public static void loadlib() {
        String os = System.getProperty("os.name");
        if (os.toLowerCase().startsWith("win")) {
            if (System.getProperty("sun.arch.data.model").equals("64")) {
                System.loadLibrary("fsdk_java_win64");
            } else {
                System.loadLibrary("fsdk_java_win32");
            }
        } else {
            if (System.getProperty("sun.arch.data.model").equals("64")) {
                System.loadLibrary("fsdk_java_linux64");
            } else {
                System.loadLibrary("fsdk_java_linux32");
            }
        }
    }
Next, initialize the libraries with the appropriate licenses. You’ll have the serial number in the `gsdk_sn.txt` file available in the downloaded lib folder. The key will be available in the `gsdk_key.txt` file in the same folder.
Use the following method to initialize the libraries with the appropriate serial number and key:
/**
     * @return
     */
    public static boolean loadLicense() {
        boolean licenseState = false;
        // Initialize the library.
        String sn = "replace it with the trial serial number you received";
        String key = "replace it with the trial key you received";

        //Load the serial number and the key.
        int error_code = Library.initialize(sn, key);
        if (error_code != e_ErrSuccess)
            licenseState = true;

        return licenseState;
    }
This method will initialize the libraries if the serial number and keys are valid and return `true` if its success. Else it’ll return `false`.
With the libraries initialized, let’s learn how to create a PDF. The following method creates a PDF file by using the field data passed as a map. Each and every line of the code is explained in comments for better understanding.
/**
     * This method creates a PDF file and appends the field data that is passed as a
     * map.
     *
     * @return
     */
    public static boolean createPDF(String fileName, Map<String, String[]> fieldData) {
        try {

            // Creating a new PDF DOC. The empty constructor PDFDOC() creates a new file
            // rather than opening the existing file.
            PDFDoc doc = new PDFDoc();

            // Insert a page in the newly created PDF file with the page size a letter
            PDFPage page = doc.insertPage(0, PDFPage.e_SizeLetter);

            // Create a new form to create new fields inside the doc.
            Form form = new Form(doc);

            // Iterator variable to increment after creating each field.
            int iteration = 0;

            // Creating the fields based on the field data
            for (Entry<String, String[]> entry : fieldData.entrySet()) {

                // To position the field, this offset is used.
                int offset = iteration * 60;

                // Add a control to the form using addcontrol() and the key as entry.getKey().
                // This key contains the name of each field passed from the HTML form. For
                // e.g. FirstName. It'll also place the control in the rectangles generated
                // using the offset.
                Control control = form.addControl(page, entry.getKey(), Field.e_TypeTextField,
                        new RectF(50f, 600f - offset, 400f, 640f - offset));

                // Getting the created field from the control to set its value.
                Field field = control.getField();

                // Set the value of the field, for eg. FirstName : Vikram
                field.setValue(entry.getKey() + ": " + entry.getValue()[0]);

                // Increment the iteration. So the next field is created in the next line.
                iteration++;

            }

            page.flatten(true, PDFPage.e_FlattenAll);

            // Save the file locally and return the file's location to the caller.
            doc.saveAs(fileName, e_SaveFlagNoOriginal);

        } catch (PDFException e) {
            e.printStackTrace();
            return false;
        }
        return true;
    }
Consider the `fieldData` map as `Keyname1: [Value]`, `Keyname2: [Value]`, `Keyname3: [Value]`, etc., where `keyname` is a normal string and `value` is stored as an array.
Each key will contain only one value in the array. Hence this value will be used to create the value in the PDF.
Configuring the Foxit SDK For PDF Redaction
You’ve learned how to create a PDF using the Foxit SDK. Next, you’ll redact the personal information from the PDF.
Load the PDF document and its first page using the Foxit API.
Next, parse the first page using the text search and find the text pattern you pass. If the text pattern is available in the PDf document, then you can apply different types of redaction.
Foxit supports various features for redaction:
– Marking the data with a rectangle
– Setting the border color for data
– Setting the fill color and hiding the data
– Fill color with opacity to highlight the data
The following example explains the different types of redaction available in the Foxit SDK. Each code line is explained in the comment.
/**
     * This method is used to redact the text in the PDF file.
     *
     * @param fileName
     * @param textToRedact
     */
    public static void redactText(String fileName, String textToRedact) {
        try {
            // Open the PDF file(filename) object that's passed.
            PDFDoc doc = new PDFDoc(fileName);

            // Load the document
            int error_code = doc.load(null);

            // Get the first PDF page in the Page2 object
            PDFPage page = doc.getPage(0);

            // Load the doc into the Redaction Object
            Redaction redaction = new Redaction(doc);

            // Start parsing the PDF page.
            page.startParse(PDFPage.e_ParsePageNormal, null, false);

            // Creating a Text page Object using the first page. This is required to create
            // a text search.
            TextPage text_page = new TextPage(page, TextPage.e_ParseTextNormal);

            // Create a text search option using the Text page you have created for the
            // first PDF page.
            TextSearch text_search = new TextSearch(text_page);

            // Create an array which will store the rectangles of the Matched Text.
            RectFArray matched_rect_array = new RectFArray();

            // Set the Text pattern using the Text to Redact.
            text_search.setPattern(textToRedact);

            // Iterate through the texts in the page and if the text is found, add the
            // rectangles of the relevant text to the matched_rect_array array.
            while (text_search.findNext()) {
                RectFArray temp_rect_array = text_search.getMatchRects();
                for (int z = 0; z < temp_rect_array.getSize(); z++)
                    matched_rect_array.add(temp_rect_array.getAt(z));
            }

            // If the matched rectangle array size is more than 0 means, there is a matching
            // text found during search. Proceed to redact.
            if (matched_rect_array.getSize() > 0) {

                // Mark and redact annotate the identified rectangles.
                Redact redact = redaction.markRedactAnnot(page, matched_rect_array);

                // Reset the appearance stream() and save the document. This will have a red
                // mark around the text
                redact.resetAppearanceStream();
                doc.saveAs("c:/temp/" + "AboutFoxit_redacted_default.pdf", PDFDoc.e_SaveFlagNormal);

                // Set the border colors and fill colors and reset the appearance stream. So the
                // text is fully hidden.

                // set border color to Green
                redact.setBorderColor((long) 0x00FF00);
                // set fill color to Blue
                redact.setFillColor((long) 0x0000FF);
                // set rollover fill color to Red
                redact.setApplyFillColor((long) 0xFF0000);

                // Reset the appearance stream() and save the document. This will hide the text
                // using the fill color Red.
                redact.resetAppearanceStream();
                doc.saveAs("c:/temp/" + "AboutFoxit_redacted_setColor.pdf", PDFDoc.e_SaveFlagNormal);

                // Change the opacity of the fill color to half. So the redacted text is still
                // visible.

                redact.setOpacity((float) 0.5);

                // Save the document. This will hide the text using the fill color Red with
                // opacity 0.5. Text will be visible.
                redact.resetAppearanceStream();
                doc.saveAs("c:/temp/" + "AboutFoxit_redacted_setOpacity.pdf", PDFDoc.e_SaveFlagNormal);

                // Redaction.apply.
                redaction.apply();
            }
        } catch (PDFException e) {
            // TODO Auto-generated catch block
            e.printStackTrace();
        }
    }
Creating a Servlet
In this section, you’ll see how to make use of the redaction functionality from the web application. You’ll create a `Servlet` class, which will act as an interface between the `HTML` form and the helper class `GenerateAndRedactCustPDF.java`. This helper class will create PDFs and redact data in PDFs.
When you submit the HTML form using the button click, this servlet will be called. In turn the servlet will make use of the PDF helper class to create a PDF with the form data and redact the text pattern you send.
So let’s create a `Servlet` class.
Right-click on the web application and click New, then Servlet.

In the Create Servlet window, enter the name for your servlet and click Next.

In the deployment descriptor configuration, leave the default settings and click Next.

Note:- I want to highlight that `javax.servlet.http.HttpServlet` is by default not downloaded by the Eclipse IDE for Enterprise Java and Web Developers. One way to fix this issue is to add the `servlet-api.jar` available in your Tomcat installation `lib` directory to your classpath. To add that jar, use the following steps.
1. Right Click Project, Choose Build Path, Select Configure Build Path..
2. Then Click the Libraries tab
3. In that tab, Click Add External Jars
4. Browse to Tomcat installation directory and select `servlet-api.jar`
5. Click Apply and Close to update the Build Path
Note:- You would also need to make sure that you are passing the VM argument -Djava.library.path before you run the application. It should point to .dll file 32-bit or 64-bit as per your system architecture. Otherwise, you will get an error `java.lang.UnsatisfiedLinkError`. You can add VM arguments by Double-clicking on the Tomcat under the servers tab in your eclipse IDE. It will open a window. In this window, click on the Open Launch configuration.

Enter the VM arguments under the arguments tab.

Next, select the modifiers for your default methods, the default subs you want to create, and so on. Select the doPost and service checkboxes. Optionally, select the final modifiers if you want to make your methods final. Click Finish.

A servlet class will be created in the web application. The newly created servlet will just have the stub methods.
In the `service()` stub method, add the following code to make a call to the `doPost()` method:
doPost(request, response);
In the `doPost()` stub method, add the following code, which will load the Foxit SDK, initialize the license, create a PDF, and perform the redaction of the data using the helper class you created earlier.
//Method to load the Foxit Lib
GenerateAndRedactCustPDF.loadlib();

//Method to load the License
GenerateAndRedactCustPDF.loadLicense();

//Create a PDF file with the form data
GenerateAndRedactCustPDF.createPDF("C:/temp/finalTest.pdf", request.getParameterMap());

//Redact the text 123456789		GenerateAndRedactCustPDF.redactText("C:/temp/finalTest.pdf", "123456789");
The `PDFHelperServlet` class will look as follows:
/**
 * Servlet implementation class PDFHelperServlet
 */
@WebServlet("/PDFHelperServlet")
public final class PDFHelperServlet extends HttpServlet {
    private static final long serialVersionUID = 1L;

    /**
     * @see HttpServlet#HttpServlet()
     */
    public PDFHelperServlet() {
        super();
    }

    /**
     * @see HttpServlet#service(HttpServletRequest request, HttpServletResponse
     *      response)
     */
    protected void service(HttpServletRequest request, HttpServletResponse response)
            throws ServletException, IOException {
        doPost(request, response);
    }

    /**
     * @see HttpServlet#doPost(HttpServletRequest request, HttpServletResponse
     *      response)
     */
    protected void doPost(HttpServletRequest request, HttpServletResponse response)
            throws ServletException, IOException {

        //Method to load the Foxit Lib
        GenerateAndRedactCustPDF.loadlib();

        //Method to load the License
        GenerateAndRedactCustPDF.loadLicense();

        //Create a PDF file with the form data
        GenerateAndRedactCustPDF.createPDF("C:/temp/finalTest.pdf", request.getParameterMap());

        //Redact the text 123456789
        GenerateAndRedactCustPDF.redactText("C:/temp/finalTest.pdf", "123456789");
    }

}
Note the annotation `@WebServlet(“/PDFHelperServlet”)` at the top of the class name. This specifies the path to access this servlet. This URL path needs to be specified along with the web project name and the `localhost:8080` in the form action attribute of your HTML file.
For example: `http://localhost:8080/<your project name>/PDFHelperServlet`.
If you’re hosting this application on any remote server, you can replace `localhost` with the remote server address to access this PDF helper servlet.
Running the Web Application and Redacting a PDF
To run your application, configure the Tomcat in your Eclipse IDE.
Once configured, right-click the Eclipse project and click Run As, then Run on Server.

You’ll see your HTML page open automatically in the Eclipse browser window.
Enter the value for the relevant fields and click Create PDF and Redact Confidential Data.

Separate PDFs will be created for the different redaction options:


Conclusion
Protecting personal information is obviously important, to ensure your users’ privacy and to make your organization compliant to GDPR regulations. Being able to redact data from PDFs is a helpful component in this effort. Foxit’s SDK makes that easy, helping you redact PDF data in applications built for a variety of platforms.
Author: Vikram Aruchamy