How to implement OCR Add-on for Foxit PDF SDK (Windows)
The Foxit PDF SDK OCR (Optical Character Recognition) add-on provides great problem-solving functionality to your application. Although we’ve provided this feature for a quite a while to our customers, we’ve now developed an add-on that makes implementation completely enclosed in our SDK. This also means additional development for our SDK OCR capabilities, more OS’s supported, enhancements in the data output from the recognition engine and constant improvement of this feature in Foxit PDF SDK. OCR is an example of what makes Foxit a premium PDF software vendor; scalable industry-leading functionality with state-of-the-art reliable performance.
This article will provide instructions on how to set up your environment for the OCR add-on using Foxit PDF SDK for Windows:
[table id=35 /]
Contents
What’s in the package
OCR add-on
The OCR add-on provide the resource files required by the SDK to run the project correctly. They are provided separately to the SDK, please contact our team to receive the OCR add-on.
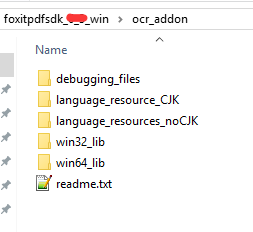
The OCR add-on file structure is described below:
- debugging_files – Resource files used for debugging the OCR project.
- language_resource_CJK – Language resource files. Chinese-traditional, Chinese-simplified, Japanese and Korean only.
- language_resource_noCJK – Language resource files.
Languages Available:
Basque, Bulgarian, Catalan, Croatian, Czech, Danish, Dutch, English, Estonian, Faeroese, Finnish, French, Galician, German, Greek, Hebrew, Hungarian, Icelandic, Italian, Latvian (Lettish), Lithuanian, Macedonian, Maltese, Norwegian, Polish, Portuguese, Romanian, Russian, Serbian, Slovak, Slovenian, Spanish, Swedish, Thai, Turkish, Ukrainian. - win32_lib – 32-bit library resource files
- win64_lib – 64-bit library resource files
Figure 1-1
How to run the OCR demo
The OCR demo is located in the simple_demo folder (foxitpdfsdk_version_win -> examples -> simple_demo -> ocr). This is the sample project used in this tutorial. Load the solution and open the ocr.cpp project in your specific environment.
Building the OCR Resource directory
The C++ project requires you to point the project to a file path where the project can locate and use the OCR resource files.
Figure 1-2
Please create a new folder to add the resources (e.g D:/ocr_resources) and add it to your desired location. Then change the path to the ocr_resource_path WString. This path will be used to initialize the OCR engine.
Adding SDK resource
If your environment uses 32-bit, copy the win32_lib folder content to the ‘D:/ocr_resources‘ resources folder.
If your environment uses 64-bit, copy the win64_lib folder content to the ‘D:/ocr_resources‘ resources folder.
Adding your language resource
For Chinese, Japanese and Korean languages, copy the language_resources_CJK to the ‘D:/ocr_resource‘ resources folder.
For all other languages, copy the language_resources_noCJK to the ‘D:/ocr_resource‘ resources folder.
Choose the language resource used inside the demo code
You will need to set the language used by the OCR engine into the demo code. This is done with the OCREngine::SetLanguages method and is set to “English” by default.
Figure 1-3
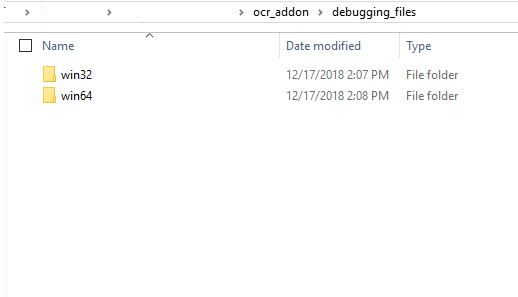
Adding debugging file resource
The OCR Add-on allows users to debug the file if required. These files are also separated into 32-bit and 64-bit, so in order to use the SDK OCR functionality in Debug mode, follow the steps below carefully:
- Copy the 32-bit (../debugging_files/win32) or 64-bit(../debugging_files/win64) folder contents to the ‘D:/ocr_resources‘ resources folder.
Figure 1-4
- Uncomment the SetLogFile method to generate a log file as below:
// Set log for OCREngine. (This can be opened to set log file if necessary)
    OCREngine::SetLogFile(output_directory+L"ocr.log");
Notes:
Debugging mode will print the entire log of the OCR Engine. This may greatly slow the process and output a very large log file.
Debugging mode should be exclusively used for testing purposes. Never release any product with the debugging mode enabled.
Run the Project
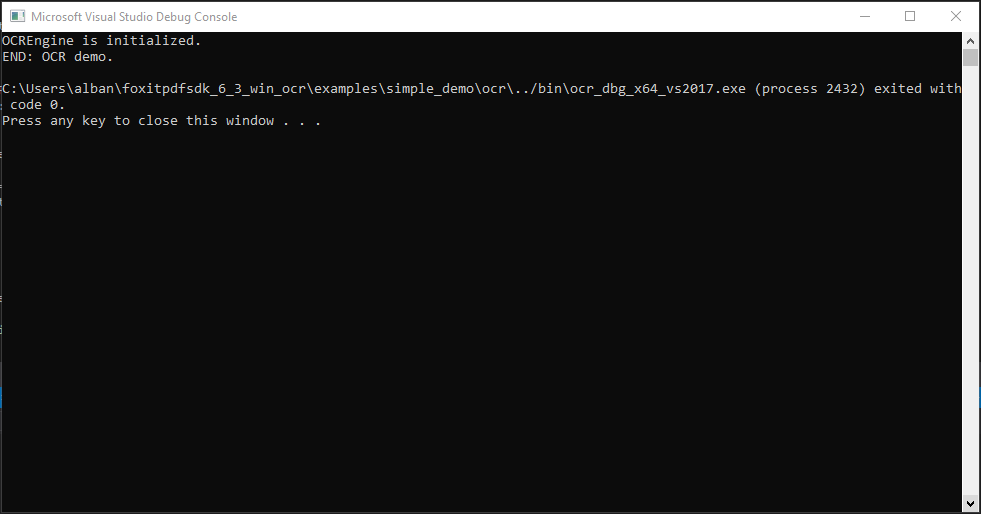
Once you run the project, as per the example below in ‘Release’ mode, the console will print the following by default:
Figure 1-5
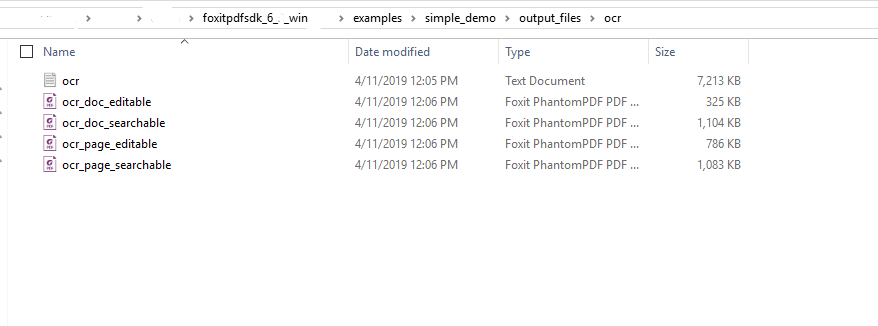
The default project will OCR the default document (‘simple_demo/input_folder/ocr/AboutFoxit_ocr.pdf’) in four different ways, which will output four different PDFs in the output folder(‘simple_demo/output_folder/ocr/’) :
- OCR Editable PDF – ocr_doc_editable.pdf
- OCR Searchable PDF – ocr_doc_editable.pdf
- OCR Editable PDF Page – ocr_page_editable.pdf
- OCR Searchable PDF Page – ocr_page_editable.pdf
Figure 1-6
And all done, you have successfully OCR’d a PDF file using Foxit PDF SDK!
Updated on April 10, 2019


