Developer Guide for Foxit PDF SDK for C++ (11.0)
Contents
- Introduction to Foxit PDF SDK
- Getting Started
- Working with SDK API
- Initialize Library
- Document
- Page
- Render
- Attachment
- Text Page
- Text Search
- Search and Replace
- Text Link
- Bookmark
- Form (AcroForm)
- XFA Form
- Form Filler
- Form Design
- Annotations
- Image Conversion
- Watermark
- Barcode
- Security
- Reflow
- Asynchronous PDF
- Pressure Sensitive Ink
- Wrapper
- PDF Objects
- Page Object
- Marked content
- Layer
- Signature
- Long term validation (LTV)
- PAdES
- PDF Action
- JavaScript
- Redaction
- Comparison
- OCR
- Compliance
- Optimization
- HTML to PDF Conversion
- Office to PDF Conversion with third-party engines
- Office to PDF Conversion with Foxit’s self-developed engines
- Output Preview
- Combination
- PDF Portfolio
- Table Maker
- Accessibility
- PDF to Office Conversion
- DWG to PDF Conversion
- OFD
- Paragraph Editing
- 3D Rendering
- FAQ
- Appendix
- References
- Support
Introduction to Foxit PDF SDK
Have you ever thought about building your own application that can do everything you want with PDF files? If your answer is “Yes”, congratulations! You just found the best solution in the industry that allows you to build stable, secure, efficient and full-featured PDF applications.
Foxit PDF SDK provides high-performance libraries to help any software developer add robust PDF functionality to their enterprise, mobile and cloud applications across all platforms (includes Windows, Mac, Linux, Web, Android, iOS, and UWP), using the most popular development languages and environments.
Why Choose Foxit PDF SDK
Foxit is a leading software provider of solutions for reading, editing, creating, organizing, and securing PDF documents. Foxit PDF SDK libraries have been used in many of today’s leading apps, and are proven, robust, and battle-tested to provide the quality, performance, and features that the industry’s largest apps demand. Customers choose Foxit PDF SDK product for the following reasons:
Easy to integrate
Developers can seamlessly integrate Foxit PDF SDK into their own applications.
Lightweight footprint
Does not exhaust system resource and deploys quickly.
Cross-platform support
Support current mainstream platforms, such as Windows, Mac, Linux, Web, Android, iOS, and UWP.
Powered by Foxit’s high fidelity rendering PDF engine
The core technology of the SDK is based on Foxit’s PDF engine, which is trusted by a large number of the world’s largest and well-known companies. Foxit’s powerful engine makes the app fast on parsing, rendering, and makes document viewing consistent on a variety of devices.
Premium World-side Support
Foxit offers premium support for its developer products because when you are developing mission critical products you need the best support. Foxit has one of the PDF industry’s largest team of support engineers. Updates are released on a regular basis to improve user experience by adding new features and enhancements.
Foxit PDF SDK for C++ API
Application developers who use Foxit PDF SDK can leverage Foxit’s powerful, standard-compliant PDF technology to securely display, create, edit, annotate, format, organize, print, share, secure, search documents as well as to fill PDF forms. Additionally, Foxit PDF SDK (for C++ and .NET) includes a built-in, embeddable PDF Viewer, making the development process easier and faster. For more detailed information, please visit the website https://developers.foxitsoftware.com/pdf-sdk/.
In this guide, we focus on the introduction of Foxit PDF SDK for C++ API on Windows, Linux and Mac platforms.
Foxit PDF SDK for C++ API ships with simple-to-use APIs that can help C++ developers seamlessly integrate powerful PDF technology into their own projects on Windows, Linux and Mac platforms. It provides rich features on PDF documents, such as PDF viewing, bookmark navigating, text selecting/copying/searching, PDF signatures, PDF forms, rights management, PDF annotations, and full text search.
Evaluation
Foxit PDF SDK allows users to download a trial version to evaluate the SDK. The trial version has no difference from a standard version except for the 10-day limitation trial period and the trail watermarks that will be generated on the PDF pages. After the evaluation period expires, customers should contact Foxit sales team and purchase licenses to continue using Foxit PDF SDK.
License
Developers should purchase licenses to use Foxit PDF SDK in their solutions. Licenses grant users permissions to release their applications based on PDF SDK libraries. However, users are prohibited to distribute any documents, sample codes, or source codes in the SDK released package to any third party without the permission from Foxit Software Incorporated.
About this guide
This guide is intended for developers who need to integrate Foxit PDF SDK with the C++ program language into their own applications. It aims at introducing the installation package, and the usage of SDK.
Getting Started
It’s very easy to setup Foxit PDF SDK and see it in action! This guide will provide you with a brief introduction about our SDK package. As a cross-platform product, Foxit PDF SDK supports the identical interfaces for desktop system of Windows, Linux, and Mac. The following sections introduce the contents of system requirements, the installation package as well as how to run a demo, and create your own project.
System Requirements
| Platform | System Requirement | Note |
| Windows | Windows 8, 10 and 11 (32-bit and 64-bit) Windows Server 2012 or later (32-bit and 64-bit) | It only supports for Windows 8/10 classic style, but not for Store App or Universal App. |
| Linux | x86/x64 (32-bit and 64-bit OS) armv7/armv8 | All Linux for x86/x64 samples have been tested on Ubuntu14.0 32/64 bit. All Linux for armv7/armv8 samples have been tested on armv7 or armv8 OS. |
| Mac | Mac OS X 10.6 or higher(x64) Mac OS 12.0 or later(arm64) |
Note: If you are using an older version of Windows (for example, Windows 7 and Windows Server 2008), you may need to visit this link https://support.microsoft.com/en-us/help/4019990/update-for-the-d3dcompiler-47-dll-component-on-windows to download and install the “D3DCOMPILER_47.dll“. If you do not do this, you may encounter errors.
Windows
What is in the package
Download the Foxit PDF SDK zip for Windows package and extract it to a new directory. The release package contains the following folders:
doc: API references, developer guide
examples: sample projects and demos
include: header files for Foxit PDF SDK API
lib: libraries and license files
res: the default icc profile files used for output preview demo
In the “examples” folder, there are two types of demos. “examples\simple_demo” contains more than 30 demos that cover a wide range of PDF applications. “examples\view_demo” contains a UI demo that realizes a lite PDF viewer.
How to run a demo
Simple Demo
Simple demo projects provide examples to show developers how to effectively apply Foxit PDF SDK APIs to complete their applications.
To run a demo in Visual Studio (except security, signature, ocr, compliance, preflight, html2pdf, office2pdf, output preview, pdf2office, dwg2pdf and ofd demos which will be introduced later), you can follow the steps below:
Load the visual studio solution files “simple_demo_vs2010.sln” or “simple_demo_vs2015.sln” or “simple_demo_vs2017.sln” or “simple_demo_vs2019.sln” or “simple_demo_vs2022.sln” (depending on your Visual Studio version) in the “examples\simple_demo” folder.
Build all the demos by clicking “Build > Build Solution”. Alternatively, if you merely want to build a specific demo, you can right-click it and then choose “Build” or load the “*.vcxproj” file in the folder of a specific demo project and then build it.
After building, the executable file “.exe” will be generated in the “examples\simple_demo\bin” folder. The names of the executable files depend on the build configurations.
Run a specific executable file by double-clicking it.
Some demos will generate output files (pdf, text or image files) to a folder named by the project name under “examples\simple_demo\output_files\” folder.
Note: If you want to see the detailed executing processes, you can run it in command line. Start “cmd.exe”, navigate to “examples\simple_demo\bin”, and run a specific executable file.
Security demo
Before running security demo, you should install the certificates “foxit.cer” and “foxit_all.pfx” found in “examples\simple_demo\input_files” folder.
To install “foxit.cer”, double-click it to start the certificate import wizard. Then select “Install certificate… > Next > Next > Finish”.
To install “foxit_all.pfx”, double-click it to start the certificate import wizard. Then select “Next > Next > (Type the password “123456” for the private key in the textbox) and click Next > Next > Finish”.
Run the demo following the steps as the other demos.
Signature demo
Before running signature demo, you should ensure that the OpenSSL has been already installed in your machine. Download an OpenSSL source package from the OpenSSL website, or you can contact us directly, and then extract it and do the following:
Put the OpenSSL folder into the “include” folder which ensures that the OpenSSL header files included in the demos can be found.
Put the “libeay32.lib” library into the “lib” folder.
Run the demo following the steps as the other demos.
Note: We have verified that OpenSSL 1.1.1-stable version is available on the signature demo, you can replace it with the desired version, and maybe need to do some changes.
OCR and Compliance/Preflight demos
For ocr and compliance/preflight demos, you should build a resource directory at first, please contact Foxit support team or sales team to get the resource files packages. For more details about how to run the demos, please refer to section “OCR” and section “Compliance”.
HTML to PDF demo
For html2pdf demo, you should contact Foxit support team or sales team to get the engine files package for converting from HTML to PDF at first. For more details about how to run the demo, please refer to section “HTML to PDF Conversion”.
Office to PDF demo
For office2pdf demo, you need to refer to section “Office to PDF Conversion with third-party engines” and “Office to PDF Conversion with Foxit’s self-developed engines”.
Output Preview demo
For output preview demo, you should set the folder path which contains default icc profile files. For more details about how to run the demo, please refer to section “Output Preview”.
PDF to Office demo
For pdf2office demo, you should contact Foxit support team or sales team to get the engine files package for converting from PDF to office at first. For more details about how to run the demo, please refer to section “PDF to Office Conversion”.
Dwg to PDF demo
For dwg2pdf demo, you should contact Foxit support team or sales team to get the engine files package for converting from DWG to PDF at first. For more details about how to run the demo, please refer to section “DWG to PDF Conversion”.
OFD demo
For ofd demo, you should contact Foxit support team or sales team to get the OFD engine files package at first. For more details about how to run the demo, please refer to section “OFD”.
View Demo
This view demo provides an example for developers to realize a PDF reader using Foxit PDF SDK APIs.
To run the demo in Visual Studio, load “PDFReader_VS2010.sln” or “PDFReader_VS2015.sln” or “PDFReader_VS2017.sln ” or “PDFReader_VS2019.sln” or “PDFReader_VS2022.sln” (depending on your Visual Studio version) in the “examples\view_demo\PDFReader\project” folder, and then click “Debug > Start Without Debugging” to run it.
After the demo runs successfully, you can select a PDF file and browse the content by scrolling down or moving the PDF page by holding the left mouse button. Besides, you can click “Annot > HighLight” to highlight the selected text. A screenshot of the demo is shown in Figure 2-1.
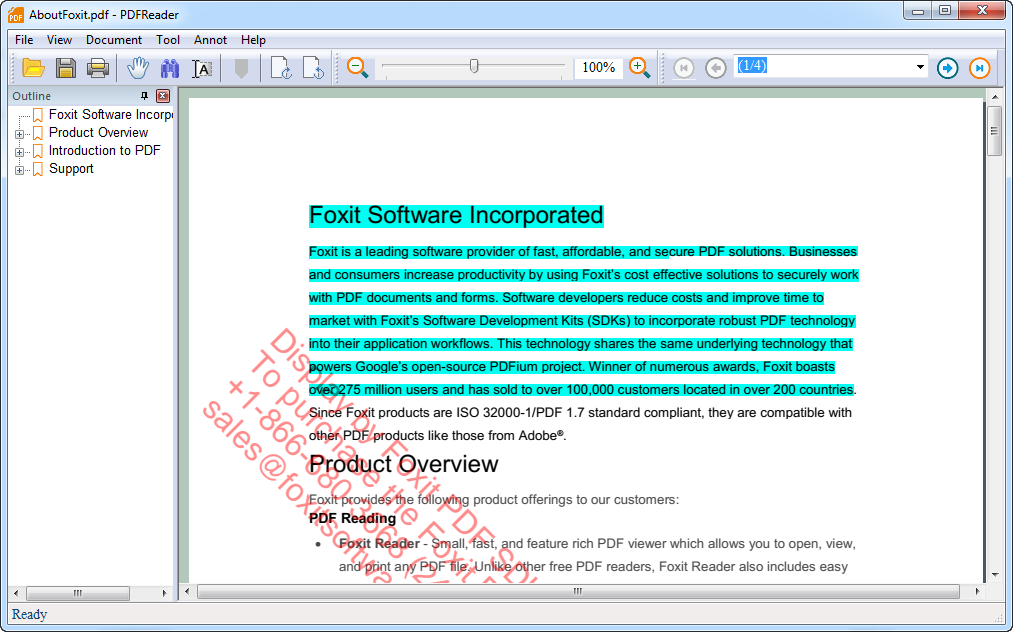
Figure 2-1
How to create a simple project
In this section, we will show you how to use Foxit PDF SDK for Windows to create a simple project that renders the first page of a PDF to a bitmap and saves it as a JPG image. Please follow the steps below:
Open Visual Studio and create a new Win32 Console Application named “test_win”.
Copy the “include” and “lib” folders from the “foxitpdfsdk_11_0_win” folder to the project “test_win” folder.
Add the “include” folder to your “Additional Include Directories”. Right-click the test_win project in Solution Explorer, choose “Properties”, and find “Configuration Properties > C/C++ > General > Additional Include Directories”.
Add include header statements to the beginning of test_win.cpp.
#include <iostream>
#include "../include/common/fs_common.h"
#include "../include/pdf/fs_pdfdoc.h"
#include "../include/pdf/fs_pdfpage.h"
#include "../include/common/fs_render.h"
Add using namespace statements.
using namespace std;
using namespace foxit;
using namespace common;
using namespace pdf;
using namespace foxit::common;
Include Foxit PDF SDK library.
#if defined (_WIN64) // windows 64bit platforms.
    #if defined (_DEBUG)
        #pragma comment (lib, "../lib/fsdk_win64.lib")
    #else
        #pragma comment (lib, "../lib/fsdk_win64.lib")
    #endif

#elif defined (_WIN32) // windows 32bit platforms.
    #if defined (_DEBUG)
        #pragma comment (lib, "../lib/fsdk_win32.lib")
    #else
        #pragma comment (lib, "../lib/fsdk_win32.lib")
    #endif
#endif
Initialize the Foxit PDF SDK library. It is necessary for apps to initialize Foxit PDF SDK using a license before calling any APIs. The trial license files can be found in the “lib” folder.
const char* sn = " ";
const char* key = " ";
foxit::ErrorCode code = Library::Initialize(sn, key);
if (code != foxit::e_ErrSuccess) {
       return FALSE;
}
Note The value of “sn” can be got from “gsdk_sn.txt” (the string after “SN=”) and the value of “key” can be got from “gsdk_key.txt” (the string after “Sign=”).
Load a PDF document, and parse the first page of the document. Let us assume that you have already put a “Sample.pdf” to the “test_win\test_win” folder.
PDFDoc doc("Sample.pdf");
ErrorCode error_code = doc.Load();
if (error_code!= foxit::e_ErrSuccess) return 0;
PDFPage page = doc.GetPage(0);
page.StartParse(foxit::pdf::PDFPage::e_ParsePageNormal, NULL, false);
Render a Page to a bitmap and save it as a JPG file.
int width = static_cast<int>(page.GetWidth());
int height = static_cast<int>(page.GetHeight());
Matrix matrix = page.GetDisplayMatrix(0, 0, width, height, page.GetRotation());

// Prepare a bitmap for rendering.
Bitmap bitmap(width, height, Bitmap::e_DIBArgb, NULL, 0);
bitmap.FillRect(0xFFFFFFFF, NULL);
// Render page.
Renderer render(bitmap, false);
render.StartRender(page, matrix, NULL);

// Add the bitmap to image and save the image.
Image img;
img.AddFrame(bitmap);
img.SaveAs("testpage.jpg");
Click “Build > Build Solution” to build the project. The executable file “test_win.exe” will be generated in “test_win\Debug” or “test_win\Release” folder depending on the build configurations.
Copy “fsdk_win32.dll” or “fsdk_win64.dll” in the “lib” folder to the output directory (“test_win\Debug” or “test_win\Release”). Please make sure that the “fsdk_win**.dll” architecture needs to match the platform target (Win32 or Win64) of the application.
Run the project. Choose one of the following:
Click “Debug > Start Without Debugging” in Visual Studio to run the project, and the “testpage.jpg” will be generated in the “test_win\test_win” folder (same with “test_win.cpp”).
Double-click the executable file “test_win.exe” to run the project. In this way, you should put the “Sample.pdf” to the same folder with the “test_win.exe”, and the “testpage.jpg” will also be generated in the same folder.
The final contents of “test_win.cpp” is as follow:
#include "stdafx.h"

#include <iostream>
#include "../include/common/fs_common.h"
#include "../include/pdf/fs_pdfdoc.h"
#include "../include/pdf/fs_pdfpage.h"
#include "../include/common/fs_render.h"

using namespace std;
using namespace foxit;
using namespace common;
using namespace pdf;
using namespace foxit::common;

// Include Foxit PDF SDK library.
#if defined (_WIN64) // windows 64bit platforms.
    #if defined (_DEBUG)
        #pragma comment (lib, "../lib/fsdk_win64.lib")
    #else
        #pragma comment (lib, "../lib/fsdk_win64.lib")
    #endif

#elif defined (_WIN32) // windows 32bit platforms.
    #if defined (_DEBUG)
        #pragma comment (lib, "../lib/fsdk_win32.lib")
    #else
        #pragma comment (lib, "../lib/fsdk_win32.lib")
    #endif
#endif

int _tmain(int argc, _TCHAR* argv[])

{
// The value of "sn" can be got from "gsdk_sn.txt" (the string after "SN=").
// The value of "key" can be got from "gsdk_key.txt" (the string after "Sign=").
    const char* sn = " ";
    const char* key = " ";
foxit::ErrorCode code = Library::Initialize(sn, key);
    if (code != foxit::e_ErrSuccess) {
        return FALSE;
}

    // Load a PDF document, and parse the first page of the document.
    PDFDoc doc("Sample.pdf");
ErrorCode error_code = doc.Load();
    if (error_code!= foxit::e_ErrSuccess) return 0;
PDFPage page = doc.GetPage(0);
    page.StartParse(foxit::pdf::PDFPage::e_ParsePageNormal, NULL, false);

    int width = static_cast<int>(page.GetWidth());
    int height = static_cast<int>(page.GetHeight());
Matrix matrix = page.GetDisplayMatrix(0, 0, width, height, page.GetRotation());

    // Prepare a bitmap for rendering.
Bitmap bitmap(width, height, Bitmap::e_DIBArgb, NULL, 0);
    bitmap.FillRect(0xFFFFFFFF, NULL);
    // Render page.
Renderer render(bitmap, false);
    render.StartRender(page, matrix, NULL);

    // Add the bitmap to image and save the image.
Image img;
    img.AddFrame(bitmap);
    img.SaveAs("testpage.jpg");
    return 0;
}
Linux
Linux for x86/x64
What is in this package
Download the Foxit PDF SDK zip for Linux (x86/x64) package and extract it to a new directory. The release package contains the following folders:
doc: API references, developer guide
examples: sample projects and demos
include: header files for Foxit PDF SDK API
lib: libraries and license files
res: the default icc profile files used for output preview demo
In the “examples” folder, there are two types of demos. “examples/simple_demo” contains a wide range of PDF document application demos. “examples/view_demo” contains a Qt UI demo that realizes a lite PDF viewer.
How to run a demo
GCC compiler update on Linux
Starting from version 11.0 of Foxit PDF SDK for Linux (x86 and x64), the minimum supported version of GCC compiler has been upgraded from gcc4.9.4 to gcc5.4. For the SDK to work properly, make sure your current GCC version is 5.4 or higher, or the libstdc++.so.6 is 6.0.20 or higher.
Simple Demo
Simple demo projects provide examples to show developers how to effectively apply Foxit PDF SDK APIs to complete their applications.
Before running the demos, please make sure you have configured the environment correctly and installed CMake (3.1 or later) on your machine.
| OS | Tool chain | GLIBC |
| Linux x86/x64 | gcc5.4 or higher | GLIBC_2.17 or higher |
To run a demo in a terminal window (except security, signature, ocr (x64), compliance, preflight, html2pdf, office2pdf, output preview, pdf2office, dwg2pdf and ofd (x64) demos which will be introduced later), please follow the steps:
Open a terminal window, navigate to “foxitpdfsdk_11_0_linux/examples/simple_demo”;
Run “cmake -DPRJ_NAME=XXX” to compile a specific demo. “XXX” is the demo name, which must be “annotation”, “attachment”, “pdf2text” and so on. For example, run “cmake -DPRJ_NAME=annotation”.
Run “make” to build the demo specified in the above command. Then the executable file will be generated named “XXX_xxx“. “XXX” is the demo name and “xxx” is the architecture name, such as “annotation_linux64”.
Run “./XXX_xxx” to run the demo. For example, run “./annotation_linux64” to run the annotation demo.
Some demos will generate output files (pdf, text or image files) to a folder named by the project name under “examples/simple_demo/output_files/”.
Security and Signature demos
Before running security and signature demos, please make sure that you have already installed OpenSSL. Download an OpenSSL source package from the OpenSSL website, or you can contact us directly, and then extract it and do the following:
Put the OpenSSL folder into the “include” folder which ensures that the OpenSSL header files included in the demos can be found.
Put the “libssl.a” and “libcrypto.a” libraries into the “lib” folder.
Run the demos following the steps as the other demos.
Note: We have verified that OpenSSL 1.0.2m version is available on the security and signature demos, you can replace it with the desired version, and maybe need to do some changes.
OCR demo
For how to run the ocr demo, please refer to section “OCR”.
Compliance and Preflight demos
For how to run the compliance and preflight demos, please refer to section “Compliance”.
HTML to PDF demo
For how to run the html2pdf demo, please refer to section “HTML to PDF Conversion”.
Office to PDF demo
For office2pdf demo, you need to refer to section “Office to PDF Conversion with third-party engines” and “Office to PDF Conversion with Foxit’s self-developed engines”.
Output Preview demo
For how to run the output preview demo, please refer to section “Output Preview”.
PDF to Office demo
For how to run the pdf2office demo, please refer to section “PDF to Office Conversion”.
Dwg to PDF demo
For how to run the dwg2pdf demo, please refer to section “DWG to PDF Conversion”.
OFD demo (x64)
For how to run the ofd demo, please refer to section “OFD”.
View Demo
This view demo provides a Qt example for developers to realize a PDF reader using Foxit PDF SDK APIs.
Before running the demo, please make sure that the compiler tool (GCC5.4 or later) and the IDE “Qt Creator” are available on your Linux system.
To run the demo in Qt Creator, please follow the steps below:
Open Qt Creator, click Open Project, then navigate to “examples/view_demo/PDFReader_Qt” folder, and choose PDFReader_Qt.pro file to open the demo.
If the “Configure Project“ window appears, please choose one kit according to the prompt, and then click Configure Project button as shown in Figure 2-2.
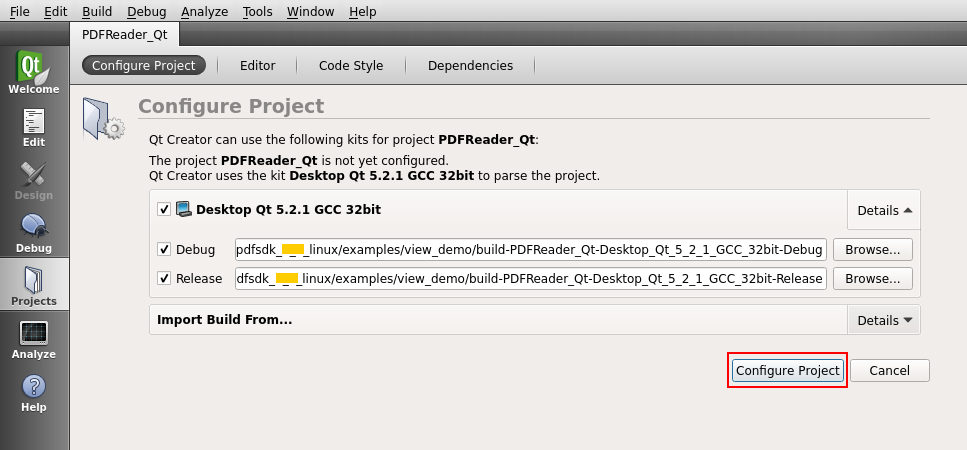
Figure 2-2
After opening the demo, click Projects on the left toolbar, uncheck the Shadow build option under “Build&Run -> Build Settings -> General” as shown in Figure 2-3.
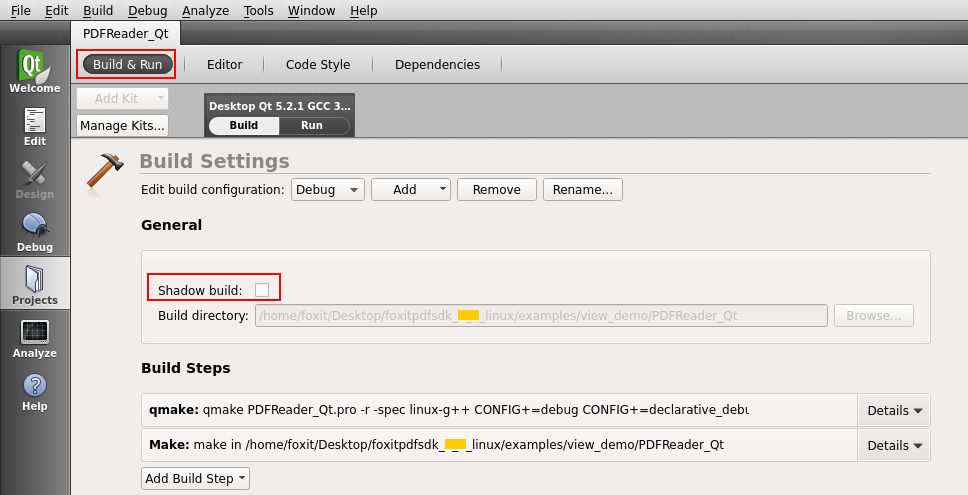
Figure 2-3
Compile and run the demo. Click Build -> Run to run the demo. After the demo starts, you will see the following window:

Figure 2-4
Click  on the above image (Figure 2-4) to open a PDF document. Then you can browse the content by scrolling down, turn to the next page, and zoom in/out the PDF page as shown in Figure 2-5.
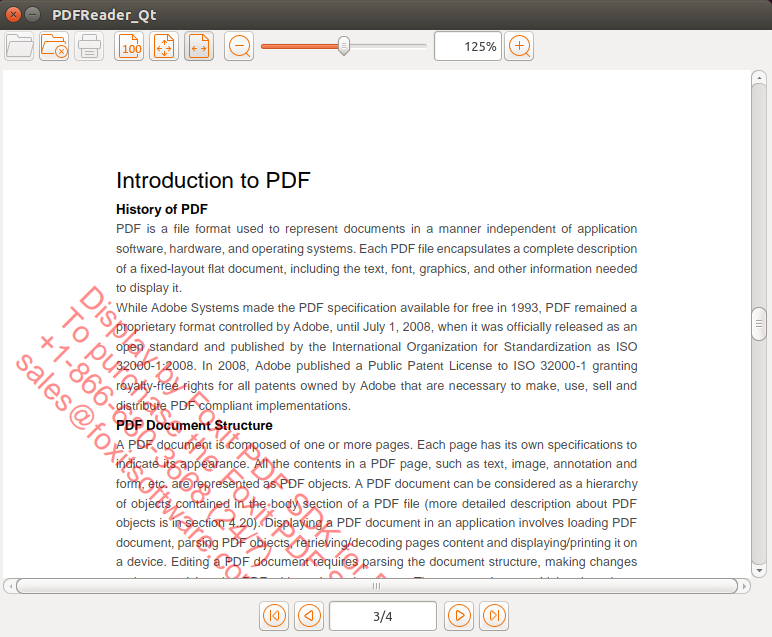
Figure 2-5
Create a simple project
In this section, we will show you how to use Foxit PDF SDK for Linux to create a simple project that renders the first page of a PDF to a bitmap and saves it as a JPG image. Please follow the steps below:
Create a folder called “test_linux”.
Copy “include” and “lib” folders from “foxitpdfsdk_11_0_linux” folder to the project “test_linux” folder.
Create a “test_linux.cpp” file under “test_linux” folder, and add the code similar to the “test_win.cpp” described in section 2.2.3 “How to create a simple project”.
The “test_linux.cpp” will look like as follows: (For better viewing, I paste the code to Visual Studio to highlight the code)
#include <iostream>
#include "common/fs_common.h"
#include "pdf/fs_pdfdoc.h"
#include "pdf/fs_pdfpage.h"
#include "common/fs_render.h"

using namespace std;
using namespace foxit;
using namespace common;
using namespace pdf;
using namespace foxit::common;

int main(int argc, char* argv[])

{
    // The value of "sn" can be got from "gsdk_sn.txt" (the string after "SN=").
    // The value of "key" can be got from "gsdk_key.txt" (the string after "Sign=").
    const char* sn = " ";
    const char* key = " ";
foxit::ErrorCode code = Library::Initialize(sn, key);
    if (code != foxit::e_ErrSuccess) {
        return FALSE;
}

    // Load a PDF document, and parse the first page of the document.
    PDFDoc doc("../../Sample.pdf");
ErrorCode error_code = doc.Load();
    if (error_code!= foxit::e_ErrSuccess) return 0;
PDFPage page = doc.GetPage(0);
    page.StartParse(foxit::pdf::PDFPage::e_ParsePageNormal, NULL, false);

    int width = static_cast<int>(page.GetWidth());
    int height = static_cast<int>(page.GetHeight());
Matrix matrix = page.GetDisplayMatrix(0, 0, width, height, page.GetRotation());

    // Prepare a bitmap for rendering.
Bitmap bitmap(width, height, Bitmap::e_DIBArgb, NULL, 0);
    bitmap.FillRect(0xFFFFFFFF, NULL);
    // Render page.
Renderer render(bitmap, false);
    render.StartRender(page, matrix, NULL);

    // Add the bitmap to image and save the image.
Image img;
    img.AddFrame(bitmap);
    img.SaveAs("testpage.jpg");
    return 0;
}
Put a “Sample.pdf” document into the project “test_linux” folder.
Create a Makefile. In this Makefile, the PDF SDK library shall be included in the build path. Use libfsdk_linux64.so for 64-bit system or libfsdk_linux32.so for 32-bit system. A sample Makefile is as follows:
CXX=g++
# Foxit PDF SDK lib and head files include
INCLUDE_PATH=-Iinclude
FSDKLIB_PATH=-Llib
LIB_PATH=lib
FSDKLIB=-lfsdk_linux64
LIBNAME=libfsdk_linux64.so
LIBS=$(FSDKLIB) -lpthread
LDFLAGS=-Wl,--rpath=.
DEST_PATH=./bin/rel_gcc
OBJ_PATH=./obj/rel
CCFLAGS=-c
CXXFLAGS=-std=c++11
# Copy the given library to the destination path
CP_LIB=cp $(LIB_PATH)/$(LIBNAME) $(DEST_PATH)
DEST=-o $(DEST_PATH)/$@
OBJ_DEST= -o $(OBJ_PATH)/$@

all: test_linux copy_so

dir:
   mkdir -p $(DEST_PATH)
   mkdir -p $(OBJ_PATH)

copy_so:
   $(CP_LIB)

test_linux.o :test_linux.cpp
   $(CXX) $(CCFLAGS) $(CXXFLAGS) $(INCLUDE_PATH) $^ $(OBJ_DEST)

test_linux: dir test_linux.o
   $(CXX) $(OBJ_PATH)/test_linux.o $(DEST) $(FSDKLIB_PATH) $(LIBS) $(LDFLAGS)
Build the project. Open a terminal window, navigate to “test_linux”, and run “make test_linux” to generate binary file in “test_linux/bin/rel_gcc” folder.
Execute the binary file. Navigate to the folder with the terminal, run “./test_linux“, and the “testpage.jpg” will be generated in the current folder.
Linux for armv7/armv8
From version 8.0, Foixt PDF SDK provides armv7 and armv8 libraries for Linux OS with ARM framework.
What is in this package
Download the Foxit PDF SDK zip for Linux (arm) package and extract it to a new directory. The release package contains the following folders:
doc: API references, developer guide
examples: sample projects and demos
include: header files for Foxit PDF SDK API
lib: libraries and license files
In “examples/simple_demo” folder, there are a wide range of PDF document application demos.
How to run a demo
Before running the demos, please make sure you have configured the environment correctly and installed CMake (3.1 or later) on your machine.
| OS | Tool chain | GLIBC |
| Linux armv7 | gcc-arm-8.3-2019.03-x86_64-arm-linux-gnueabihf or higher | GLIBC_2.28 or higher |
| Linux armv8 | gcc-arm-8.3-2019.03-x86_64-aarch64-linux-gnu or higher | GLIBC_2.27 or higher |
Foxit PDF SDK provides several simple demos in directory “examples/simple_demo”. All these demos (except security, signature, office2pdf (armv8), pdf2office and ofd (armv8) demos which will be introduced later) can be run directly with the “.sh” files in directory “examples/simple_demo”:
Go to directory “examples/simple_demo”, and run all demos by “./RunAllDemo.sh all“.
If you want to run a specific single demo, please use “./RunAllDemo.sh demo_name“. For example, use “./RunAllDemo.sh annotation” to run the annotation demo.
Some demos will generate output files (pdf, text or image files) to a folder named by the project name under “examples/simple_demo/output_files/”.
Security and Signature demos
Before running security and signature demos, please make sure that you have already installed OpenSSL. Download an OpenSSL source package from the OpenSSL website, or you can contact us directly, and then extract it and do the following:
Put the OpenSSL folder into the “include” folder which ensures that the OpenSSL header files included in the demos can be found.
Put the “libssl.a” and “libcrypto.a” libraries into the “lib” folder.
Run the demos.
Note: We have verified that OpenSSL 1.0.2m version is available on the security and signature demos, you can replace it with the desired version, and maybe need to do some changes.
Office to PDF demo (armv8)
For office2pdf demo, you need to refer to section “Office to PDF Conversion with third-party engines”.
PDF to Office demo
For how to run the pdf2office demo, please refer to section “PDF to Office Conversion”.
OFD demo (armv8)
For how to run the ofd demo, please refer to section “OFD”.
Create a simple project
Creating a project using Foxit PDF SDK for Linux (arm) is similar to Create a simple project in Linux for x86/x64, the only difference is the Makefile.
In this Makefile, the PDF SDK library shall be included in the build path. Use libfsdk_linuxarmv7.so or libfsdk_linuxarmv8.so based on your system. A sample Makefile is as follows:
CXX=g++
# Foxit PDF SDK lib and head files include
INCLUDE_PATH=-Iinclude
FSDKLIB_PATH=-Llib
LIB_PATH=lib
FSDKLIB=-libfsdk_linuxarmv8.so
LIBNAME=libfsdk_linuxarmv8.so
LIBS=$(FSDKLIB) -lpthread
LDFLAGS=-Wl,--rpath=.
DEST_PATH=./bin/rel_gcc
OBJ_PATH=./obj/rel
CCFLAGS=-c
CXXFLAGS=-std=c++11
# Copy the given library to the destination path
CP_LIB=cp $(LIB_PATH)/$(LIBNAME) $(DEST_PATH)
DEST=-o $(DEST_PATH)/$@
OBJ_DEST= -o $(OBJ_PATH)/$@

all: test_linux copy_so

dir:
    mkdir -p $(DEST_PATH)
    mkdir -p $(OBJ_PATH)

copy_so:
   $(CP_LIB)

test_linux.o :test_linux.cpp
    $(CXX) $(CCFLAGS) $(CXXFLAGS) $(INCLUDE_PATH) $^ $(OBJ_DEST)

test_linux: dir test_linux.o
    $(CXX) $(OBJ_PATH)/test_linux.o $(DEST) $(FSDKLIB_PATH) $(LIBS) $(LDFLAGS)
Build the project. Open a terminal window, navigate to “test_linux”, and run “make test_linux” to generate binary file in “test_linux/bin/rel_gcc” folder.
Execute the binary file. Navigate to the folder with the terminal, run “./test_linux“, and the “testpage.jpg” will be generated in the current folder.
Mac
Mac for x64
What is in this package
Download the Foxit PDF SDK zip for Mac x64 package and extract it to a new directory. The release package contains the following folders:
doc: API references, developer guide
examples: sample projects and demos
include: header files for Foxit PDF SDK API
lib: libraries and license files
res: the default icc profile files used for output preview demo
In “examples/simple_demo” folder, there are a wide range of PDF document application demos.
How to run a demo
Note: Starting from version 9.0, the version of clang used for building and compiling the Foxit PDF SDK for Mac (x64) has been upgraded from 9.1.0 to 11.0.3.
Before running the demos, please make sure you have configured the environment correctly and installed CMake (3.1 or later) on your machine.
| OS | Compiler tools or IDE | Version |
| Mac | Xcode | 8 and later |
To run a demo in a terminal window (except security, signature, compliance, preflight, html2pdf, output preview and dwg2pdf demos which will be introduced later), please follow the steps:
Open a terminal window, navigate to “foxitpdfsdk_11_0_mac/examples/simple_demo”;
Run “cmake -DPRJ_NAME=XXX” to compile a specific demo. “XXX” is the demo name, which must be “annotation”, “attachment”, “pdf2text” and so on. For example, run “cmake -DPRJ_NAME=annotation”.
Run “make” to build the demo specified in the above command. Then the executable file will be generated named “XXX_xxx“. “XXX” is the demo name and “xxx” is the architecture name, such as “annotation_mac64”.
Run “./XXX_xxx” to run the demo. For example, run “./annotation_mac64” to run the annotation demo.
“examples/simple_demo/input_files” contains all the input files used among these demos. Some demos will generate output files (pdf, text or image files) to a folder named by the demo name under “examples/simple_demo/output_files/”.
Security and Signature demos
Before running security and signature demos, please make sure that you have already installed OpenSSL. Download an OpenSSL source package from the OpenSSL website, or you can contact us directly, and then extract it and do the following:
Put the OpenSSL folder into the “include” folder which ensures that the OpenSSL header files included in the demos can be found.
Put the “libssl.a” and “libcrypto.a” libraries into the “lib” folder.
Run the demos following the steps as the other demos.
Note: We have verified that OpenSSL 1.0.2m version is available on the security and signature demos, you can replace it with the desired version, and maybe need to do some changes.
Compliance and Preflight demos
For how to run the compliance and preflight demos, please refer to section “Compliance”.
HTML to PDF demo
For how to run the html2pdf demo, please refer to section “HTML to PDF Conversion”.
Output Preview demo
For how to run the output preview demo, please refer to section “Output Preview”.
Dwg to PDF demo
For how to run the dwg2pdf demo, please refer to section “DWG to PDF Conversion”.
How to create a simple project
In this section, we will show you how to use Foxit PDF SDK for Mac x64 (C++) to create a simple project that renders the first page of a PDF to a bitmap and saves it as a JPG image. Please follow the steps below:
Create a folder called “test_mac”.
Copy “include” and “lib” folders from “foxitpdfsdk_11_0_mac” folder to the project “test_mac” folder.
Create a “test_mac.cpp” file under “test_mac” folder, and add the code similar to the “test_win.cpp” described in section 2.2.3 “How to create a simple project”.
The “test_mac.cpp” will look like as follows:
#include <iostream>
#include "common/fs_common.h"
#include "pdf/fs_pdfdoc.h"
#include "pdf/fs_pdfpage.h"
#include "common/fs_render.h"

using namespace std;
using namespace foxit;
using namespace common;
using namespace pdf;
using namespace foxit::common;

int main(int argc, char* argv[])

{
    // The value of "sn" can be got from "gsdk_sn.txt" (the string after "SN=").
    // The value of "key" can be got from "gsdk_key.txt" (the string after "Sign=").
    const char* sn = " ";
    const char* key = " ";
    foxit::ErrorCode code = Library::Initialize(sn, key);
    if (code != foxit::e_ErrSuccess) {
        return FALSE;
    }

    // Load a PDF document, and parse the first page of the document.
    PDFDoc doc("../../Sample.pdf");
    ErrorCode error_code = doc.Load();
    if (error_code!= foxit::e_ErrSuccess) return 0;
    PDFPage page = doc.GetPage(0);
    page.StartParse(foxit::pdf::PDFPage::e_ParsePageNormal, NULL, false);

    int width = static_cast<int>(page.GetWidth());
    int height = static_cast<int>(page.GetHeight());
    Matrix matrix = page.GetDisplayMatrix(0, 0, width, height, page.GetRotation());

    // Prepare a bitmap for rendering.
    Bitmap bitmap(width, height, Bitmap::e_DIBArgb, NULL, 0);
    bitmap.FillRect(0xFFFFFFFF, NULL);
    // Render page.
    Renderer render(bitmap, false);
    render.StartRender(page, matrix, NULL);

    // Add the bitmap to image and save the image.
    Image img;
    img.AddFrame(bitmap);
    img.SaveAs("testpage.jpg");
    return 0;
}
Put a “Sample.pdf” document into the project “test_mac” folder.
Create a Makefile. In this Makefile, the PDF SDK library shall be included in the build path. Use libfsdk_mac64.dylib. A sample Makefile is as follows:
CXX=g++

# Foxit PDF SDK lib and head files include
INCLUDE_PATH=-Iinclude
LIBNAME=./lib/libfsdk_mac64.dylib
LDFLAGS=-Wl,-rpath,../../lib
DEST_PATH=./bin/rel_gcc
OBJ_PATH=./obj/rel
CCFLAGS=-c
CXXFLAGS=-std=c++11
DEST=-o $(DEST_PATH)/$@
OBJ_DEST= -o $(OBJ_PATH)/$@

all: test_mac

dir:
    mkdir -p $(DEST_PATH)
    mkdir -p $(OBJ_PATH)

test_mac.o :test_mac.cpp
    $(CXX) $(CCFLAGS) $(CXXFLAGS) $(INCLUDE_PATH) $^ $(OBJ_DEST)

test_mac: dir test_mac.o
    $(CXX) $(OBJ_PATH)/test_mac.o $(DEST) $(LDFLAGS) $(LIBNAME)
Build the project. Open a terminal window, navigate to “test_mac”, and run “make test_mac” to generate binary file in “test_mac/bin/rel_gcc” folder.
Execute the binary file. Navigate to the folder with the terminal, run “./test_mac”, and the “testpage.jpg” will be generated in the current folder.
Mac for arm64
From version 8.4, Foixt PDF SDK provides arm64 libraries for MacOS with ARM64 framework.
What is in the package
Download the Foxit PDF SDK zip for Mac arm64 package and extract it to a new directory. The release package contains the following folders:
doc: API references, developer guide
examples: sample projects and demos
include: header files for Foxit PDF SDK API
lib: libraries and license files
In “examples/simple_demo” folder, there are a wide range of PDF document application demos.
How to run a demo
Before running the demos, please make sure you have configured the environment correctly and installed CMake (3.2 or later) on your machine.
| OS | Compiler tools or IDE | Version |
| Mac | Xcode | 13 and later |
To run a demo in a terminal window (except security, signature, compliance, preflight and html2pdf demos which will be introduced later), please follow the steps:
Open a terminal window, navigate to “foxitpdfsdk_11_0_mac_arm64/examples/simple_demo”;
Run “cmake -DPRJ_NAME=XXX” to compile a specific demo. “XXX” is the demo name, which must be “annotation”, “attachment”, “pdf2text” and so on. For example, run “cmake -DPRJ_NAME=annotation”.
Run “make” to build the demo specified in the above command. Then the executable file will be generated named “XXX_xxx“. “XXX” is the demo name and “xxx” is the architecture name, such as “annotation_macarm64”.
Run “./XXX_xxx” to run the demo. For example, run “./annotation_macarm64” to run the annotation demo.
“examples/simple_demo/input_files” contains all the input files used among these demos. Some demos will generate output files (pdf, text or image files) to a folder named by the demo name under “examples/simple_demo/output_files/”.
Security and Signature demos
Before running security and signature demos, please make sure that you have already installed OpenSSL. Download an OpenSSL source package from the OpenSSL website, or you can contact us directly, and then extract it and do the following:
Put the OpenSSL folder into the “include” folder which ensures that the OpenSSL header files included in the demos can be found.
Put the “libssl.a” and “libcrypto.a” libraries into the “lib” folder.
Run the demos following the steps as the other demos.
Note: We have verified that OpenSSL 1.1.1-stable version is available on the security and signature demos, you can replace it with the desired version, and maybe need to do some changes.
Compliance and Preflight demos
For how to run the compliance and preflight demos, please refer to section “Compliance”.
HTML to PDF demo
For how to run the html2pdf demo, please refer to section “HTML to PDF Conversion”.
How to create a simple project
In this section, we will show you how to use Foxit PDF SDK for Mac arm64 (C++) to create a simple project that renders the first page of a PDF to a bitmap and saves it as a JPG image. Please follow the steps below:
Create a folder called “test_mac_arm64”.
Copy “include” and “lib” folders from “foxitpdfsdk_11_0_mac_arm64” folder to the project “test_mac_arm64” folder.
Create a “test_mac_arm64.cpp” file under ” test_mac_arm64″ folder and add the code similar to the “test_win.cpp” described in section 2.2.3 “How to create a simple project”.
The ” test_mac_arm64.cpp” will look like as follows:
#include <iostream>
#include "common/fs_common.h"
#include "pdf/fs_pdfdoc.h"
#include "pdf/fs_pdfpage.h"
#include "common/fs_render.h"

using namespace std;
using namespace foxit;
using namespace common;
using namespace pdf;
using namespace foxit::common;

int main(int argc, char* argv[])

{
    // The value of "sn" can be got from "gsdk_sn.txt" (the string after "SN=").
    // The value of "key" can be got from "gsdk_key.txt" (the string after "Sign=").
    const char* sn = " ";
    const char* key = " ";
    foxit::ErrorCode code = Library::Initialize(sn, key);
    if (code != foxit::e_ErrSuccess) {
        return FALSE;
    }

    // Load a PDF document, and parse the first page of the document.
    PDFDoc doc("../../Sample.pdf");
    ErrorCode error_code = doc.Load();
    if (error_code!= foxit::e_ErrSuccess) return 0;
    PDFPage page = doc.GetPage(0);
    page.StartParse(foxit::pdf::PDFPage::e_ParsePageNormal, NULL, false);

    int width = static_cast<int>(page.GetWidth());
    int height = static_cast<int>(page.GetHeight());
    Matrix matrix = page.GetDisplayMatrix(0, 0, width, height, page.GetRotation());

    // Prepare a bitmap for rendering.
    Bitmap bitmap(width, height, Bitmap::e_DIBArgb, NULL, 0);
    bitmap.FillRect(0xFFFFFFFF, NULL);
    // Render page.
    Renderer render(bitmap, false);
    render.StartRender(page, matrix, NULL);

    // Add the bitmap to image and save the image.
    Image img;
    img.AddFrame(bitmap);
    img.SaveAs("testpage.jpg");
    return 0;
}
Put a “Sample.pdf” document into the project “test_mac_arm64” folder.
Create a Makefile. In this Makefile, the PDF SDK library shall be included in the build path. Use libfsdk_macarm.dylib. A sample Makefile is as follows:
CXX=g++

# Foxit PDF SDK lib and head files include
INCLUDE_PATH=-Iinclude
LIBNAME=./lib/libfsdk_macarm.dylib
LDFLAGS=-Wl,-rpath,../../lib
DEST_PATH=./bin/rel_gcc
OBJ_PATH=./obj/rel
CCFLAGS=-c
CXXFLAGS=-std=c++11
DEST=-o $(DEST_PATH)/$@
OBJ_DEST= -o $(OBJ_PATH)/$@

all: test_mac_arm64
dir:
    mkdir -p $(DEST_PATH)
    mkdir -p $(OBJ_PATH)

test_mac_arm64.o :test_mac_arm64.cpp
$(CXX) $(CCFLAGS) $(CXXFLAGS) $(INCLUDE_PATH) $^ $(OBJ_DEST)

test_mac_arm64: test_mac_arm64.o
$(CXX) $(OBJ_PATH)/test_mac_arm64.o $(DEST) $(LDFLAGS) $(LIBNAME)
Build the project. Open a terminal window, navigate to ” test_mac_arm64″, and run “make test_mac_arm64″ to generate binary file in ” test_mac_arm64/bin/rel_gcc” folder.
Execute the binary file. Navigate to the folder with the terminal, run “./ test_mac_arm64”, and the “testpage.jpg” will be generated in the current folder.
Working with SDK API
In this section, we will introduce a set of major features and list some examples for each feature to show you how to integrate powerful PDF capabilities with your applications using Foxit PDF SDK C++ API. You can refer to the API reference [2] to get more details about the APIs used in all of the examples.
Initialize Library
It is necessary for applications to initialize Foxit PDF SDK before calling any APIs. The function foxit::common::Library::Initialize is provided to initialize Foxit PDF SDK. A license should be purchased for the application and pass unlock key and code to get proper support. When there is no need to use Foxit PDF SDK any more, please call function foxit::common::Library::Release to release it.
Note The parameter “sn” can be found in the “gsdk_sn.txt” (the string after “SN=”) and the “key” can be found in the “gsdk_key.txt” (the string after “Sign=”).
Example:
How to initialize Foxit PDF SDK
#include "include/common/fs_common.h"

using namespace foxit;
using namespace common;
...

const char* sn = " ";
const char* key = " ";
foxit::ErrorCode code = Library::Initialize(sn, key);
if (code != foxit::e_ErrSuccess) {
       return FALSE;
}
Document
A PDF document object can be constructed with an existing PDF file from file path, memory buffer, a custom implemented ReaderCallback object and an input file stream. Then call function foxit::pdf::PDFDoc::Load or foxit::pdf::PDFDoc::StartLoad to load document content. A PDF document object is used for document level operation, such as opening and closing files, getting page, metadata and etc.
Example:
How to create a PDF document from scratch
#include "include/pdf/fs_pdfdoc.h"

using namespace foxit;
using namespace common;
using namespace pdf;
...

PDFDoc doc();
Note: It creates a new PDF document without any pages.
How to load an existing PDF document from file path
#include "include/pdf/fs_pdfdoc.h"

using namespace foxit;
using namespace common;
using namespace pdf;
...

PDFDoc doc("Sample.pdf");
ErrorCode error_code = doc.Load();
if (error_code!= foxit::e_ErrSuccess) return 0;
How to load an existing PDF document from a memory buffer
#include "include/pdf/fs_pdfdoc.h"

using namespace foxit;
using namespace common;
using namespace pdf;
...

FILE* pFile = fopen(TEST_DOC_PATH"blank.pdf", "rb");
ASSERT_EQ(TRUE, NULL != pFile);
fseek(pFile, 0, SEEK_END);
long lFileSize = ftell(pFile);
char* buffer = new char[lFileSize];
memset(buffer, 0, sizeof(char)*lFileSize);
fseek(pFile, 0, SEEK_SET);
fread(buffer, sizeof(char), lFileSize, pFile);
fclose(pFile);
PDFDoc doc = PDFDoc(buffer, lFileSize);
ErrorCode error_code = doc.Load();
if (error_code!= foxit::e_ErrSuccess) return 0;
How to load an existing PDF document from a file read callback object
#include "include/pdf/fs_pdfdoc.h"

using namespace foxit;
using namespace common;
using namespace pdf;
...

class CFSFile_Read : public ReaderCallback
{
public:
    CFSFile_Read():m_fileFP(NULL)
    ,m_bLargeFile(FALSE)
{}

~CFSFile_Read() {}

    bool LoadFile(const wchar_t* wFilePath, bool bLargeFile = FALSE)
{
    std::wstring strTemp(wFilePath);
    string bstrFilepath = wchar2utf8(strTemp.c_str(), strTemp.size());

        m_fileFP = fopen(bstrFilepath.c_str(), "rb");
        if (!m_fileFP) return FALSE;

        m_bLargeFile = bLargeFile;
        return TRUE;
}

    bool LoadFile(const char* filePath, bool bLargeFile = FALSE)
{
        m_fileFP = fopen(filePath, "rb");
        if (!m_fileFP) return FALSE;

        m_bLargeFile = bLargeFile;
        return TRUE;
}

FILESIZE    GetSize()
{
        if (m_bLargeFile)
    {
#if defined(_WIN32) || defined(_WIN64)
        _fseeki64(m_fileFP, 0, SEEK_END);
            long long sizeL = _ftelli64(m_fileFP);
#elif defined(__linux__) || defined(__APPLE__)
            fseeko(m_fileFP, 0, SEEK_END);
            long long sizeL = ftello(m_fileFP);
#endif
            return sizeL;
    }
        else
    {
            fseek(m_fileFP, 0, SEEK_END);
            return (uint32)ftell(m_fileFP);
    }
}

    int ReadBlock(void* buffer, FILESIZE offset, size_t size)
{
        if (m_bLargeFile)
    {
#if defined(_WIN32) || defined(_WIN64)
        _fseeki64(m_fileFP, offset, SEEK_SET);
#elif defined(__linux__) || defined(__APPLE__)
            fseeko(m_fileFP, offset, SEEK_SET);
#endif
            long long readSize = fread(buffer, 1, size, m_fileFP);
            return (readSize == size);
    }
        else
    {
            if (!m_fileFP) return false;
            if(0 != fseek(m_fileFP, offset, 0))
                return false;
            if(0 == fread(buffer, size, 1, m_fileFP))
                return false;
            return true;
    }
}

    size_t    ReadBlock(void* buffer, size_t size) {
        if (m_bLargeFile)
    {
#if defined(_WIN32) || defined(_WIN64)
        _fseeki64(m_fileFP, 0, SEEK_SET);
#elif defined(__linux__) || defined(__APPLE__)
            fseeko(m_fileFP, 0, SEEK_SET);
#endif
            return fread(buffer, 1, size, m_fileFP);
    }
        else
    {
            if (!m_fileFP) return false;
            if(0 != fseek(m_fileFP, 0, 0))
                return 0;
            return fread(buffer, size, 1, m_fileFP);
    }
}

    void Release()
{
        if(m_fileFP)
            fclose(m_fileFP);
        m_fileFP = NULL;
        delete this;
}

private:
FILE* m_fileFP;
    bool m_bLargeFile;
}
...
string inputPDFPath = "Sample.pdf";
CFSFile_Read* pFileRead = new CFSFile_Read();
If(!pFileRead->LoadFile(inputPDFPath.c_str()))
    Return;
PDFDoc doc = PDFDoc(pFileRead);
ErrorCode error_code = doc.Load();
if (error_code!= foxit::e_ErrSuccess) return 0;
How to load PDF document and get the first page of the PDF document
#include "include/pdf/fs_pdfdoc.h"
#include "include/pdf/fs_pdfpage.h"

using namespace foxit;
using namespace common;
using namespace pdf;
...

PDFDoc doc("Sample.pdf");
ErrorCode error_code = doc.Load();
if (error_code!= foxit::e_ErrSuccess) return 0;
PDFPage page = doc.GetPage(0);
page.StartParse(foxit::pdf::PDFPage::e_ParsePageNormal, NULL, false);
How to save a PDF to a file
#include "include/pdf/fs_pdfdoc.h"
#include "include/pdf/fs_pdfpage.h"

using namespace foxit;
using namespace common;
using namespace pdf;
...

PDFDoc doc("Sample.pdf");
ErrorCode error_code = doc.Load();
if (error_code!= foxit::e_ErrSuccess) return 0;
doc.SaveAs("new_Sample.pdf", PDFDoc::e_SaveFlagNoOriginal);
How to save a document into memory buffer by WriterCallback
#include "include/pdf/fs_pdfdoc.h"
#include "include/pdf/fs_pdfpage.h"

using namespace foxit;
using namespace common;
using namespace pdf;
...

// FileWriter for saving file to memory buffer.
class  FileWriter:public common::file::WriterCallback
{
public:
    FileWriter() {}

~FileWriter()  {}

FILESIZE GetSize() {
        return  binary_buffer_.GetSize();
}

FX_BOOL Flush() {
        return  TRUE;
}

FX_BOOL WriteBlock(const void* buffer,FILESIZE offset,size_t size) {
        return  binary_buffer_.InsertBlock(offset,buffer,size);
}

FX_BOOL  ReadBlock(void* buffer,FILESIZE offset,size_t size)    {
    FX_LPBYTE byte_buffer = binary_buffer_.GetBuffer();
        memcpy(buffer, byte_buffer + offset, size);
}

    void Release() {
}

    CFX_BinaryBuf GetBuffer() {
        return binary_buffer_;
}
private:
    CFX_BinaryBuf binary_buffer_;
};
...

FileWriter* filewriter = new FileWriter();

// Assuming PDFDoc doc has been loaded.
...

doc.StartSaveAs(filewriter, PDFDoc::e_SaveFlagNoOriginal);
...
Page
PDF Page is the basic and important component of PDF Document. A foxit::pdf::PDFPage object is retrieved from a PDF document by function foxit::pdf::PDFDoc::GetPage. Page level APIs provide functions to parse, render, edit (includes creating, deleting, flattening and etc.) a page, retrieve PDF annotations, read and set the properties of a page, and etc. For most cases, A PDF page needs to be parsed before it is rendered or processed.
Example:
How to get page size
#include "include/pdf/fs_pdfpage.h"

using namespace foxit;
using namespace common;
using namespace pdf;
...
// Assuming PDFPage page has been loaded and parsed.

int width = static_cast<int>(page.GetWidth());
int height = static_cast<int>(page.GetHeight());
How to calculate bounding box of page contents
#include "include/pdf/fs_pdfpage.h"

using namespace foxit;
using namespace common;
using namespace pdf;
...
//Assuming PDFDoc doc has been loaded.
//Assuming PDFPage page has been loaded and parsed.

RectF ret = page.CalcContentBBox(PDFPage::e_CalcContentsBox);
...
How to create a PDF page and set the size
#include "include/pdf/fs_pdfdoc.h"
#include "include/pdf/fs_pdfpage.h"

using namespace foxit;
using namespace common;
using namespace pdf;
...
// Assuming PDFDoc doc has been loaded.

PDFPage page = doc.InsertPage(index, PageWidth, PageHeight);
How to delete a PDF page
#include "include/pdf/fs_pdfdoc.h"
#include "include/pdf/fs_pdfpage.h"

using namespace foxit;
using namespace common;
using namespace pdf;
...
// Assuming PDFDoc doc has been loaded.

// Remove a PDF page by page index.
doc.RemovePage(index);

// Remove a specified PDF page.
doc.RemovePage(&page);
...
How to flatten a PDF page
#include "include/pdf/fs_pdfpage.h"

using namespace foxit;
using namespace common;
using namespace pdf;
...
// Assuming PDFPage page has been loaded and parsed.

// Flatten all contents of a PDF page.
page.Flatten(true, PDFPage::e_FlattenAll);

// Flatten a PDF page without annotations.
page.Flatten(true, PDFPage::e_FlattenNoAnnot);

// Flatten a PDF page without form controls.
page.Flatten(true, PDFPage::e_FlattenNoFormControl);

// Flatten a PDF page without annotations and form controls (Equals to nothing to be flattened).
page.Flatten(true, PDFPage::e_FlattenNoAnnot | PDFPage::e_FlattenNoFormControl);
...
How to get and set page thumbnails in a PDF document
#include "include/pdf/fs_pdfpage.h"

using namespace foxit;
using namespace common;
using namespace pdf;
...
// Assuming PDFPage page has been loaded and parsed.

Bitmap bmp();
// Write bitmap data to the bmp object.
...
// Set thumbnails to the page.
page.SetThumbnail(bmp);
// Load thumbnails in the page.
Bitmap bitmap = page.LoadThumbnail();
...
Render
PDF rendering is realized through the Foxit renderer, a graphic engine that is used to render page to a bitmap or platform graphics device. Foxit PDF SDK provides APIs to set rendering options/flags, for example set flag to decide whether to render form fields and signature, whether to draw image anti-aliasing and path anti-aliasing. To do rendering, you can use the following APIs:
To render page and annotations, first use function Renderer::SetRenderContentFlags to decide whether to render page and annotation both or not, and then use function Renderer::StartRender to do the rendering. Function Renderer::StartQuickRender can also be used to render page but only for thumbnail purpose.
To render a single annotation, use function Renderer::RenderAnnot.
To render on a bitmap, use function Renderer::StartRenderBitmap.
To render a reflowed page, use function Renderer::StartRenderReflowPage.
Widget annotation is always associated with form field and form control in Foxit PDF SDK. For how to render widget annotations, here is a recommended flow:
After loading a PDF page, first render the page and all annotations in this page (including widget annotations).
Then, if use pdf::interform::Filler object to fill the form, the function pdf::interform::Filler::Render should be used to render the focused form control instead of the function Renderer::RenderAnnot.
Example:
How to render a page to a bitmap
#include "include/common/fs_common.h"
#include "include/pdf/fs_pdfdoc.h"
#include "include/pdf/fs_pdfpage.h"
#include "include/common/fs_render.h"
using namespace foxit;
using namespace common;
using namespace pdf;
using namespace foxit::common;
// Assuming PDFPage page has been loaded and parsed.

int width = static_cast<int>(page.GetWidth());
int height = static_cast<int>(page.GetHeight());
Matrix matrix = page.GetDisplayMatrix(0, 0, width, height, page.GetRotation());

// Prepare a bitmap for rendering.
Bitmap bitmap(width, height, Bitmap::e_DIBArgb, NULL, 0);
bitmap.FillRect(0xFFFFFFFF, NULL);
// Render page.
Renderer render(bitmap, false);
render.StartRender(page, matrix, NULL);
...
How to render page and annotation
#include "include/common/fs_common.h"
#include "include/pdf/fs_pdfdoc.h"
#include "include/pdf/fs_pdfpage.h"
#include "include/common/fs_render.h"
using namespace foxit;
using namespace common;
using namespace pdf;
using namespace foxit::common;
// Assuming PDFPage page has been loaded and parsed.
int width = static_cast<int>(page.GetWidth());
int height = static_cast<int>(page.GetHeight());
Matrix matrix = page.GetDisplayMatrix(0, 0, width, height, page.GetRotation());

// Prepare a bitmap for rendering.
Bitmap bitmap(width, height, Bitmap::e_DIBArgb, NULL, 0);
bitmap.FillRect(0xFFFFFFFF, NULL);

Renderer render(bitmap, false);
uint32 dwRenderFlag = Renderer::e_RenderAnnot | Renderer::e_RenderPage;
render.SetRenderContentFlags(dwRenderFlag);
render.StartRender(page, matrix, NULL);
...
Attachment
In Foxit PDF SDK, attachments are only referred to attachments of documents rather than file attachment annotation, which allow whole files to be encapsulated in a document, much like email attachments. PDF SDK provides applications APIs to access attachments such as loading attachments, getting attachments, inserting/removing attachments, and accessing properties of attachments.
Example:
How to export the embedded attachment file from a PDF and save it as a single file
#include "include/common/fs_common.h"
#include "include/pdf/fs_pdfdoc.h"
#include "include/pdf/fs_pdfattachments.h"

using namespace foxit;
using namespace common;
using namespace pdf;
using namespace foxit::common;
// Assuming PDFDoc doc has been loaded.

// Get information of attachments.
Attachments attachments(doc);
int count = attachments.GetCount();
for (int i = 0; i < count; i++) {
    WString key = attachments.GetKey(i);
    FileSpec file_spec = attachments.GetEmbeddedFile(key);
    if (!file_spec.IsEmpty()) {
    WString name = file_spec.GetFileName();
    if (file_spec.IsEmbedded()) {
    WString exFilePath = "output_directory";
    file_spec.ExportToFile(exFilePath);
}
    }
}
...
How to remove all the attachments of a PDF
#include "include/common/fs_common.h"
#include "include/pdf/fs_pdfdoc.h"
#include "include/pdf/fs_pdfattachments.h"
...
using namespace foxit;
using namespace common;
using namespace pdf;
using namespace foxit::common;

// Assuming PDFDoc doc has been loaded.

// Get information of attachments.
Attachments attachments(doc);
int count = attachments.GetCount();
for (int i = 0; i < count; i++) {
     WString key = attachments.GetKey(i);
     attachment.RemoveEmbeddedFile(key);
}
...
Text Page
Foxit PDF SDK provides APIs to extract, select, search and retrieve text in PDF documents. PDF text contents are stored in TextPage objects which are related to a specific page. TextPage class can be used to retrieve information about text in a PDF page, such as single character, single word, text content within specified character range or rectangle and so on. It also can be used to construct objects of other text related classes to do more operations for text contents or access specified information from text contents:
To search text in text contents of a PDF page, construct a TextSearch object with TextPage object.
To access text such like hypertext link, construct a PageTextLinks object with TextPage object.
Example:
How to extract text from a PDF page
#include "include/common/fs_common.h"
#include "include/pdf/fs_pdfdoc.h"
#include "include/pdf/fs_search.h"

using namespace std;
using namespace foxit;
using namespace foxit::common;
using foxit::common::Library;
using namespace pdf;
...

// Assuming PDFPage page has been loaded and parsed.

// Get the text page object.
TextPage text_page(page);
int count = text_page.GetCharCount();
if (count > 0) {
    WString text = text_page.GetChars();
    String s_text = text.UTF8Encode();
    fwrite((const char*)s_text, sizeof(char), s_text.GetLength(), file);
}
...
How to get the text within a rectangle area in a PDF
#include "include/common/fs_common.h"
#include "include/pdf/fs_pdfdoc.h"
#include "include/pdf/fs_search.h"

using namespace foxit;
using namespace foxit::common;
using foxit::common::Library;
using namespace pdf;
...

RectF rect;
rect.left = 90;
rect.right = 450;
rect.top = 595;
rect.bottom = 580;
TextPage textPage = new TextPage (&page, TextPage::e_ParseTextNormal);
textPage.GetTextInRect(&rect);
...
Text Search
Foxit PDF SDK provides APIs to search text in a PDF document, a XFA document, a text page or in a PDF annotation’s appearance. It offers functions to do a text search and get the searching result:
To specify the searching pattern and options, use functions TextSearch::SetPattern, TextSearch::SetStartPage (only useful for a text search in PDF document), TextSearch::SetEndPage (only useful for a text search in PDF document) and TextSearch::SetSearchFlags.
To do the searching, use function TextSearch::FindNext or TextSearch::FindPrev.
To get the searching result, use function TextSearch::GetMatchXXX().
Example:
How to search a text pattern in a PDF
#include "include/common/fs_common.h"
#include "include/pdf/fs_pdfdoc.h"
#include "include/pdf/fs_pdfpage.h"
#include "include/pdf/fs_search.h"

using namespace foxit;
using namespace foxit::common;
using foxit::common::Library;
using namespace pdf;
...

// Assuming PDFDoc doc has been loaded.

// Search for all pages of doc.
TextSearch search(doc, NULL);

int start_index = 0, end_index = doc.GetPageCount() - 1;
search.SetStartPage(start_index);
search.SetEndPage(end_index);

WString pattern = L"Foxit";
search.SetPattern(pattern);

foxit::uint32 flags = TextSearch::e_SearchNormal;
search.SetSearchFlags(flags);
...
int match_count = 0;
while (search.FindNext()) {
      RectFArray rect_array = search.GetMatchRects();
      match_count ++;
    }
...
Search and Replace
The Search and Replace feature allows you to search for specific text content within a PDF document and replace it with new content.
System requirements
Platform: Windows, Linux, Mac
Programming Language: C, C++, Java, C#, Python, Objective-C, Node.js, Go
License Key requirement: ‘AdvEdit’ module permission in the license key
SDK Version: Foxit PDF SDK (C, C++, C#, Java, Python, Objective-C) 9.0 or higher; Foxit PDF SDK (Node.js) 10.0 or higher; Foxit PDF SDK (Go) 11.0
How to work with the search and replace function
#include "include/common/fs_common.h"
#include "include/pdf/fs_pdfdoc.h"
#include "include/addon/pageeditor/fs_searchreplace.h"

using namespace foxit;
using namespace foxit::common;
using foxit::common::Library;
using namespace pdf;
using namespace foxit::addon::pageeditor;

PDFDoc doc(input_file);
ErrorCode error_code = doc.Load();

// Instantiate a TextSearchReplace object.
TextSearchReplace text_searchreplace(doc);

// Configure search options, match whole words only, whether to set match only whole words and match case.
FindOption find_option(true, true);

ReplaceCallbackImpl* replace_callback = new ReplaceCallbackImpl();
// Set replacing callback function.
text_searchreplace.SetReplaceCallback(replace_callback);

// Set keywords and page index to do searching and replacing.
text_searchreplace.SetPattern(L"PDF", 0, find_option);

// Replace with new text.
while (text_searchreplace.ReplaceNext(L"PDC")) {}
Text Link
In a PDF page, some text contents that represent a hypertext link to a website or a resource on the intent, or an email address are the same with common texts. Prior to text link processing, user should first call PageTextLinks::GetTextLink to get a textlink object.
Example:
How to retrieve hyperlinks in a PDF page
#include "include/common/fs_common.h"
#include "include/pdf/fs_pdfdoc.h"
#include "include/pdf/fs_pdfpage.h"
#include "include/pdf/fs_search.h"

using namespace foxit;
using namespace foxit::common;
using foxit::common::Library;
using namespace pdf;
...

// Assuming PDFPage page has been loaded and parsed.

// Get the text page object.
TextPage text_page(page);
PageTextLinks pageTextLink(text_page);
TextLink textLink = pageTextLink.GetTextLink(index);
String strURL = textLink.GetURI();
...
Bookmark
Foxit PDF SDK provides navigational tools called Bookmarks to allow users to quickly locate and link their point of interest within a PDF document. PDF bookmark is also called outline, and each bookmark contains a destination or actions to describe where it links to. It is a tree-structured hierarchy, so function pdf::PDFDoc::GetRootBookmark must be called first to get the root of the whole bookmark tree before accessing to the bookmark tree. Here, “root bookmark” is an abstract object which can only have some child bookmarks without next sibling bookmarks and any data (includes bookmark data, destination data and action data). It cannot be shown on the application UI since it has no data. Therefore, a root bookmark can only call function Bookmark::GetFirstChild.
After the root bookmark is retrieved, following functions can be called to access other bookmarks:
To access the parent bookmark, use function Bookmark::GetParent.
To access the first child bookmark, use function Bookmark::GetFirstChild.
To access the next sibling bookmark, use function Bookmark::GetNextSibling.
To insert a new bookmark, use function Bookmark::Insert.
To move a bookmark, use function Bookmark::MoveTo.
Example:
How to find and list all bookmarks of a PDF
#include "include/common/fs_common.h"
#include "include/pdf/fs_filespec.h"
#include "include/pdf/fs_bookmark.h"
#include "include/pdf/fs_pdfdoc.h"
#include "include/pdf/fs_pdfpage.h"

using namespace foxit;
using namespace foxit::common;
using foxit::common::Library;
using namespace pdf;
...

// Assuming PDFDoc doc has been loaded.

Bookmark root = doc.GetRootBookmark();
Bookmark first_bookmark = root.GetFirstChild();

if (first_bookmark != null)
{
       TraverseBookmark(first_bookmark, 0);
}

Private void TraverseBookmark(Bookmark root, int iLevel)
{
       if (root != null)
       {
              Bookmark child = root.GetFirstChild();
              while (child != null)
              {
                 TraverseBookmark(child, iLevel + 1);
                 child = child.GetNextSibling();
              }
        }
}
...
How to insert a new bookmark
#include "include/common/fs_common.h"
#include "include/pdf/fs_filespec.h"
#include "include/pdf/fs_bookmark.h"
#include "include/pdf/fs_pdfdoc.h"
#include "include/pdf/fs_pdfpage.h"

using namespace std;
using namespace foxit;
using namespace foxit::pdf;
using namespace foxit::common;
using foxit::common::Library;
using namespace pdf;

// Assuming PDFDoc doc has been loaded.

Bookmark root = doc.GetRootBookmark();
if (root.IsEmpty())
{
   root = doc.CreateRootBookmark();
}
Destination dest = Destination::CreateFitPage(doc, 0);
CFX_WideString ws_title;
ws_title.Format((FX_LPCWSTR)L"A bookmark to a page (index: %d)", 0);
Bookmark child = root.Insert(ws_title, foxit::pdf::Bookmark::e_PosLastChild);
child.SetDestination(dest);
child.SetColor(0xF68C21);
How to create a table of contents based on bookmark information in PDFs
#include "include/common/fs_common.h"
#include "include/pdf/fs_filespec.h"
#include "include/pdf/fs_bookmark.h"
#include "include/pdf/fs_pdfdoc.h"
#include "include/pdf/fs_pdfpage.h"

using namespace foxit;
using namespace foxit::common;
using foxit::common::Library;
using namespace pdf;
...

void AddTOCToPDF(PDFDoc doc) {
    //Set the table of contents configuration.
    Int32Array intarray;
    int depth = doc.GetBookmarkLevelDepth();
    if (depth > 0) {
        for (int i = 1; i <= depth; i++) {
            intarray.Add(i);
        }
    }
    WString title = L"";
    TableOfContentsConfig toc_config = TableOfContentsConfig(title, intarray, true, false);

    //Add the table of contents
    doc.AddTableOfContents(toc_config);
}
Form (AcroForm)
PDF currently supports two different forms for gathering information interactively from the user – AcroForms and XFA forms. Acroforms are the original PDF-based fillable forms, based on the PDF architecture. Foxit PDF SDK provides APIs to view and edit form field programmatically. Form fields are commonly used in PDF documents to gather data. The Form class offers functions to retrieve form fields or form controls, import/export form data and other features, for example:
To retrieve form fields, please use functions Form::GetFieldCount and Form::GetField.
To retrieve form controls from a PDF page, please use functions Form::GetControlCount and Form::GetControl.
To import form data from an XML file, please use function Form::ImportFromXML; to export form data to an XML file, please use function Form::ExportToXML.
To retrieve form filler object, please use function Form::GetFormFiller.
To import form data from a FDF/XFDF file or export such data to a FDF/XFDF file, please refer to functions pdf::PDFDoc::ImportFromFDF and pdf::PDFDoc::ExportToFDF.
Example:
How to load the forms in a PDF
#include "include/common/fs_common.h"
#include "include/pdf/fs_pdfdoc.h"
#include "include/pdf/fs_pdfform.h"

using namespace foxit;
using namespace pdf;
using namespace interform;
...

// Assuming PDFDoc doc has been loaded.

bool hasForm = doc.HasForm();
if(hasForm)
   Form form(doc);
...
How to count form fields and get/set the properties
#include "include/common/fs_common.h"
#include "include/pdf/fs_pdfdoc.h"
#include "include/pdf/interform/fs_pdfform.h"

using namespace foxit;
using namespace pdf;
using namespace interform;

...
// Assuming PDFDoc doc has been loaded.

Form form(doc);
int countFields = form. GetFieldCount(NULL);
for (int i = 0; i < nFieldCount; i++)
{
     Field field = form.GetField(i, filter);
     Field::Type type = field.GetType();
     WString org_alternateName = field.GetAlternateName();
     field.SetAlternateName(L"signature");
}
How to export the form data in a PDF to a XML file
#include "include/common/fs_common.h"
#include "include/pdf/fs_pdfdoc.h"
#include "include/pdf/interform/fs_pdfform.h"

using namespace foxit;
using namespace pdf;
using namespace interform;
...
// Assuming PDFDoc doc has been loaded.

Form form(doc);
...
form.ExportToXML(XMLFilePath);
...
How to import form data from a XML file
#include "include/common/fs_common.h"
#include "include/pdf/fs_pdfdoc.h"
#include "include/pdf/interform/fs_pdfform.h"

using namespace foxit;
using namespace pdf;
using namespace interform;
...
// Assuming PDFDoc doc has been loaded.

Form form(doc);
...
form.ImportFromXML(XMLFilePath);
...
How to get coordinates of a form field
Load PDF file by PDFDoc.
Traverse the form fields of the PDFDoc to get the field object of form.
Traverse the form controls of the field object to get the form control object.
Get the related widget annotation object by form control.
Call the GetRect of the widget annotation object to get the coordinate of the form.
#include <iostream>

#include "../../../include/common/fs_common.h"
#include "../../../include/pdf/fs_pdfdoc.h"
#include "../../../include/pdf/annots/fs_annot.h"
#include "../../../include/pdf/interform/fs_pdfform.h"

using namespace foxit;
using namespace foxit::common;
using namespace pdf;
using namespace annots;
using namespace interform;

...

PDFDoc doc(input_file);
ErrorCode error_code = doc.Load();
if (error_code != foxit::e_ErrSuccess) {
  printf("The Doc [%s] Error: %d\n", (const char*)String::FromUnicode(input_path), error_code);
  return 1;
}

if (!doc.HasForm()) return 1;
interform::Form form(doc);
for (int i = 0; i < form.GetFieldCount(NULL); i++) {
  interform::Field field = form.GetField(i, NULL);
  if (field.IsEmpty()) continue;
  for (int j = 0; j < field.GetControlCount(); j++) {
    interform::Control control = field.GetControl(j);
    annots::Widget widget = control.GetWidget();
    // Get rectangle of the  annot widget.
    RectF rect = widget.GetRect();
  }
}

...
XFA Form
XFA (XML Forms Architecture) forms are XML-based forms, wrapped inside a PDF. The XML Forms Architecture provides a template-based grammar and a set of processing rules that allow uses to build interactive forms. At its simplest, a template-based grammar defines fields in which a user provides data.
Foxit PDF SDK provides APIs to render the XFA form, fill the form, export or import form’s data.
Note:
Foxit PDF SDK provides two callback classes foxit::addon::xfa::AppProviderCallback and foxit::addon::xfa::DocProviderCallback to represent the callback objects as an XFA document provider and an XFA application provider respectively. All the functions in those classes are used as callback functions. Pure virtual functions should be implemented by users.
To use the XFA form feature, please make sure the license key has the permission of the ‘XFA’ module.
Example:
How to load XFADoc and represent an Interactive XFA form
#include "include/common/fs_common.h"
#include "include/pdf/fs_pdfdoc.h"

#include "include/pdf/interform/fs_pdfform.h"
#include "include/addon/xfa/fs_xfa.h"

using namespace foxit;
using namespace foxit::common;

using namespace pdf;
using namespace foxit::addon::xfa;

CFS_XFAAppHandler* pXFAAppHandler = new CFS_XFAAppHandler(); // implement from foxit::addon::xfa::AppProviderCallback
Library::RegisterXFAAppProviderCallback(pXFAAppHandler);
WString input_file = input_path + L"xfa_dynamic.pdf";
PDFDoc doc(input_file);
ErrorCode error_code = doc.Load();
if (error_code != foxit::e_ErrSuccess) {
    return 1;
}

CFS_XFADocHandler* pXFADocHandler = new CFS_XFADocHandler(); // implement from foxit::addon::xfa::DocProviderCallback
XFADoc xfa_doc(doc, pXFADocHandler);
xfa_doc.StartLoad(NULL);
...
How to export and import XFA form data
#include "include/common/fs_common.h"
#include "include/pdf/fs_pdfdoc.h"
#include "include/pdf/interform/fs_pdfform.h"
#include "include/addon/xfa/fs_xfa.h"

using namespace foxit;
using namespace foxit::common;
using namespace pdf;
using namespace foxit::addon::xfa;

// Assuming FSXFADoc xfa_doc has been loaded.

xfa_doc.ExportData(L"xfa_form.xml", XFADoc::e_ExportDataTypeXML);

xfa_doc.ResetForm();
doc.SaveAs( L"xfa_dynamic_resetform.pdf");

xfa_doc.ImportData(L"xfa_form.xml");
doc.SaveAs(L"xfa_dynamic_importdata.pdf");
...
Form Filler
Form filler is the most commonly used feature for users. Form filler allows applications to fill forms dynamically. The key point for applications to fill forms is to construct some callback functions for PDF SDK to call. To fill the form, please construct a Filler object by current Form object or retrieve the Filler object by function Form::GetFormFiller if such object has been constructed. (There should be only one form filler object for an interactive form). For how to fill a form with form filler, you can refer to the view demo “view_demo” in the “examples\view_demo” folder of the download package for Windows.
Form Design
Fillable PDF forms (AcroForm) are especially convenient for preparation of various applications, such as taxes and other government forms. Form design provides APIs to add or remove form fields (Acroform) to or from a PDF file. Designing a form from scratch allows developers to create the exact content and layout of the form they want.
Example:
How to add a text form field to a PDF
#include "include/common/fs_common.h"
#include "include/pdf/fs_pdfdoc.h"
#include "include/pdf/fs_pdfpage.h"
#include "include/pdf/interform/fs_pdfform.h"

using namespace foxit;
using namespace pdf;
using namespace interform;
...
// Assuming PDFDoc doc has been loaded.
// Assuming PDFPage page has been loaded and parsed.

// Add text field
Control control = form.AddControl(page, L"Text Field0", Field::e_TypeTextField, RectF(50, 600, 90, 640));
control.GetField().SetValue(L"3");
// Update text field's appearance.
control.GetWidget().ResetAppearanceStream();

Control control1 = form.AddControl(page, L"Text Field1", Field::e_TypeTextField, RectF(100, 600, 140, 640));
control1.GetField().SetValue(L"123");
// Update text field's appearance.
control1.GetWidget().ResetAppearanceStream();
...
How to remove a text form field from a PDF
#include "include/common/fs_common.h"
#include "include/pdf/fs_pdfdoc.h"
#include "include/pdf/fs_pdfpage.h"
#include "include/pdf/interform/fs_pdfform.h"

using namespace foxit;
using namespace pdf;
using namespace interform;
...
// Assuming PDFDoc doc has been loaded.

Form form(doc);
const wchar_t* filter = L"text1";
int countFields = form.GetFieldCount(NULL);
for (int i = 0; i < countFields; i++)
{
     Field field = form.GetField(i, filter);
     if (field.GetType() == Field::e_TypeTextField) {
    form.RemoveField(field);
     }
}
...
Annotations
General
An annotation associates an object such as note, line, and highlight with a location on a page of a PDF document. It provides a way to interact with users by means of the mouse and keyboard. PDF includes a wide variety of standard annotation types as listed in Table 3-1. Among these annotation types, many of them are defined as markup annotations for they are used primarily to mark up PDF documents. These annotations have text that appears as part of the annotation and may be displayed in other ways by a conforming reader, such as in a Comments pane. The ‘Markup’ column in Table 3-1 shows whether an annotation is a markup annotation.
Foxit PDF SDK supports most annotation types defined in PDF reference [1]. PDF SDK provides APIs of annotation creation, properties access and modification, appearance setting and drawing.
Table 3-1
| Annotation type | Description | Markup | Supported by SDK |
| Text(Note) | Text annotation | Yes | Yes |
| Link | Link Annotation | No | Yes |
| FreeText (TypeWritter/TextBox/Callout) | Free text annotation | Yes | Yes |
| Line | Line annotation | Yes | Yes |
| Square | Square annotation | Yes | Yes |
| Circle | Circle annotation | Yes | Yes |
| Polygon | Polygon annotation | Yes | Yes |
| PolyLine | PolyLine annotation | Yes | Yes |
| Highlight | Highlight annotation | Yes | Yes |
| Underline | Underline annotation | Yes | Yes |
| Squiggly | Squiggly annotation | Yes | Yes |
| StrikeOut | StrikeOut annotation | Yes | Yes |
| Stamp | Stamp annotation | Yes | Yes |
| Caret | Caret annotation | Yes | Yes |
| Ink(pencil) | Ink annotation | Yes | Yes |
| Popup | Popup annotation | No | Yes |
| File Attachment | FileAttachment annotation | Yes | Yes |
| Sound | Sound annotation | Yes | No |
| Movie | Movie annotation | No | No |
| Widget* | Widget annotation | No | Yes |
| Screen | Screen annotation | No | Yes |
| PrinterMark | PrinterMark annotation | No | No |
| TrapNet | Trap network annotation | No | No |
| Watermark* | Watermark annotation | No | Yes |
| 3D | 3D annotation | No | No |
| Redact | Redact annotation | Yes | Yes |
Note:
The annotation types of widget and watermark are special. They aren’t supported in the module of ‘Annotation’. The type of widget is only used in the module of ‘form filler’ and the type of watermark only in the module of ‘watermark’.
Foxit PDF SDK supports a customized annotation type called PSI (pressure sensitive ink) annotation that is not described in PDF reference [1]. Usually, PSI is for handwriting features and Foxit PDF SDK treats it as PSI annotation so that it can be handled by other PDF products.
Example:
How to add a link annotation to a PDF page
#include "include/common/fs_common.h"
#include "include/pdf/actions/fs_action.h"
#include "include/pdf/annots/fs_annot.h"
#include "include/pdf/fs_pdfdoc.h"
#include "include/pdf/objects/fs_pdfobject.h"
#include "include/pdf/fs_pdfpage.h"

using namespace foxit;
using namespace foxit::common;
using namespace pdf;
using namespace annots;

// Assuming PDFPage page has been loaded and parsed.
// Assuming the annnots in the page have been loaded.

// Add link annotation.
annots::Link link(page.AddAnnot( Annot::e_Link, RectF(350,350,380,400)));
link.SetHighlightingMode(Annot::e_HighlightingToggle);
...
How to add a highlight annotation to a page and set the related annotation properties
#include "include/common/fs_common.h"
#include "include/pdf/actions/fs_action.h"
#include "include/pdf/annots/fs_annot.h"
#include "include/pdf/fs_pdfdoc.h"
#include "include/pdf/objects/fs_pdfobject.h"
#include "include/pdf/fs_pdfpage.h"

using namespace foxit;
using namespace foxit::common;
using namespace pdf;
using namespace annots;

// Assuming PDFPage page has been loaded and parsed.
// Assuming the annnots in the page have been loaded.

// Add highlight annotation.
annots::Highlight highlight(page.AddAnnot(Annot::e_Highlight,RectF(10,450,100,550)));
highlight.SetContent(L"Highlight");
annots::QuadPoints quad_points;
quad_points.first = PointF(10, 500);
quad_points.second = PointF(90, 500);
quad_points.third = PointF(10, 480);
quad_points.fourth = PointF(90, 480);
annots::QuadPointsArray quad_points_array;
quad_points_array.Add(quad_points);
highlight.SetQuadPoints(quad_points_array);
highlight.SetSubject(L"Highlight");
highlight.SetTitle(L"Foxit SDK");
highlight.SetCreationDateTime(GetLocalDateTime());
highlight.SetModifiedDateTime(GetLocalDateTime());
highlight.SetUniqueID(WString::FromLocal(RandomUID()));

// Appearance should be reset.
highlight.ResetAppearanceStream();
...
How to set the popup information when creating markup annotations
#include "include/common/fs_common.h"
#include "include/pdf/actions/fs_action.h"
#include "include/pdf/annots/fs_annot.h"
#include "include/pdf/fs_pdfdoc.h"
#include "include/pdf/objects/fs_pdfobject.h"
#include "include/pdf/fs_pdfpage.h"

using namespace foxit;
using namespace foxit::common;
using namespace pdf;
using namespace annots;

// Assuming PDFPage page has been loaded and parsed.
// Assuming the annnots in the page have been loaded.

// Create a new note annot and set the properties for it.
annots::Note note(page.AddAnnot(Annot::e_Note, RectF(10,350,50,400)));
note.SetIconName("Comment");
note.SetSubject(L"Note");
note.SetTitle(L"Foxit SDK");
note.SetContent(L"Note annotation.");
note.SetCreationDateTime(GetLocalDateTime());
note.SetModifiedDateTime(GetLocalDateTime());
note.SetUniqueID(WString::FromLocal(RandomUID()));

// Create a new popup annot and set it to the new note annot.
Popup popup(page.AddAnnot(Annot::e_Popup, RectF(300,450,500,550)));
popup.SetBorderColor(0x00FF00);
popup.SetOpenStatus(false);
popup.SetModifiedDateTime(GetLocalDateTime());
note.SetPopup(popup);
...
How to get a specific annotation in a PDF using device coordinates
#include "include/common/fs_common.h"
#include "include/pdf/actions/fs_action.h"
#include "include/pdf/annots/fs_annot.h"
#include "include/pdf/fs_pdfdoc.h"
#include "include/pdf/objects/fs_pdfobject.h"
#include "include/pdf/fs_pdfpage.h"

using namespace foxit;
using namespace foxit::common;
using namespace pdf;
using namespace annots;

// Assuming PDFDoc doc has been loaded.
// Assuming PDFPage page has been loaded and parsed.
...

int width = static_cast<int>(page.GetWidth());
int height = static_cast<int>(page.GetHeight());

// Get page transformation matrix.
Matrix displayMatrix= page.GetDisplayMatrix(0, 0, width, height, page.GetRotation());
int iAnnotCount = page.GetAnnotCount();

for(int i=0; i<iAnnotCount; i++)
{
Annot pAnnot = page.GetAnnot(i);
ASSERT_FALSE(pAnnot.IsEmpty());
    if (Annot::e_Popup == pAnnot.GetType()) continue;
    RectI annotRect = pAnnot.GetDeviceRect(false, displayMatrix);
    PointF pt;
    float tolerance = 1.0;

    // Get the same annot (pAnnot) using annotRect.
    pt.x = annotRect.left + tolerance;
    pt.y = (annotRect.top - annotRect.bottom)/2 + annotRect.bottom;
Annot gAnnot = page.GetAnnotAtDevicePoint(pt, tolerance, &displayMatrix);
...
}
How to extract the texts under text markup annotations
#include "include/common/fs_common.h"
#include "include/pdf/fs_pdfdoc.h"
#include "include/pdf/fs_pdfpage.h"
#include "include/pdf/fs_search.h"

using namespace foxit;
using namespace foxit::common;
using namespace pdf;
using namespace annots;
...

// Assuming PDFDoc doc has been loaded.
...

PDFPage page = doc.GetPage(0);
// Parse the first page.
page.StartParse(foxit::pdf::PDFPage::e_ParsePageNormal, NULL, false);
int annot_count = page.GetAnnotCount();
TextPage text_page(page);
for (int i = 0; i < annot_count; i++) {
    annots::Annot annot = page.GetAnnot(i);
    annots::TextMarkup text_markup(annot);
    if (!text_markup.IsEmpty()) {
        // Get the texts which intersect with a text markup annotation.
        WString text = text_page.GetTextUnderAnnot(text_markup);
}
}
How to add richtext for freetext annotation
#include "include/common/fs_common.h"
#include "include/pdf/annots/fs_annot.h"

using namespace foxit;
using namespace foxit::common;
using namespace pdf;
using namespace annots;
...

// Make sure that SDK has already been initialized successfully.
// Load a PDF document, get a PDF page and parse it.

// Add a new freetext annotation, as text box.
annots::FreeText freetext(pdf_page.AddAnnot(Annot::e_FreeText, RectF(50, 50, 150, 100)));
// Set annotation's properties.

// Add/insert richtext string with style.
RichTextStyle richtext_style;
richtext_style.font = Font(L"Times New Roman", 0, Font::e_CharsetANSI, 0);
richtext_style.text_color = 0xFF0000;
richtext_style.text_size = 10;
freetext.AddRichText(L"Textbox annotation ", richtext_style);

richtext_style.text_color = 0x00FF00;
richtext_style.is_underline = true;
freetext.AddRichText(L"1-underline ", richtext_style);

richtext_style.font = Font(L"Calibri", 0, Font::e_CharsetANSI, 0);
richtext_style.text_color = 0x0000FF;
richtext_style.is_underline = false;
richtext_style.is_strikethrough = true;
int richtext_count = freetext.GetRichTextCount();
freetext.InsertRichText(richtext_count - 1, L"2_strikethrough ", richtext_style);

// Appearance should be reset.
freetext.ResetAppearanceStream();
Import annotations from or export annotations to a FDF file
In Foxit PDF SDK, annotations can be created with data not only from applications but also from FDF files. At the same time, PDF SDK supports to export annotations to FDF files.
Example:
How to load annotations from a FDF file and add them into the first page of a given PDF
#include "include/common/fs_common.h"
#include "include/pdf/actions/fs_action.h"
#include "include/pdf/annots/fs_annot.h"
#include "include/pdf/fs_pdfdoc.h"
#include "include/pdf/objects/fs_pdfobject.h"
#include "include/pdf/fs_pdfpage.h"

using namespace std;
using namespace foxit;
using namespace foxit::common;
using foxit::common::Library;
using namespace pdf;
using namespace annots;

// Assuming PDFDoc doc has been loaded.
...

FILE* file = NULL;
#if defined(_WIN32) || defined(_WIN64)
       fopen_s(&file, (const char*)(const char*)String::FromUnicode(fdf_file), "rb+");
#else
       file = fopen((const char*)(const char*)String::FromUnicode(fdf_file), "rb+");
#endif
fseek(file, 0, SEEK_END);
size_t file_size = (size_t)ftell(file);
char* buffer = (char*)malloc(file_size * sizeof(char));
memset(buffer, 0 , file_size);

fseek(file, 0, SEEK_SET);
fread(buffer, sizeof(char), file_size, file);
fclose(file);

fdf::FDFDoc fdf_doc(buffer, file_size);
pdf_doc.ImportFromFDF(fdf_doc, PDFDoc::e_Annots);
Image Conversion
Foxit PDF SDK provides APIs for conversion between PDF files and images. Applications could easily fulfill functionalities like image creation and image conversion which supports the following image formats: BMP, TIFF, PNG, JPX, JPEG, and GIF. Foxit PDF SDK can make the conversion between PDF files and the supported image formats except for GIF. It only supports converting GIF images to PDF files.
Example:
How to convert PDF pages to bitmap files
#include "include/common/fs_common.h"
#include "include/common/fs_image.h"
#include "include/pdf/fs_pdfdoc.h"
#include "include/pdf/fs_pdfpage.h"
#include "include/common/fs_render.h"
using namespace foxit;
using namespace foxit::common;
using namespace pdf;

// Assuming PDFDoc doc has been loaded.
...

// Get page count
int nPageCount = doc.GetPageCount();
for(int i=0;i<nPageCount;i++) {
    PDFPage page = doc.GetPage(i);

    // Parse page.
    page.StartParse(foxit::pdf::PDFPage::e_ParsePageNormal, NULL, false);

    int width = static_cast<int>(page.GetWidth());
    int height = static_cast<int>(page.GetHeight());
    Matrix matrix = page.GetDisplayMatrix(0, 0, width, height, page.GetRotation());

    // Prepare a bitmap for rendering.
    Bitmap bitmap(width, height, foxit::common::Bitmap::e_DIBArgb, NULL, 0);
    bitmap.FillRect(0xFFFFFFFF, NULL);

    // Render page.
    Renderer render(bitmap, false);
    render.StartRender(page, matrix, NULL);
    image.AddFrame(bitmap);
}
...
Note: For pdf2image functionality, if the PDF file contains images larger than 1G, it is recommended to process the images using tiled rendering. Otherwise, it may occur exceptions. Following is a brief implementation of tiled rendering.
#include "include/common/fs_common.h"
#include "include/pdf/fs_pdfdoc.h"
#include "include/pdf/fs_pdfpage.h"

using namespace std;
using namespace foxit;
using namespace foxit::common;

...
page.StartParse((int)foxit.pdf.PDFPage.ParseFlags.e_ParsePageNormal, null, false);
int render_sum = 10;
int width = static_cast<int>(page.GetWidth());
int height = static_cast<int>(page.GetHeight());

int width_scale = 1;
int height_scale = 1;
int little_width = width * width_scale;
int little_height = height / render_sum * height_scale;

for (size_t i = 0; i<render_sum; i++)
{
    // According to Matrix, do module rendering for large PDF files.
    Matrix matrix = page.GetDisplayMatrix(0, -1 * i * little_height, width * width_scale, height * height_scale, e_Rotation0);
    // Prepare a bitmap for rendering.
    Bitmap bitmap(little_width, little_height, Bitmap::e_DIBArgb, NULL, 0);
    bitmap.FillRect(0xFFFFFFFF, NULL);
    Renderer render(bitmap, false);
    render.StartRender(page, matrix, NULL);
    // The bitmap data will be added to the end of image file after rendering.
    ...


}
How to convert an image file to PDF file
#include "include/common/fs_common.h"
#include "include/common/fs_image.h"
#include "include/pdf/fs_pdfdoc.h"
#include "include/pdf/fs_pdfpage.h"

using namespace foxit;
using namespace foxit::common;
using namespace pdf;

Image image(input_file);
int count = image.GetFrameCount();

PDFDoc doc;
for (int i = 0; i < count; i++) {
    PDFPage page = doc.InsertPage(i);
    page.StartParse(foxit::pdf::PDFPage::e_ParsePageNormal, NULL, false);
    // Add image to page.
    page.AddImage(image, i, PointF(0, 0), page.GetWidth(), page.GetHeight(), true);
}

doc.SaveAs(output_file, PDFDoc::e_SaveFlagNoOriginal);
...
Watermark
Watermark is a type of PDF annotation and is widely used in PDF document. Watermark is a visible embedded overlay on a document consisting of text, a logo, or a copyright notice. The purpose of a watermark is to identify the work and discourage its unauthorized use. Foxit PDF SDK provides APIs to work with watermark, allowing applications to create, insert, release and remove watermarks.
Example:
How to create a text watermark and insert it into the first page
#include "include/common/fs_common.h"
#include "include/pdf/fs_pdfdoc.h"
#include "include/pdf/fs_pdfpage.h"
#include "include/pdf/fs_watermark.h"

using namespace foxit;
using namespace foxit::common;
using foxit::common::Library;
using namespace pdf;
...

// Assuming PDFDoc doc has been loaded.

WatermarkSettings settings;
settings.flags = WatermarkSettings::e_FlagASPageContents | WatermarkSettings::e_FlagOnTop;
settings.offset_x = 0;
settings.offset_y = 0;
settings.opacity = 90;
settings.position = common::e_PosTopRight;
settings.rotation = -45.f;
settings.scale_x = 1.f;
settings.scale_y = 1.f;

WatermarkTextProperties text_properties;
text_properties.alignment = CommonDefines::e_AlignmentCenter;
text_properties.color = 0xF68C21;
text_properties.font_style = WatermarkTextProperties::e_FontStyleNormal;
text_properties.line_space = 1;
text_properties.font_size = 12.f;
text_properties.font = Font(Font::e_StdIDTimesB);

Watermark watermark(doc, L"Foxit PDF SDK\nwww.foxitsoftware.com", text_properties, settings);
watermark.InsertToPage(doc.GetPage(0));

// Save document to file
...
How to create an image watermark and insert it into the first page
#include "include/common/fs_common.h"
#include "include/pdf/fs_pdfdoc.h"
#include "include/pdf/fs_pdfpage.h"
#include "include/pdf/fs_watermark.h"

using namespace foxit;
using namespace foxit::common;
using foxit::common::Library;
using namespace pdf;
...

// Assuming PDFDoc doc has been loaded.

WatermarkSettings settings;
settings.flags = WatermarkSettings::e_FlagASPageContents | WatermarkSettings::e_FlagOnTop;
settings.offset_x = 0.f;
settings.offset_y = 0.f;
settings.opacity = 20;
settings.position = common::e_PosCenter;
settings.rotation = 0.0f;

Image image(image_file);
Bitmap bitmap = image.GetFrameBitmap(0);
settings.scale_x = page.GetWidth() * 0.618f / bitmap.GetWidth();
settings.scale_y = settings.scale_x;

Watermark watermark(doc, image, 0, settings);
watermark.InsertToPage(doc.GetPage(0));

// Save document to file.
...
How to remove all watermarks from a page
#include "include/common/fs_common.h"
#include "include/pdf/fs_pdfdoc.h"
#include "include/pdf/fs_pdfpage.h"

using namespace foxit;
using namespace foxit::common;
using foxit::common::Library;
using namespace pdf;
...
// Assuming PDFPage page has been loaded and parsed.
...
page.RemoveAllWatermarks();
...
// Save document to file
...
Barcode
A barcode is an optical machine-readable representation of data relating to the object to which it is attached. Originally barcodes systematically represented data by varying the widths and spacing of parallel lines, and may be referred to as linear or one-dimensional (1D). Later they evolved into rectangles, dots, hexagons and other geometric patterns in two dimensions (2D). Although 2D systems use a variety of symbols, they are generally referred to as barcodes as well. Barcodes originally were scanned by special optical scanners called barcode readers. Later, scanners and interpretive software became available on devices including desktop printers and smartphones. Foxit PDF SDK provides applications to generate a barcode bitmap from a given string. The barcode types that Foxit PDF SDK supports are listed in Table 3-2.
Table 3-2
| Barcode Type | Code39 | Code128 | EAN8 | UPCA | EAN13 | ITF | PDF417 | QR |
| Dimension | 1D | 1D | 1D | 1D | 1D | 1D | 2D | 2D |
Example:
How to generate a barcode bitmap from a string
#include "include/common/fs_common.h"
#include "include/common/fs_barcode.h"

using namespace foxit;
using namespace foxit::common;
using foxit::common::Library;
...

// Strings used as barcode content.
WString sz_code_string = L"TEST-SHEET";

// Barcode format types.
Barcode::Format code_format = Barcode::e_FormatCode39;

//Format error correction level of QR code.
Barcode::QRErrorCorrectionLevel sz_qr_level = Barcode::e_QRCorrectionLevelLow;

//Image names for the saved image files for QR code.
WString bmp_qr_name = L"/QR_CODE_TestForBarcodeQrCode_L.bmp";

// Unit width for barcode in pixels, preferred value is 1-5 pixels.
int unit_width = 2;

// Unit height for barcode in pixels, preferred value is >= 20 pixels.
int unit_height = 120;

Barcode barcode;
Bitmap bitmap = barcode.GenerateBitmap(sz_code_string, code_format, unit_width, unit_height, sz_qr_level);
...
Security
Foxit PDF SDK provides a range of encryption and decryption functions to meet different level of document security protection. Users can use regular password encryption and certificate-driven encryption, or using their own security handler for custom security implementation. It also provides APIs to integrate with the third-party security mechanism (Microsoft RMS). These APIs allow developers to work with the Microsoft RMS SDK to both encrypt (protect) and decrypt (unprotect) PDF documents.
Note: For more detailed information about the RMS encryption and decryption, please refer to the simple demo “security” in the “examples\simple_demo” folder of the download package.
Example:
How to encrypt a PDF file with Certificate
#include "include/pdf/fs_pdfdoc.h"
#include "include/pdf/fs_security.h"

using namespace foxit;
using namespace foxit::common;
using foxit::common::Library;
using namespace pdf;
...
PDFDoc doc(input_file);
ErrorCode error_code = doc.Load();
    if (error_code != foxit::e_ErrSuccess) {
      return false;
    }

// Do encryption.
StringArray envelopes;
String initial_key;
WString cert_file_path = input_path + L"foxit.cer";
if (!GetCertificateInfo((const char*)String::FromUnicode(cert_file_path), envelopes, initial_key, true, 16)) {
     return false;
}
CertificateSecurityHandler handler;
CertificateEncryptData encrypt_data(true, SecurityHandler::e_CipherAES, envelopes);
handler.Initialize(encrypt_data, initial_key);

doc.SetSecurityHandler(handler);
WString output_file = output_directory + L"certificate_encrypt.pdf";
doc.SaveAs(output_file, PDFDoc::e_SaveFlagNoOriginal);
...
How to encrypt a PDF file with Foxit DRM
#include "include/pdf/fs_pdfdoc.h"
#include "include/pdf/fs_security.h"

using namespace foxit;
using namespace foxit::common;
using foxit::common::Library;
using namespace pdf;
...

PDFDoc doc(input_file);
ErrorCode error_code = doc.Load();
if (error_code != foxit::e_ErrSuccess) {
   return false;
}

// Do encryption.
DRMSecurityHandler handler = DRMSecurityHandler();
const char* file_id = "Simple-DRM-file-ID";
String initialize_key = "Simple-DRM-initialize-key";
DRMEncryptData encrypt_data(true, "Simple-DRM-filter", SecurityHandler::e_CipherAES, 16, true, 0xfffffffc);
handler.Initialize(encrypt_data, file_id, initialize_key);
doc.SetSecurityHandler(handler);

WString output_file = output_directory + L"foxit_drm_encrypt.pdf";
doc.SaveAs(output_file, PDFDoc::e_SaveFlagNoOriginal);
...
Reflow
Reflow is a function that rearranges page content when the page size changes. It is useful for applications that have output devices with difference sizes. Reflow frees the applications from considering layout for different devices. This function provides APIs to create, render, release and access properties of ‘reflow’ pages.
Example:
How to create a reflow page and render it to a bmp file
#include "include/common/fs_common.h"
#include "include/pdf/fs_pdfdoc.h"
#include "include/pdf/fs_pdfpage.h"
#include "include/pdf/fs_reflowpage.h"
#include "include/common/fs_render.h"

using namespace foxit;
using namespace foxit::common;
using foxit::common::Library;
using namespace pdf;
...

// Assuming PDFDoc doc has been loaded.

PDFPage page = doc.GetPage(0);
// Parse PDF page.
page.StartParse(foxit::pdf::PDFPage::e_ParsePageNormal, NULL, false);

ReflowPage reflow_page(page);

// Set some arguments used for parsing the reflow page.
reflow_page.SetLineSpace(0);
reflow_page.SetZoom(100);
reflow_page.SetParseFlags(ReflowPage::e_Normal);

// Parse reflow page.
reflow_page.StartParse(NULL);

// Get actual size of content of reflow page. The content size does not contain the margin.
float content_width = reflow_page.GetContentWidth();
float content_height = reflow_page.GetContentHeight();

// Assuming Bitmap bitmap has been created.

// Render reflow page.
Renderer renderer(bitmap, false);
foxit::Matrix matrix = reflow_page.GetDisplayMatrix(0, 0);
renderer.StartRenderReflowPage(reflow_page, matrix, NULL);
...
Asynchronous PDF
Asynchronous PDF technique is a way to access PDF pages without loading the whole document when it takes a long time. It’s especially designed for accessing PDF files on internet. With asynchronous PDF technique, applications do not have to wait for the whole PDF file to be downloaded before accessing it. Applications can open any page when the data of that page is available. It provides a convenient and efficient way for web reading applications. For how to open and parse pages with asynchronous mode, you can refer to the simple demo “async_load” in the “examples\simple_demo” folder of the download package.
Pressure Sensitive Ink
Pressure Sensitive Ink (PSI) is a technique to obtain varying electrical outputs in response to varying pressure or force applied across a layer of pressure sensitive devices. In PDF, PSI is usually used for hand writing signatures. PSI data are collected by touching screens or handwriting on boards. PSI data contains coordinates and canvas of the operating area which can be used to generate appearance of PSI. Foxit PDF SDK allows applications to create PSI, access properties, operate on ink and canvas, and release PSI.
Example:
How to create a PSI and set the related properties for it
#include "include/common/fs_common.h"
#include "include/pdf/fs_pdfdoc.h"
#include "include/pdf/fs_pdfpage.h"
#include "include/pdf/fs_psi.h"

using namespace foxit;
using namespace foxit::common;
using foxit::common::Library;
using namespace pdf;
using namespace annots;

PSI psi(480, 180, true);

// Set ink diameter.
psi.SetDiameter(9);

// Set ink color.
psi.SetColor(0x434236);

// Set ink opacity.
psi.SetOpacity(0.8f);

// Add points to pressure sensitive ink.
float x = 121.3043f;
float y = 326.6846f;
float pressure = 0.0966f;
Path::PointType type = Path::e_TypeMoveTo;
psi.AddPoint(PointF(x, y), type, pressure);
...
Wrapper
Wrapper provides a way for users to save their own data related to a PDF document. For example, when opening an encrypted unauthorized PDF document, users may get an error message. In this case, users can still access wrapper data even when they do not have permissions to the PDF content. The wrapper data could be used to provide information like where to get decryption method of this document.
Example:
How to open a document including wrapper data
#include "include/common/fs_common.h"
#include "include/pdf/fs_pdfdoc.h"
#include "include/pdf/fs_pdfpage.h"
#include "include/common/fs_render.h"

using namespace foxit;
using namespace foxit::common;
using foxit::common::Library;
using namespace pdf;
using namespace common::file;

// file_name is PDF document which includes wrapper data.
PDFDoc doc(file_name);
ErrorCode code = doc.Load();
if (code != foxit::e_ErrSuccess) {
    return false;
}
if(!doc.IsWrapper()){
    return false;
}
int64 offset = doc.GetWrapperOffset();

FileReader file_reader(offset);
file_reader.LoadFile(String::FromUnicode(file_name));
...
PDF Objects
There are eight types of objects in PDF: Boolean object, numerical object, string object, name object, array object, dictionary object, stream object and null object. PDF objects are document level objects that are different from page objects (see 3.25) which are associated with a specific page each. Foxit PDF SDK provides APIs to create, modify, retrieve and delete these objects in a document.
Example:
How to remove some properties from catalog dictionary
#include "include/common/fs_common.h"
#include "include/pdf/fs_pdfdoc.h"
#include "include/pdf/objects/fs_pdfobject.h"

using namespace foxit;
using namespace foxit::common;
using foxit::common::Library;
using namespace pdf;
using namespace objects;
...

// Assuming PDFDoc doc has been loaded.

PDFDictionary* catalog = doc.GetCatalog();
if (NULL == catalog) return;

const char* key_strings[] = { "Type", "Boolean", "Name", "String", "Array", "Dict"};
int count = sizeof(key_strings)/sizeof(key_strings[0]);
for (int i = 0; i < count; i ++) {
  if (catalog->HasKey(key_strings[i]))
      catalog->RemoveAt(key_strings[i]);
}
...
Page Object
Page object is a feature that allows novice users having limited knowledge of PDF objects (see 3.24 for details of PDF objects) to be able to work with text, path, image, and canvas objects. Foxit PDF SDK provides APIs to add and delete PDF objects in a page and set specific attributes. Using page object, users can create PDF page from object contents. Other possible usages of page object include adding headers and footers to PDF documents, adding an image logo to each page, or generating a template PDF on demand.
Example:
How to create a text object in a PDF page
#include "include/common/fs_common.h"
#include "include/pdf/graphics/fs_pdfgraphicsobject.h"
#include "include/pdf/fs_pdfdoc.h"
#include "include/pdf/fs_pdfpage.h"


using namespace foxit;
using namespace foxit::common;
using foxit::common::Library;
using namespace pdf;
using namespace graphics;
...

// Assuming PDFPage page has been loaded and parsed.

POSITION position = page.GetLastGraphicsObjectPosition(GraphicsObject::e_TypeText);
TextObject* text_object = TextObject::Create();

text_object->SetFillColor(0xFFFF7F00);

// Prepare text state.
TextState state;
state.font_size = 80.0f;
state.font =  Font(L"Simsun", Font::e_StylesSmallCap, Font::e_CharsetGB2312, 0);
state.textmode = TextState::e_ModeFill;
text_object->SetTextState(page, state, false, 750);

// Set text.
text_object->SetText(L"Foxit Software");
POSITION last_position = page.InsertGraphicsObject(position, text_object);
...
How to add an image logo to a PDF page
#include "include/common/fs_common.h"
#include "include/pdf/graphics/fs_pdfgraphicsobject.h"
#include "include/pdf/fs_pdfdoc.h"
#include "include/pdf/fs_pdfpage.h"

using namespace foxit;
using namespace foxit::common;
using foxit::common::Library;
using namespace pdf;
using namespace graphics;
...
//Assuming PDFPage page has been loaded and parsed.

POSITION position = page.GetLastGraphicsObjectPosition(GraphicsObject::e_TypeImage);
Image image(image_file);
ImageObject* image_object = ImageObject::Create(page.GetDocument());
image_object->SetImage(image, 0);

float width = static_cast<float>(image.GetWidth());
float height = static_cast<float>(image.GetHeight());

float page_width = page.GetWidth();
float page_height = page.GetHeight();

// Please notice the matrix value.
image_object->SetMatrix(Matrix(width, 0, 0, height, (page_width - width) / 2.0f, (page_height - height) / 2.0f));

page.InsertGraphicsObject(position, image_object);
page.GenerateContent();
...
Marked content
In PDF document, a portion of content can be marked as marked content element. Marked content helps to organize the logical structure information in a PDF document and enables stylized tagged PDF. Tagged PDF has a standard structure types and attributes that allow page content to be extracted and reused for other purposes. More details about marked content could be found in chapter 10.5 of PDF reference 1.7 [1].
Example:
How to get marked content in a page and get the tag name
#include "include/common/fs_common.h"
#include "include/pdf/fs_pdfdoc.h"
#include "include/pdf/fs_pdfpage.h"
#include "include/common/fs_image.h"
#include "include/pdf/graphics/fs_pdfgraphicsobject.h"
#include "include/pdf/objects/fs_pdfobject.h"

using namespace foxit;
using namespace foxit::common;
using foxit::common::Library;
using namespace pdf;
using namespace graphics;
using namespace objects;

...
// Assuming PDFPage page has been loaded and parsed.

POSITION position = page.GetFirstGraphicsObjectPosition(GraphicsObject::e_TypeText);
TextObject* text_obj = reinterpret_cast<TextObject*>(page.GetGraphicsObject(position));
MarkedContent* content = text_obj->GetMarkedContent();
int item_count = content->GetItemCount();

// Get marked content property
for (int i = 0; i < item_count; i++) {
    String tag_name = content->GetItemTagName(i);
    int mcid = content->GetItemMCID(i);
}
...
Layer
PDF Layers, in other words, Optional Content Groups (OCG), are supported in Foxit PDF SDK. Users can selectively view or hide the contents in different layers of a multi-layer PDF document. Multi-layers are widely used in many application domains such as CAD drawings, maps, layered artwork and multi-language document, etc.
In Foxit PDF SDK, a PDF layer is associated with a layer node. To retrieve a layer node, user should construct a PDF LayerTree object first and then call function LayerTree::GetRootNode to get the root layer node of the whole layer tree. Furthermore, you can enumerate all the nodes in the layer tree from the root layer node. Foxit PDF SDK provides APIs to get/set layer data, view or hide the contents in different layers, set layers’ name, add or remove layers, and edit layers.
Example:
How to create a PDF layer
#include "include/common/fs_common.h"
#include "include/pdf/fs_pdfdoc.h"
#include "include/common/fs_render.h"
#include "include/pdf/fs_pdflayer.h"

using namespace foxit;
using namespace pdf;
 ...
// Assuming PDFDoc doc has been loaded.

LayerTree layertree(doc);
LayerNode root = layertree.GetRootNode();
if (root.IsEmpty()) {
    printf("No layer information!\r\n");
    return ;
}
...
How to set all the layer nodes information
#include "include/common/fs_common.h"
#include "include/pdf/fs_pdfdoc.h"
#include "include/common/fs_render.h"
#include "include/pdf/fs_pdflayer.h"

using namespace foxit;
using namespace foxit::common;
using foxit::common::Library;
using namespace pdf;
 ...
// Assuming PDFDoc doc has been loaded.

void SetAllLayerNodesInformation(LayerNode layer_node) {
  if (layer_node.HasLayer()) {
    layer_node.SetDefaultVisible(true);
    layer_node.SetExportUsage(LayerTree::e_StateUndefined);
    layer_node.SetViewUsage(LayerTree::e_StateOFF);
    LayerPrintData print_data("subtype_print", LayerTree::e_StateON);
    layer_node.SetPrintUsage(print_data);
    LayerZoomData zoom_data(1, 10);
    layer_node.SetZoomUsage(zoom_data);
    WString new_name = WString(L"[View_OFF_Print_ON_Export_Undefined]") + layer_node.GetName();
    layer_node.SetName(new_name);
  }
  int count = layer_node.GetChildrenCount();
  for (int i = 0; i < count; i++) {
    LayerNode child = layer_node.GetChild(i);
    SetAllLayerNodesInformation(child);
  }
}

LayerTree layertree(doc);
LayerNode root = layertree.GetRootNode();
SetAllLayerNodesInformation(root);
...
How to edit layer tree
#include "include/common/fs_common.h"
#include "include/pdf/fs_pdfdoc.h"
#include "include/common/fs_render.h"
#include "include/pdf/fs_pdflayer.h"

using namespace foxit;
using namespace foxit::common;
using namespace pdf;
 ...
// Assuming PDFDoc doc has been loaded.

// edit layer tree
PDFDoc doc(input_file);
error_code = doc.Load();
layertree = LayerTree(doc);
root = layertree.GetRootNode();
int children_count = root.GetChildrenCount();
root.RemoveChild(children_count -1);
LayerNode child = root.GetChild(children_count - 2);
LayerNode child0 = root.GetChild(0);
child.MoveTo(child0, 0);
child.AddChild(0, L"AddedLayerNode", true);
child.AddChild(0, L"AddedNode", false);
Signature
PDF Signature module can be used to create and sign digital signatures for PDF documents, which protects the security of documents’ contents and avoids it to be tampered maliciously. It can let the receiver make sure that the document is released by the signer and the contents of the document are complete and unchanged. Foxit PDF SDK provides APIs to create digital signature, verify the validity of signature, delete existing digital signature, get and set properties of digital signature, display signature and customize the appearance of the signature form fields.
Note: Foxit PDF SDK provides default Signature callbacks which supports the following two types of signature filter and subfilter:
(1) filter: Adobe.PPKLite subfilter: adbe.pkcs7.detached
(2) filter: Adobe.PPKLite subfilter: adbe.pkcs7.sha1
If you use one of the above signature filter and subfilter, you can sign a PDF document and verify the validity of signature by default without needing to register a custom callback.
Example:
How to sign the PDF document with a signature
#include "include/pdf/annots/fs_annot.h"
#include "include/common/fs_image.h"
#include "include/pdf/fs_pdfdoc.h"
#include "include/pdf/fs_pdfpage.h"
#include "include/pdf/fs_signature.h"

using namespace foxit;
using namespace foxit::common;
using foxit::common::Library;
using namespace pdf;
using namespace objects;
using namespace file;

// AdobePPKLiteSignature
const char* filter = "Adobe.PPKLite";
const char* sub_filter = "adbe.pkcs7.detached";

if (!use_default) {
    InitializeOpenssl();
    sub_filter = "adbe.pkcs7.sha1";
    SignatureCallbackImpl* sig_callback = new SignatureCallbackImpl(sub_filter);
Library::RegisterSignatureCallback(filter, sub_filter, sig_callback);
}

printf("Use signature callback object for filter \"%s\" and sub-filter \"%s\"\r\n",
  filter, sub_filter);
PDFPage pdf_page = pdf_doc.GetPage(0);
// Add a new signature to the first page.
Signature new_signature = AddSiganture(pdf_page, sub_filter);
// Set filter and subfilter for the new signature.
new_signature.SetFilter(filter);
new_signature.SetSubFilter(sub_filter);
bool is_signed = new_signature.IsSigned();
uint32 sig_state = new_signature.GetState();
printf("[Before signing] Signed?:%s\t State:%s\r\n",
  is_signed? "true" : "false",
  TransformSignatureStateToString(sig_state).c_str());

// Sign the new signature.
WString signed_pdf_path = output_directory + L"signed_newsignature.pdf";
if (use_default)
    signed_pdf_path = output_directory + L"signed_newsignature_default_handler.pdf";

WString cert_file_path = input_path + L"foxit_all.pfx";
WString cert_file_password = L"123456";
// Cert file path will be passed back to application through callback function FSSignatureCallback::Sign().
// In this demo, the cert file path will be used for signing in callback function FSSignatureCallback::Sign().
new_signature.StartSign((const wchar_t*)cert_file_path, cert_file_password,
  Signature::e_DigestSHA1, (const wchar_t*)signed_pdf_path, NULL, NULL);
printf("[Sign] Finished!\r\n");
is_signed = new_signature.IsSigned();
sig_state = new_signature.GetState();
printf("[After signing] Signed?:%s\tState:%s\r\n",
  is_signed? "true" : "false",
  TransformSignatureStateToString(sig_state).c_str());

// Open the signed document and verify the newly added signature (which is the last one).
printf("Signed PDF file: %s\r\n", (const char*)String::FromUnicode(signed_pdf_path));
PDFDoc signed_pdf_doc((const wchar_t*)signed_pdf_path);
ErrorCode error_code = signed_pdf_doc.Load(NULL);
if (foxit::e_ErrSuccess !=error_code ) {
    printf("Fail to open the signed PDF file.\r\n");
    return;
}
// Get the last signature which is just added and signed.
int sig_count = signed_pdf_doc.GetSignatureCount();
Signature signed_signature = signed_pdf_doc.GetSignature(sig_count-1);
// Verify the signature.
signed_signature.StartVerify(NULL, NULL);
printf("[Verify] Finished!\r\n");
is_signed = signed_signature.IsSigned();
sig_state = signed_signature.GetState();
printf("[After verifying] Signed?:%s\tState:%s\r\n",
  is_signed? "true" : "false",
  TransformSignatureStateToString(sig_state).c_str());
How to implement signature callback function of signing
#include "include/pdf/annots/fs_annot.h"
#include "include/common/fs_image.h"
#include "include/pdf/fs_pdfdoc.h"
#include "include/pdf/fs_pdfpage.h"
#include "include/pdf/fs_signature.h"

using namespace foxit;
using namespace foxit::common;
using foxit::common::Library;
using namespace pdf;
using namespace objects;
using namespace file;

// Implementation of pdf::SignatureCallback
class SignatureCallbackImpl : public pdf::SignatureCallback {
public:
    SignatureCallbackImpl(string subfilter)
    : sub_filter_(subfilter)
    , digest_context_(NULL) {}
~SignatureCallbackImpl();

    virtual void Release() {
        delete this;
}
    virtual bool StartCalcDigest(const ReaderCallback* file, const uint32* byte_range_array,
    uint32 size_of_array, const Signature& signature, const void* client_data);
    virtual Progressive::State ContinueCalcDigest(const void* client_data, const PauseCallback* pause);
    virtual String GetDigest(const void* client_data);
    virtual String Sign(const void* digest, uint32 digest_length, const wchar_t* cert_path,
        const WString& password, Signature::DigestAlgorithm digest_algorithm,
        void* client_data);
    virtual uint32 VerifySigState(const void* digest, uint32 digest_length,
        const void* signed_data, uint32 signed_data_len,
        void* client_data);
    virtual bool IsNeedPadData() {return false;}
protected:
    bool GetTextFromFile(unsigned char *plainString);

    unsigned char* PKCS7Sign(const wchar_t* cert_file_path, String cert_file_password,
    String plain_text, int& signed_data_size);
    bool PKCS7VerifySignature(String signed_data, String plain_text);
    bool ParseP12File(const wchar_t* cert_file_path, String cert_file_password,
    EVP_PKEY** pkey, X509** x509, STACK_OF(X509)** ca);
ASN1_INTEGER* CreateNonce(int bits);

private:
string sub_filter_;
    DigestContext* digest_context_;

string cert_file_path_;
string cert_file_password_;
};

SignatureCallbackImpl::~SignatureCallbackImpl() {
    if (digest_context_) {
        delete digest_context_;
        digest_context_ = NULL;
}
}

bool SignatureCallbackImpl::GetTextFromFile(unsigned char* file_buffer) {
    if (!digest_context_ || !digest_context_->GetFileReadCallback()) return false;
    ReaderCallback* file_read = digest_context_->GetFileReadCallback();
    file_read->ReadBlock(file_buffer, digest_context_->GetByteRangeElement(0), digest_context_->GetByteRangeElement(1));
    file_read->ReadBlock(file_buffer + (digest_context_->GetByteRangeElement(1)-digest_context_->GetByteRangeElement(0)),
        digest_context_->GetByteRangeElement(2), digest_context_->GetByteRangeElement(3));
    return true;
}

bool SignatureCallbackImpl::StartCalcDigest(const ReaderCallback* file, const uint32* byte_range_array,
uint32 size_of_array, const Signature& signature, const void* client_data) {
        if (digest_context_) {
            delete digest_context_;
            digest_context_ = NULL;
    }
        digest_context_ = new DigestContext(const_cast<ReaderCallback*>(file), byte_range_array, size_of_array);
        if(!SHA1_Init(&digest_context_->sha_ctx_)) {
            delete digest_context_;
            digest_context_ = NULL;
            return false;
    }
        return true;
}

Progressive::State SignatureCallbackImpl::ContinueCalcDigest(const void* client_data, const PauseCallback* pause) {
    if (!digest_context_) return Progressive::e_Error;

uint32 file_length = digest_context_->GetByteRangeElement(1) + digest_context_->GetByteRangeElement(3);
    unsigned char* file_buffer = (unsigned char*)malloc(file_length);
    if (!file_buffer || !GetTextFromFile(file_buffer)) return Progressive::e_Error;

SHA1_Update(&digest_context_->sha_ctx_, file_buffer, file_length);
free(file_buffer);
    return Progressive::e_Finished;
}

String SignatureCallbackImpl::GetDigest(const void* client_data) {
    if (!digest_context_) return "";
    unsigned char* md = reinterpret_cast<unsigned char*>(OPENSSL_malloc((SHA_DIGEST_LENGTH)*sizeof(unsigned char)));
    if (1 != SHA1_Final(md, &digest_context_->sha_ctx_))
        return "";
String digest = String(reinterpret_cast<const char*>(md), SHA_DIGEST_LENGTH);
    OPENSSL_free(md);
    return digest;
}

String SignatureCallbackImpl::Sign(const void* digest, uint32 digest_length, const wchar_t* cert_path,
    const WString& password, Signature::DigestAlgorithm digest_algorithm,
    void* client_data) {
        if (!digest_context_) return "";
    String plain_text;
        if ("adbe.pkcs7.sha1" == sub_filter_) {
            plain_text = String((const char*)digest, digest_length);
    }
        int signed_data_length = 0;
        unsigned char* signed_data_buffer = PKCS7Sign(cert_path, String::FromUnicode(password),
            plain_text, signed_data_length);
        if (!signed_data_buffer) return "";

    String signed_data = String((const char*)signed_data_buffer, signed_data_length);
    free(signed_data_buffer);
        return signed_data;
}

uint32 SignatureCallbackImpl::VerifySigState(const void* digest, uint32 digest_length,
    const void* signed_data, uint32 signed_data_len, void* client_data) {
        // Usually, the content of a signature field is contain the certification of signer.
        // But we can't judge this certification is trusted.
        // For this example, the signer is ourself. So when using api PKCS7_verify to verify,
        // we pass NULL to it's parameter <i>certs</i>.
        // Meanwhile, if application should specify the certificates, we suggest pass flag PKCS7_NOINTERN to
        // api PKCS7_verify.
        if (!digest_context_) return Signature::e_StateVerifyErrorData;
    String plain_text;
        unsigned char* file_buffer = NULL;
        if ("adbe.pkcs7.sha1" == sub_filter_) {
            plain_text = String(reinterpret_cast<const char*>(digest), digest_length);
    } else {
            return Signature::e_StateUnknown;
    }

    String signed_data_str = String(reinterpret_cast<const char*>(signed_data), signed_data_len);
        bool ret = PKCS7VerifySignature(signed_data_str, plain_text);
        if (file_buffer) free(file_buffer);
        return ret ? Signature::e_StateVerifyNoChange : Signature::e_StateVerifyChange;

}

ASN1_INTEGER* SignatureCallbackImpl::CreateNonce(int bits) {
    unsigned char buf[20];
    int len = (bits - 1) / 8 + 1;
    // Generating random byte sequence.
    if (len > (int)sizeof(buf)) {
        return NULL;
}
    if (RAND_bytes(buf, len) <= 0) {
        return NULL;
}
    // Find the first non-zero byte and creating ASN1_INTEGER object.
    int i = 0;
    for (i = 0; i < len && !buf[i]; ++i) ;
ASN1_INTEGER* nonce = NULL;
    if (!(nonce = ASN1_INTEGER_new())) {
    ASN1_INTEGER_free(nonce);
        return NULL;
}
    OPENSSL_free(nonce->data);
    // Allocate at least one byte.
nonce->length = len - i;
    if (!(nonce->data = reinterpret_cast<unsigned char*>(OPENSSL_malloc(nonce->length + 1)))) {
    ASN1_INTEGER_free(nonce);
        return NULL;
}
    memcpy(nonce->data, buf + i, nonce->length);
    return nonce;
}

bool SignatureCallbackImpl::ParseP12File(const wchar_t* cert_file_path, String cert_file_password,
EVP_PKEY** pkey, X509** x509, STACK_OF(X509)** ca) {
    FILE* file = NULL;
#if defined(_WIN32) || defined(_WIN64)
    _wfopen_s(&file, cert_file_path, L"rb");
#else
    file = fopen(String::FromUnicode(cert_file_path), "rb");
#endif  // defined(_WIN32) || defined(_WIN64)
        if (!file) {
            return false;
    }

    PKCS12* pkcs12 = d2i_PKCS12_fp(file, NULL);
        fclose (file);
        if (!pkcs12) {
            return false;
    }

        if (!PKCS12_parse(pkcs12, (const char*)cert_file_password, pkey, x509, ca)) {
            return false;
    }

    PKCS12_free(pkcs12);
        if (!pkey)
            return false;
        return true;
}

unsigned char* SignatureCallbackImpl::PKCS7Sign(const wchar_t* cert_file_path, String cert_file_password,
String plain_text, int& signed_data_size) {
    PKCS7* p7 = NULL;
    EVP_PKEY* pkey = NULL;
    X509* x509 = NULL;
    STACK_OF(X509)* ca = NULL;
        if(!ParseP12File(cert_file_path, cert_file_password, &pkey, &x509, &ca))
            return NULL;

    p7 = PKCS7_new();
    PKCS7_set_type(p7, NID_pkcs7_signed);
    PKCS7_content_new(p7, NID_pkcs7_data);

        // Application should not judge the sign algorithm with the content's length.
        // Here, just for convenient;
        if (plain_text.GetLength() > 32)
        PKCS7_ctrl(p7, PKCS7_OP_SET_DETACHED_SIGNATURE, 1, NULL);

    PKCS7_SIGNER_INFO* signer_info = PKCS7_add_signature(p7, x509, pkey, EVP_sha1());
    PKCS7_add_certificate(p7, x509);

        for (int i = 0; i< sk_num(CHECKED_STACK_OF(X509,ca)); i++)
        PKCS7_add_certificate(p7, (X509*)sk_value(CHECKED_STACK_OF(X509,ca), i));

        // Set source data to BIO.
    BIO* p7bio = PKCS7_dataInit(p7, NULL);
        BIO_write(p7bio, plain_text.GetBuffer(1), plain_text.GetLength());
    PKCS7_dataFinal(p7, p7bio);

    FREE_CERT_KEY;
        BIO_free_all(p7bio);
        // Get signed data.
        unsigned long der_length = i2d_PKCS7(p7, NULL);
        unsigned char* der = reinterpret_cast<unsigned char*>(malloc(der_length));
        memset(der, 0, der_length);
        unsigned char* der_temp = der;
    i2d_PKCS7(p7, &der_temp);
    PKCS7_free(p7);
        signed_data_size = der_length;
        return (unsigned char*)der;
}

bool SignatureCallbackImpl::PKCS7VerifySignature(String signed_data, String plain_text) {
    // Retain PKCS7 object from signed data.
BIO* vin = BIO_new_mem_buf((void*)signed_data.GetBuffer(1), signed_data.GetLength());
PKCS7* p7 = d2i_PKCS7_bio(vin, NULL);
STACK_OF(PKCS7_SIGNER_INFO) *sk = PKCS7_get_signer_info(p7);
    int sign_count = sk_PKCS7_SIGNER_INFO_num(sk);

    int length = 0;
    bool bSigAppr = false;
    unsigned char *p = NULL;
    for(int i=0;i<sign_count; i++) {
    PKCS7_SIGNER_INFO* sign_info = sk_PKCS7_SIGNER_INFO_value(sk,i);

    BIO *p7bio = BIO_new_mem_buf((void*)plain_text.GetBuffer(1), plain_text.GetLength());
    X509 *x509= PKCS7_cert_from_signer_info(p7,sign_info);
        if(1 == PKCS7_verify(p7, NULL, NULL,p7bio, NULL, PKCS7_NOVERIFY))
            bSigAppr = true;
        BIO_free(p7bio);
}
PKCS7_free(p7);
    BIO_free(vin);
    return bSigAppr;
}
Long term validation (LTV)
From version 7.0, Foxit PDF SDK provides APIs to establish long term validation of signatures, which is mainly used to solve the verification problem of signatures that have already expired. LTV requires DSS (Document Security Store) which contains the verification information of the signatures, as well as DTS (Document Timestamp Signature) which belongs to the type of time stamp signature.
In order to support LTV, Foxit PDF SDK provides:
Support for adding the signatures of time stamp type, and provides a default signature callback for the subfilter “ETSI.RFC3161”.
TimeStampServerMgr and TimeStampServer classes, which are used to set and manager the server for time stamp. The default signature callback for the subfilter “ETSI.RFC3161” will use the default time stamp server.
LTVVerifier class which offers the functionalities of verifying signatures and adding DSS information to documents. It also provides a basic default RevocationCallback which is required by LTVVerifier.
Following lists an example about how to establish long term validation of signatures using the default signature callback for subfilter “ETSI.RFC3161” and the default RevocationCallback. For more details, please refer to the simple demo “ltv” in the “examples\simple_demo” folder of the download package.
Example:
How to establish long term validation of signatures using the default signature callback for subfilter “ETSI.RFC3161” and the default RevocationCallback
#include "include/pdf/fs_pdfdoc.h"
#include "include/pdf/fs_pdfpage.h"
#include "include/pdf/fs_signature.h"
#include "include/pdf/fs_ltvverifier.h"
...

// Initialize time stamp server manager, add and set a default time stamp server, which will be used by default signature callback for time stamp signature.
TimeStampServerMgr::Initialize();
TimeStampServer timestamp_server = TimeStampServerMgr::AddServer(server_name, server_url, server_username, server_password);
TimeStampServerMgr::SetDefaultServer(timestamp_server);

// Assume that "signed_pdf_path" represents a signed PDF document which contains signed signature.
PDFDoc pdf_doc(signed_pdf_path);
pdf_doc.StartLoad();
{
    // Use LTVVerifier to verify and add DSS.
    LTVVerifier ltv_verifier(pdf_doc, true, true, false, LTVVerifier::e_SignatureCreationTime);
    // Set verifying mode which is necessary.
    ltv_verifier.SetVerifyMode(LTVVerifier::e_VerifyModeAcrobat);
    SignatureVerifyResultArray sig_verify_result_array = ltv_verifier.Verify();
    for (size_t i = 0; i < sig_verify_result_array.GetSize(); i++) {
        // ltv state would be e_LTVStateNotEnable here.
        SignatureVerifyResult::LTVState ltv_state =  sig_verify_result_array.GetAt(i).GetLTVState();
        if (sig_verify_result_array.GetAt(i).GetSignatureState() & Signature::e_StateVerifyValid)
            ltv_verifier.AddDSS(sig_verify_result_array.GetAt(i));
}
}

// Add a time stamp signature as DTS and sign it. "saved_ltv_pdf_path" represents the newly saved signed PDF file.
PDFPage pdf_page = pdf_doc.GetPage(0);
// The new time stamp signature will have default filter name "Adobe.PPKLite" and default subfilter name "ETSI.RFC3161".
Signature timestamp_signature = pdf_page.AddSignature(RectF(), L"", Signature::e_SignatureTypeTimeStamp);
Progressive sign_progressive = timestamp_signature.StartSign(L"", L"", Signature::e_DigestSHA256, saved_ltv_pdf_path);
if (sign_progressive.GetRateOfProgress() != 100)
    sign_progressive.Continue();

// Then use LTVVeirfier to verify the new signed PDF file.
PDFDoc check_pdf_doc(saved_ltv_pdf_path);
check_pdf_doc.StartLoad();
{
    // Use LTVVeirfier to verify.
    LTVVerifier ltv_verifier(pdf_doc, true, true, false, LTVVerifier::e_SignatureCreationTime);
    // Set verifying mode which is necessary.
    ltv_verifier.SetVerifyMode(LTVVerifier::e_VerifyModeAcrobat);
    SignatureVerifyResultArray sig_verify_result_array = ltv_verifier.Verify();
    for (size_t i = 0; i < sig_verify_result_array.GetSize(); i++) {
        // ltv state would be e_LTVStateEnable here.
        SignatureVerifyResult::LTVState ltv_state =  sig_verify_result_array.GetAt(i).GetLTVState();
    ... // User can get other information from SignatureVerifyResult.
}
}

// Release time stamp server manager when everything is done.
TimeStampServerMgr::Release();
PAdES
From version 7.0, Foxit PDF SDK also supports PAdES (PDF Advanced Electronic Signature) which is the application for CAdES signature in the field of PDF. CAdES is a new standard for advanced digital signature, its default subfilter is “ETSI.CAdES.detached”. PAdES signature includes four levels: B-B, B-T, B-LT, and B-LTA.
B-B: Must include the basic attributes.
B-T: Must include document time stamp or signature time stamp to provide trusted time for existing signatures, based on B-B.
B-LT: Must include DSS/VRI to provide certificates and revocation information, based on B-T.
B-LTA: Must include the trusted time DTS for existing revocation information, based on B-LT.
Foxit PDF SDK provides a default signature callback for the subfilter “ETSI.CAdES.detached” to sign and verify the signatures (with subfilter “ETSI.CAdES.detached”). It also provides TimeStampServerMgr and TimeStampServer classes to set and manager the server for time stamp. The default signature callback for the subfilter “ETSI.CAdES.detached” will use the default time stamp server.
Foxit PDF SDK provides functions to get the level of PAdES from signature, and application level can also judge and determine the level of PAdES according to the requirements of each level. For more details about how to add, sign and verify a PAdES signature in PDF document, please refer to the simple demo “pades” in the “examples\simple_demo” folder of the download package.
PDF Action
PDF Action is represented as the base PDF action class. Foxit PDF SDK provides APIs to create a series of actions and get the action handlers, such as embedded goto action, JavaScript action, named action and launch action, etc.
Example:
How to create a URI action and insert to a link annot
#include "include/common/fs_common.h"
#include "include/pdf/actions/fs_action.h"
#include "include/pdf/annots/fs_annot.h"
#include "include/pdf/objects/fs_pdfobject.h"

using namespace foxit;
using namespace foxit::common;
using namespace pdf;
using namespace annots;

// Assuming PDFPage page has been loaded and parsed.
// Assuming the annnots in the page have been loaded.
...

// Add link annotation
annots::Link link(page.AddAnnot(Annot::e_Link, RectF(350,350,380,400)));
link.SetHighlightingMode(Annot::e_HighlightingToggle);
// Add action for link annotation
using foxit::pdf::actions::Action;
using foxit::pdf::actions::URIAction;
URIAction action = (URIAction)Action::Create(page.GetDocument(), Action::e_TypeURI);
action.SetTrackPositionFlag(true);
action.SetURI("www.foxitsoftware.com");
link.SetAction(action);
// Appearance should be reset.
link.ResetAppearanceStream();
How to create a GoTo action and insert to a link annot
#include "include/common/fs_common.h"
#include "include/pdf/actions/fs_action.h"
#include "include/pdf/annots/fs_annot.h"
#include "include/pdf/fs_pdfdoc.h"
#include "include/pdf/objects/fs_pdfobject.h"
#include "include/pdf/fs_pdfpage.h"

using namespace foxit;
using namespace foxit::common;
using namespace pdf;
using namespace annots;

// Assuming the PDFDoc doc has been loaded.
// Assuming PDFPage page has been loaded and parsed.

// Add link annotation
annots::Link link(page.AddAnnot(Annot::e_Link, RectF(350,350,380,400)));
link.SetHighlightingMode(Annot::e_HighlightingToggle);

GotoAction action = Action::Create(page.GetDocument(), Action::e_TypeGoto);
Destination newDest = Destination::CreateXYZ(page.GetDocument(), 0,0,0,0);
action.SetDestination(newDest);
JavaScript
JavaScript was created to offload Web page processing from a server onto a client in Web-based applications. Foxit PDF SDK JavaScript implements extensions, in the form of new objects and their accompanying methods and properties, to the JavaScript language. It enables a developer to manage document security, communicate with a database, handle file attachments, and manipulate a PDF file so that it behaves as an interactive, web-enabled form, and so on.
JavaScript action is an action that causes a script to be compiled and executed by the JavaScript interpreter. Class foxit::pdf::actions::JavaScriptAction is derived from Action and offers functions to get/set JavaScript action data.
The JavaScript methods and properties supported by Foxit PDF SDK are listed in the appendix.
Example:
How to add JavaScript Action to Document
#include "include/pdf/actions/fs_action.h"
#include "include/pdf/annots/fs_annot.h"

using namespace foxit;
using namespace pdf;
using namespace annots;

// Load Document doc.
...

actions::JavaScriptAction javascript_action = (actions::JavaScriptAction)Action::Create(doc, Action::e_TypeJavaScript);
javascipt_action.SetScript(L"app.alert(\"Hello Foxit \");");
AdditionalAction additional_act(doc);
additional_act.SetAction(AdditionalAction::e_TriggerDocWillClose,javascipt_action);
additional_act.DoJSAction(AdditionalAction::e_TriggerDocWillClose);
...
How to add JavaScript Action to Annotation
#include "include/pdf/actions/fs_action.h"
#include "include/pdf/annots/fs_annot.h"

using namespace foxit;
using namespace pdf;
using namespace annots;

// Load Document and get a widget annotation.
...

actions::JavaScriptAction javascript_action = (actions::JavaScriptAction)Action::Create(page.GetDocument(), Action::e_TypeJavaScript);
javascipt_action.SetScript(L"app.alert(\"Hello Foxit \");");
AdditionalAction additional_act(annot);
additional_act.SetAction(AdditionalAction::e_TriggerAnnotMouseButtonPressed,javascipt_action);
additional_act.DoJSAction(AdditionalAction::e_TriggerAnnotMouseButtonPressed);
...
How to add JavaScript Action to FormField
#include "include/pdf/actions/fs_action.h"
#include "include/pdf/annots/fs_annot.h"
#include "include/pdf/interform/fs_pdfform.h"

using namespace foxit;
using namespace pdf;
using namespace annots;
using namespace interform;

// Load Document and get a form field.
...

// Add text field.
Control control = form.AddControl(page, L"Text Field0", Field::e_TypeTextField, RectF(50, 600, 90, 640));
control.GetField().SetValue(L"3");
// Update text field's appearance.
control.GetWidget().ResetAppearanceStream();

Control control1 = form.AddControl(page, L"Text Field1", Field::e_TypeTextField, RectF(100, 600, 140, 640));
control1.GetField().SetValue(L"23");
// Update text field's appearance.
control1.GetWidget().ResetAppearanceStream();

Control control2 = form.AddControl(page, L"Text Field2", Field::e_TypeTextField, RectF(150, 600, 190, 640));
actions::JavaScriptAction javascipt_action = (actions::JavaScriptAction)Action::Create(form.GetDocument(), Action::e_TypeJavaScript);
javascipt_action.SetScript(L"AFSimple_Calculate(\"SUM\", new Array (\"Text Field0\", \"Text Field1\"));" );
Field field2 = control2.GetField();
AdditionalAction additional_act(field2);
additional_act.SetAction(AdditionalAction::e_TriggerFieldRecalculateValue,javascipt_action);
// Update text field's appearance.
control2.GetWidget().ResetAppearanceStream();
...
How to add a new annotation to PDF using JavaScript
#include "include/pdf/actions/fs_action.h"
#include "include/pdf/annots/fs_annot.h"

// Load Document and get form field, construct a Form object and a Filler object.
...

actions::JavaScriptAction javascipt_action = (actions::JavaScriptAction)Action::Create(form.GetDocument(), Action::e_TypeJavaScript);
javascipt_action.SetScript(L"var annot = this.addAnnot({ page : 0, type : \"Square\", rect : [ 0, 0, 100, 100 ], name : \"UniqueID\", author : \"A. C. Robat\", contents : \"This section needs revision.\" });" );
AdditionalAction additional_act(field);
additional_act.SetAction(AdditionalAction::e_TriggerAnnotCursorEnter,javascipt_action);
additional_act.DoJSAction(AdditionalAction::e_TriggerAnnotCursorEnter);
...
How to get/set properties of annotations (strokeColor, fillColor, readOnly, rect, type) using JavaScript
#include "include/pdf/actions/fs_action.h"
#include "include/pdf/annots/fs_annot.h"

// Load Document and get form field, construct a Form object and a Filler object.
...

// Get properties of annotations.
actions::JavaScriptAction javascipt_action = (actions::JavaScriptAction)Action::Create(form.GetDocument(), Action::e_TypeJavaScript);
javascipt_action.SetScript(L"var ann = this.getAnnot(0, \" UniqueID \"); if (ann != null) { console.println(\"Found it! type: \" + ann.type); console.println(\"readOnly: \" + ann.readOnly); console.println(\"strokeColor: \" + ann.strokeColor);console.println(\"fillColor: \" + ann.fillColor); console.println(\"rect: \" + ann.rect);}");
AdditionalAction additional_act(field);
additional_act.SetAction(AdditionalAction::e_TriggerAnnotCursorEnter,javascipt_action);
additional_act.DoJSAction(AdditionalAction::e_TriggerAnnotCursorEnter);

// Set properties of annotations (only take strokeColor as an example).
actions::JavaScriptAction javascipt_action1 = (actions::JavaScriptAction)Action::Create(form.GetDocument(), Action::e_TypeJavaScript);
javascipt_action1.SetScript(L"var ann = this.getAnnot(0, \"UniqueID\");if (ann != null) { ann.strokeColor = color.blue; }");
AdditionalAction additional_act1(field1);
additional_act1.SetAction(AdditionalAction::e_TriggerAnnotCursorEnter,javascipt_action1);
additional_act1.DoJSAction(AdditionalAction::e_TriggerAnnotCursorEnter);
...
How to destroy annotation using JavaScript
#include "include/pdf/actions/fs_action.h"
#include "include/pdf/annots/fs_annot.h"

// Load Document and get form field, construct a Form object and a Filler object.
...

actions::JavaScriptAction javascipt_action = (actions::JavaScriptAction)Action::Create(form.GetDocument(), Action::e_TypeJavaScript);
javascipt_action.SetScript(L"var ann = this.getAnnot(0, \" UniqueID \"); if (ann != null) { ann.destroy(); } " );
AdditionalAction additional_act(field);
additional_act.SetAction(AdditionalAction::e_TriggerAnnotCursorEnter,javascipt_action);
additional_act.DoJSAction(AdditionalAction::e_TriggerAnnotCursorEnter);
...
Redaction
Redaction is the process of removing sensitive information while keeping the document’s layout. It allows users to permanently remove (redact) visible text and images from PDF documents to protect confidential information, such as social security numbers, credit card information, product release dates, and so on.
Redaction is a type of markup annotation, which is used to mark some contents of a PDF file and then the contents will be removed once the redact annotations are applied.
To do Redaction, you can use the following APIs:
Call function foxit::addon::Redaction::Redaction to create a redaction module. If module “Redaction” is not defined in the license information which is used in function common::Library::Initialize, it means user has no right in using redaction related functions and this constructor will throw exception foxit::e_ErrInvalidLicense.
Then call function foxit::addon::Redaction::MarkRedactAnnot to create a redaction object and mark page contents (text object, image object, and path object) which are to be redacted.
Finally call function foxit::addon::Redaction::Apply to apply redaction in marked areas: remove the text or graphics under marked areas permanently.
Note: To use the redaction feature, please make sure the license key has the permission of the ‘Redaction’ module.
Example:
How to redact the text “PDF” on the first page of a PDF
#include "include/common/fs_common.h"
#include "include/pdf/fs_pdfdoc.h"
#include "include/pdf/fs_pdfpage.h"
#include "include/pdf/fs_search.h"
#include "include/addon/fs_redaction.h"
#include "include/common/fs_render.h"

using namespace foxit;
using namespace common;
using namespace addon;
using namespace pdf;
using namespace foxit::pdf::annots;
...

Redaction redaction(doc);
// Parse PDF page.
PDFPage page = doc.GetPage(0);
page.StartParse(foxit::pdf::PDFPage::e_ParsePageNormal, NULL, false);
//Find Text Object to redact
TextPage text_page(page);
TextSearch text_search(text_page);
text_search.SetPattern(L"PDF");
RectFArray rect_array;
while(text_search.FindNext()) {
    rect_array.Append(text_search.GetMatchRects());
  }
if(rect_array.GetSize() > 0) {
Redact redact = redaction.MarkRedactAnnot(page, rect_array);
    redact.ResetAppearanceStream();
    doc.SaveAs(output_directory + L"AboutFoxit_redected_default.pdf");

    // set border color to Green
    redact.SetBorderColor((long)0x00FF00);
    // set fill color to Blue
    redact.SetFillColor((long)0x0000FF);
    // set rollover fill color to Red
    redact.SetApplyFillColor((long)0xFF0000);
    redact.ResetAppearanceStream();
    doc.SaveAs(output_directory + L"AboutFoxit_redected_setColor.pdf");

    redact.SetOpacity((float)0.5);
    redact.ResetAppearanceStream();
    doc.SaveAs(output_directory + L"AboutFoxit_redected_setOpacity.pdf");

    if(redaction.Apply())
        cout << "Redact page(0) succeed." << endl;
    else
        cout << "Redact page(0) failed." << endl;
  }
doc.SaveAs(output_directory + L"AboutFoxit_redected_apply.pdf");
Comparison
Comparison feature lets you see the differences in two versions of a PDF. Foxit PDF SDK provides APIs to compare two PDF documents page by page, the differences between the two documents will be returned.
The differences can be defined into three types: delete, insert and replace. You can save these differences into a PDF file and mark them as annotations.
Note: To use the comparison feature, please make sure the license key has the permission of the ‘Comparison’ module.
Example:
How to compare two PDF documents and save the differences between them into a PDF file
#include "include/common/fs_common.h"
#include "include/pdf/fs_pdfdoc.h"
#include "include/pdf/fs_pdfpage.h"
#include "include/pdf/fs_search.h"
#include "include/addon/fs_compare.h"
#include "include/common/fxcrt/fx_basic.h"

using namespace foxit;
using namespace common;
using namespace addon;
using namespace pdf;
using namespace foxit::pdf::annots;
...

PDFDoc base_doc("input_base_file");
ErrorCode error_code = base_doc.Load();
if (error_code != foxit::e_ErrSuccess) {
    return 1;
}

PDFDoc compared_doc("input_compared_file");
error_code = compared_doc.Load();
if (error_code != foxit::e_ErrSuccess) {
    return 1;
}

Comparison comparison(base_doc, compared_doc);

// Start comparing.
CompareResults result = comparison.DoCompare(0, 0, Comparison::e_CompareTypeText);
CompareResultInfoArray& oldInfo = result.results_base_doc;
CompareResultInfoArray& newInfo = result.results_compared_doc;
int oldInfoSize = oldInfo.GetSize();
int newInfoSize = newInfo.GetSize();
PDFPage page = compared_doc.GetPage(0);
for (int i=0; i<newInfoSize; i++)
{
    const CompareResultInfo& item = newInfo.GetAt(i);
    CompareResultInfo::CompareResultType type = item.type;
    if (type == CompareResultInfo::e_CompareResultTypeDeleteText)
    {
        String res_string;
        res_string.Format((FX_LPCSTR)"\"%s\"", (FX_LPCSTR)String::FromUnicode(item.diff_contents));
        CreateDeleteTextStamp(page, item.rect_array, 0xff0000, WString::FromLocal(res_string), L"Compare : Delete", L"Text");
    }
    else if (type == CompareResultInfo::e_CompareResultTypeInsertText)
    {
   String res_string;
        res_string.Format((FX_LPCSTR)"\"%s\"", (FX_LPCSTR)String::FromUnicode(item.diff_contents));
CreateDeleteText(page, item.rect_array, 0x0000ff, WString::FromLocal(res_string), L”Compare : Insert”, L”Text”);
    }
    else if (type == CompareResultInfo::e_CompareResultTypeReplaceText)
    {
        String res_string;
        res_string.Format("[Old]: \"%s\"\r\n[New]: \"%s\"", (FX_LPCSTR)String::FromUnicode(old_info.GetAt(i).diff_contents), (FX_LPCSTR)String::FromUnicode(item.diff_contents));
        CreateSquigglyRect(page, item.rect_array, 0xe7651a, WString::FromLocal(res_string), L"Compare : Replace", L"Text");
    }
}

// Save the comparison result to a PDF file.
compared_doc.SaveAs(output_directory + L"result.pdf");
Note: for CreateDeleteTextStamp, CreateDeleteText and CreateSquigglyRect functions, please refer to the simple demo “pdfcompare” located in the “examples\simple_demo” folder of the download package.
OCR
Optical Character Recognition, or OCR, is a software process that enables images or printed text
to be translated into machine-readable text. OCR is most commonly used when scanning paper
documents to create electronic copies, but can also be performed on existing electronic
documents (e.g. PDF).
From version 9.0, Linux x64 platform supports OCR feature, and the OCR engine has been upgraded, please contact Foxit support team or sales team to get the latest engine files package.
This section will provide instructions on how to set up your environment for the OCR feature module using Foxit PDF SDK for Windows and Linux.
System requirements
Platform: Windows, Linux (x64)
Programming Language: C, C++, Java, Python, C#, Node.js, Go
License Key requirement: ‘OCR’ module permission in the license key
SDK Version: Foxit PDF SDK for Windows (C++, Java, C#) 6.4 or higher; Foxit PDF SDK (C) 7.4 or higher; Foxit PDF SDK for Windows (Python) 8.3 or higher; Foxit PDF SDK for Linux x64 (C++, Java, C#, Python) 9.0 or higher; Foxit PDF SDK (Node.js) 10.0 or higher
Note:
For Linux platform, in some cases, particularly within a clean Docker environment, you may encounter an engine initialization failure due to the lack of certain libraries during the container setup. The ‘libFREngine.so‘ in the engine may lack ‘libgomp.so.1‘, which can cause this issue.
To resolve this issue, perform the following commands in Docker:
sudo apt-get update
sudo apt-get install libgomp1
Trial limit for SDK OCR add-on module
For the trial version, there are three trail limits that you should notice:
Allow 30 consecutive natural days to evaluate SDK from the first time of OCREngine initialization.
Allow up to 5000 pages to be converted using OCR from the first time of OCREngine initialization.
Trail watermarks will be generated on the PDF pages. This limit is used for all of the SDK modules.
OCR resource files
Please contact Foxit support team or sales team to get the OCR resource files package.
For Windows:
After getting the package for Windows, extract it to a desired directory (for example, extract the package to a directory named “ocr_addon“), and then you can see the resource files for OCR are as follows:
debugging_files: Resource files used for debugging the OCR project. These file(s) cannot be distributed.
language_resource_CJK: Resource files for CJK language, including: Chinese-Simplified, Chinese-Traditional, Japanese, and Korean.
language_resources_noCJK: Resource files for the languages except CJK, including: Basque, Bulgarian, Catalan, Croatian, Czech, Danish, Dutch, English, Estonian, Faeroese, Finnish, French, Galician, German, Greek, Hebrew, Hungarian, Icelandic, Italian, Latvian (Lettish), Lithuanian, Macedonian, Maltese, Norwegian, Polish, Portuguese, Romanian, Russian, Serbian, Slovak, Slovenian, Spanish, Swedish, Thai, Turkish, Ukrainian.
win32_lib: 32-bit library resource files
win64_lib: 64-bit library resource files
readme.txt: A txt file for introducing the role of each folder in this directory, as well as how to use those resource files for OCR.
For Linux x64:
After getting the package for Linux, extract it to a desired directory (for example, extract the package to a directory named “ocr_addon_linux“), and then you can see the resource files for OCR are as follows:
Data: Data and resource files for following languages:
Chinese-Simplified, Chinese-Traditional, Japanese, Korean, Basque, Bulgarian, Catalan, Croatian, Czech, Danish, Dutch, English, Estonian, Faeroese, Finnish, French, Galician, German, Greek, Hebrew, Hungarian, Icelandic, Italian, Latvian (Lettish), Lithuanian, Macedonian, Maltese, Norwegian, Polish, Portuguese, Romanian, Russian, Serbian, Slovak, Slovenian, Spanish, Swedish, Thai, Turkish, Ukrainian.
Bin: Library files for Linux64.
How to run the OCR demo
Foxit PDF SDK for C++ API (Windows and Linux x64) provides an OCR demo located in the “examples\simple_demo\ocr” folder to show you how to use Foxit PDF SDK to do OCR for a PDF page or a PDF document.
Build an OCR resource directory
Before running the OCR demo, you should first build an OCR resource directory, and then pass the directory to Foxit PDF SDK API OCREngine::Initialize to initialize OCR engine.
Note: Starting from version 10.1, Foxit PDF SDK has restructured the OCREngine::Initialize interface and added a new parameter, is_shared_cpu_cores_mode, to specify whether to use multi-process mode. When this parameter value is true, multi-process mode will be used during the OCR process, and when the value is false, single-process mode will be used.
For Windows:
To build an OCR resource directory on Windows, please follow the steps below:
Create a new folder to add the resources. For example, “D:/ocr_resources”.
Add the appropriate library resource based on the platform architecture.
For win32, copy all the files under “ocr_addon/win32_lib” folder to “D:/ocr_resources”.
For win64, copy all the files under “ocr_addon/win64_lib” folder to “D:/ocr_resources”.
Add the language resource.
For CJK (Chinese-Simplified, Chinese-Traditional, Japanese, and Korean), copy all the files under “ocr_addon/language_resource_CJK” folder to “D:/ocr_resources”.
For all other languages except CJK, copy all the files under “ocr_addon/language_resources_noCJK” folder to “D:/ocr_resources”.
For all the supported languages, copy all the files under “ocr_addon/language_resource_CJK” and “ocr_addon/language_resources_noCJK” folders to “D:/ocr_resources”.
(Optional) Add debugging file resource if you need to debug the demo.
For win32, copy the file(s) under “ocr_addon/debugging_files/win32” folder to “D:/ocr_resources”.
For win64, copy the file(s) under “ocr_addon/debugging_files/win64” folder to “D:/ocr_resources”.
Note: The debugging files should be exclusively used for testing purposes. So, you cannot distribute them.
For Linux x64:
To build an OCR resource directory on Linux, please follow the steps below:
Create a new folder to add the resources. For example, “/root/Desktop/ocr_resources”.
Copy the whole folders of “Data“, “Bin” under the “ocr_addon_linux” to “/root/Desktop/ocr_resources”.
Then, the OCR resource files path is set to “/root/Desktop/ocr_resources/Bin“.
Note: Before loading the resource files, please set the environment variable for loading the library, please execute: export LD_LIBRARY_PATH=/root/Desktop/ocr_resources/Bin.
Configure the demo
After building the OCR resource directory, configure the demo in the “examples\simple_demo\ocr\ocr.cpp” file. Following will configure the demo in “ocr.cpp” file on Windows for example. For Linux x64 platform, do the similar configuration with Windows.
Specify the OCR resource directory
Add the OCR resource directory as follows, which will be used to initialize the OCR engine.

Choose the language resource
You will need to set the language used by the OCR engine into the demo code. This is done with the OCREngine::SetLanguages method and is set to “English” by default.

(Optional) Set log for OCREngine
If you want to print the entire log of the OCR Engine, please uncomment the OCREngine::SetLogFile method as below:

Run the demo
Once you run the demo successfully, the console will print the following by default:
The demo will OCR the default document (“examples\simple_demo\input_files\ocr\AboutFoxit_ocr.pdf”) in four different ways, which will output four different PDFs in the output folder (“examples\simple_demo\output_files\ocr”):
OCR Editable PDF – ocr_doc_editable.pdf
OCR Searchable PDF – ocr_doc_searchable.pdf
OCR Editable PDF Page – ocr_page_editable.pdf
OCR Searchable PDF Page – ocr_page_searchable.pdf
Compliance
PDF Compliance
Foxit PDF SDK supports to convert PDF versions among PDF 1.3, PDF 1.4, PDF 1.5, PDF 1.6 and PDF 1.7. When converting to PDF 1.3, if the source document contains transparency data, then it will be converted to PDF 1.4 instead of PDF 1.3 (PDF 1.3 does not support transparency). If the source document does not contain any transparency data, then it will be converted to PDF 1.3 as expected.
PDF/A Compliance
PDF/A is an ISO-standardized version of the PDF specialized for use in the archiving and long-term preservation of electronic documents. PDF/A differs from PDF by prohibiting features unsuitable for long-term archiving, such as font linking (as opposed to font embedding), encryption, JavaScript, audio, video and so on.
Foxit PDF SDK provides APIs to convert a PDF to be compliance with PDF/A standard, or verify whether a PDF is compliance with PDF/A standard. It supports the PDF/A version including PDF/A-1a, PDF/A-1b, PDF/A-2a, PDF/A-2b, PDF/A-2u, PDF/A-3a, PDF/A-3b, PDF/A-3u (ISO 19005- 1, 19005 -2 and 19005-3).
PDF/E Compliance
PDF/E is an ISO-standardized version of the PDF specialized for the reliable exchange and archiving of engineering documents. It is designed for the creation, exchange, archiving, and printing documents used in engineering workflows.
From version 10.1, Foxit PDF SDK provides APIs to convert a PDF to be compliance with PDF/E standard or verify whether a PDF is compliance with PDF/E standard. It supports the PDF/E-1 version.
PDF/X Compliance
PDF/X is an ISO-standardized version of the PDF specialized for the exchange of graphics-intensive documents. It is mainly used to ensure consistency and predictability when printing files in fields such as design, drawing, engineering, and graphic arts.
From version 10.1, Foxit PDF SDK provides APIs to convert a PDF to be compliance with PDF/X standard or verify whether a PDF is compliance with PDF/X standard. It supports the PDF/X version including PDF/X-1a, PDF/X-3, PDF/X-4, PDF/X-4p.
Preflight Feature
From version 10.1, Foxit PDF SDK supports preflight feature, which allows users to utilize Foxit PDF SDK to get preflight keys and analyze or fixup PDF file.
This section will provide instructions on how to set up your environment for running the ‘compliance’ or ‘preflight’ demo.
System requirements
Platform: Windows, Linux (x86 and x64), Mac
Programming Language: C, C++, Java, C#, Python, Objective-C, Node.js, Go
License Key requirement: ‘Compliance’ module permission in the license key
SDK Version: Foxit PDF SDK (C++, Java, C#, Objective-C) 6.4 or higher (for PDF Compliance, it requires Foxit PDF SDK 7.1 or higher); Foxit PDF SDK (C) 7.4 or higher; Foxit PDF SDK (Python) 8.3 or higher; Foxit PDF SDK (Node.js) 10.0 or higher
Note: For PDF/E, PDF/X, and preflight feature, it requires Foxit PDF SDK 10.1 or higher.
Compliance resource files
Please contact Foxit support team or sales team to get the Compliance resource files package.
After getting the package, extract it to a desired directory (for example, extract the package to a directory: “compliance/win” for Windows, “compliance/linux” for Linux, and “compliance/mac” for Mac), and then you can see the resource files for Compliance are as follows:
For Windows:
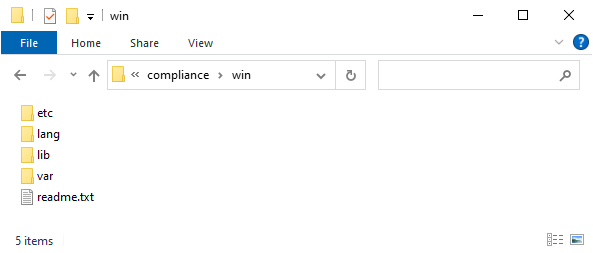
For Linux:
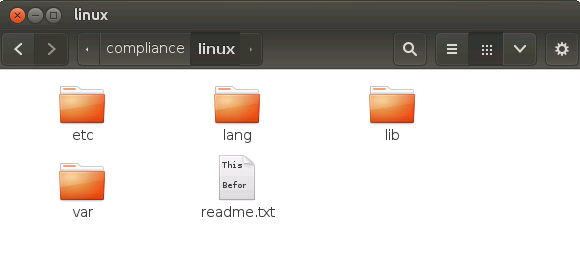
For Mac:
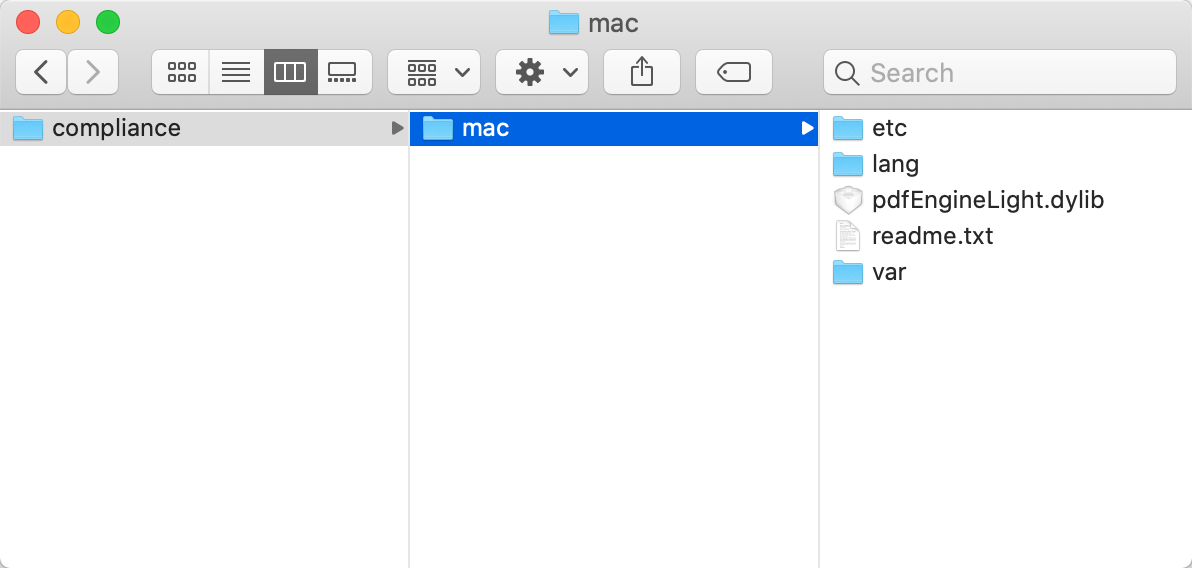
How to run the compliance or preflight demo
Before version 10.1, Foxit PDF SDK provides a compliance demo located in the “examples\simple_demo\compliance” folder to show you how to use Foxit PDF SDK to verify whether a PDF is compliance with PDF/A standard, and convert a PDF to be compliance with PDF/A standard, as well as convert PDF versions.
From version 10.1, Foxit PDF SDK provides two demos:
A compliance demo located in the “examples\simple_demo\compliance” folder to show you how to use Foxit PDF SDK to verify whether a PDF is compliance with PDF/A or PDF/E or PDF/X standard, and convert a PDF to be compliance with PDF/A or PDF/E or PDF/X standard, as well as convert PDF versions.
A preflight demo located in the “examples\simple_demo\preflight” folder to show you how to use Foxit PDF SDK to get preflight keys and analyze or fixup PDF file.
Build a compliance resource directory
Before running the compliance or preflight demo, you should first build a compliance resource directory, and then pass the directory to Foxit PDF SDK API ComplianceEngine::Initialize to initialize compliance engine.
Starting from version 10.0, the compliance resource files provide default thread-safety. For multithreading, the API ComplianceEngine::InitializeThreadContext should be called first for a new thread before using any other methods in the compliance add-on module.
Windows
To build a compliance resource directory on Windows, please follow the steps below:
Create a new folder to add the resources. For example, “D:/compliance_resources”.
Copy the whole folders of “ect“, “lang“, “var” under the “compliance/win” to “D:/compliance_resources”.
Add the appropriate library resource based on the platform architecture.
For win32, copy all the files under “compliance/win/lib/x86” folder to “D:/compliance_resources”.
For win64, copy all the files under “compliance/win/lib/x64” folder to “D:/compliance_resources”.
For example, use win32 platform architecture, then the compliance resource directory should be as follows:

Linux
To build a compliance resource directory on Linux, please follow the steps below:
Create a new folder to add the resources. For example, “/root/Desktop/compliance_resources”.
Copy the whole folders of “ect“, “lang“, “var” under the “compliance/linux” to “/root/Desktop/compliance_resources”.
Add the appropriate library resource based on the platform architecture.
For linux32, copy all the files under “compliance/linux/lib/x86” folder to “/root/Desktop/compliance_resources”.
For linux64, copy all the files under “compliance/linux/lib/x64” folder to “/root/Desktop/compliance_resources”.
For example, use linux32 platform architecture, then the compliance resource directory should be as follows:
Note: For Linux platform, you should put the compliance resource directory into the search path for system shared library before running the demo, otherwise ComplianceEngine::Initialize will fail.
For example, you can use the command (export LD_LIBRARY_PATH=${LD_LIBRARY_PATH}: /root/Desktop/compliance_resources) to temporarily add the compliance resource directory to LD_LIBRARY_PATH.
Mac
For Mac platform, you can directly use the “compliance/mac” resource folder as the compliance resource directory.
Configure the demo
After building the compliance resource directory, configure the demo in the “examples\simple_demo\compliance\compliance.cpp” for compliance demo or “examples\simple_demo\preflight\preflight.cpp” for preflight demo.
This section takes Windows as an example to show you how to configure the demo in the “compliance.cpp” or “preflight.cpp” file. For Linux and Mac platforms, do the same configuration with Windows.
Specify the compliance resource directory
In the “compliance.cpp” or “preflight.cpp” file, add the compliance resource directory as follows, which will be used to initialize the compliance engine.

Note:
If you are using a trial key for Foxit PDF SDK, you do not need to authorize the compliance engine library.
If you are using an authorization key for Foxit PDF SDK, Foxit sales team will send you an extra unlock code for initializing compliance engine library. Pass the unlock code to the initialize function “ComplianceEngine::Initialize (compliance_resource_folder_path, compliance_engine_unlockcode)”.
(Optional) Set language for compliance engine (only for compliance demo)
ComplianceEngine::SetLanguage function is used to set language for compliance engine. The default language is “English”, and the supported languages are as follows:
“Czech”, “Danish”, “Dutch”, “English”, “French”, “Finnish”, “German”, “Italian”, “Norwegian”, “Polish”, “Portuguese”, “Spanish”, “Swedish”, “Chinese-Simplified”, “Chinese-Traditional”, “Japanese”, “Korean”.
For example, uncomment the ComplianceEngine::SetLanguage method, and set the language to “Chinese-Simplified”.

(Optional) Set a temp folder for compliance engine (only for compliance demo)
ComplianceEngine::SetTempFolderPath function is used to set a temp folder to store several files for proper processing (e.g verifying or converting). If no custom temp folder is set by this function, the default temp folder in system will be used.
For example, uncomment the ComplianceEngine::SetTempFolderPath method, and set the path to “D:/compliance_temp” (should be a valid path).

Run the demo
Take compliance demo as an example, once you run the demo successfully, the console will print the following by default:
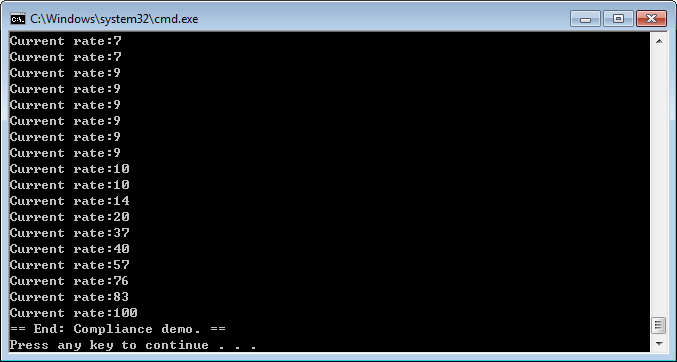
The output files are located in “examples\simple_demo\output_files\compliance” folder.
Optimization
Optimization feature can reduce the size of PDF files to save disk space and make files easier to send and store, through compressing images, deleting redundant date, discarding useless user data and so on. From version 7.0, optimization module provides functions to compress the color/grayscale/monochrome images in PDF files to reduce the size of the PDF files.
Note: To use the Optimization feature, please make sure the license key has the permission of the ‘Optimization’ module.
Example:
How to optimize PDF files by compressing the color/grayscale/monochrome images
#include "include/common/fs_common.h"
#include "include/pdf/fs_pdfdoc.h"
#include "include/pdf/fs_pdfpage.h"
#include "include/addon/optimization/fs_optimization.h"

using namespace std;
using namespace foxit;
using namespace foxit::common;
using namespace pdf;
using namespace foxit::addon;

PDFDoc doc("input_pdf_file");
ErrorCode error_code = doc.Load();
if (error_code != foxit::e_ErrSuccess) {
    printf("Error: %d\n", error_code);
    return 1;
}
Optimization_Pause pause(0,true);
addon::optimization::OptimizerSettings settings;
common::Progressive progressive =  addon::optimization::Optimizer::Optimize(doc,settings,&pause);
cout << "Optimized Start." << endl;
Progressive::State progress_state = Progressive::e_ToBeContinued;
while (Progressive::e_ToBeContinued == progress_state) {
    progress_state = progressive.Continue();
    int percent = progressive.GetRateOfProgress();
String res_string;
    res_string.Format("Optimize progress percent: %d %",percent);
std::cout<<res_string<<std::endl;
}
if(Progressive::e_Finished ==  progress_state)
{
    doc.SaveAs(L"ImageCompression_Optimized.pdf", foxit::pdf::PDFDoc::e_SaveFlagRemoveRedundantObjects);

}
cout << "Optimized Finish." << endl;
HTML to PDF Conversion
For some large HTML files or a webpage which contain(s) many contents, it is not convenient to print or archive them directly. Foxit PDF SDK provides APIs to convert the online webpage or local HTML files like invoices or reports into PDF file(s), which makes them easier to print or archive. In the process of conversion from HTML to PDF, Foxit PDF SDK also supports to create and add PDF Tags based on the organizational structure of HTML.
For HTML to PDF module, it supports HTML5, CSS3 and JavaScript.
From version 7.6, Foxit PDF SDK supports to convert HTML to PDF on Linux platform (only for x86 and x64). But for HTML to PDF engine (Linux), the version of libnss should be 3.22.
From version 8.1, the converted files (generated by HTML to PDF) can be provided in the form of file stream. If you want to use this feature, you should contact Foxit support team or sales team to get the latest engine files package.
From version 11.0, the HTML to PDF engine for Linux x86 will no longer receive updates or maintenance. The current version of the old engine will remain available for use, but new features will not be supported. In future releases, the engine may be deprecated.
This section will provide instructions on how to set up your environment for running the ‘html2pdf’ demo.
System requirements
Platform: Windows, Linux (x86 and x64), Mac
Programming Language: C, C++, Java, C#, Python, Objective-C, Node.js, Go
License Key requirement: ‘Conversion’ module permission in the license key
SDK Version: Foxit PDF SDK (C++, Java, C#, Objective-C) 7.0 or higher; Foxit PDF SDK (C) 7.4 or higher; Foxit PDF SDK (Python) 8.3 or higher; Foxit PDF SDK (Node.js) 10.0 or higher; Foxit PDF SDK (Go) 11.0
HTML to PDF engine files
Please contact Foxit support team or sales team to get the HTML to PDF engine files package.
After getting the package, extract it to a desired directory (for example, extract the package to a directory: “htmltopdf/win/” for Windows, “htmltopdf/linux/” for Linux, and “htmltopdf/mac/” for Mac).
How to run the html2pdf demo
Foxit PDF SDK provides a html2pdf demo located in the “examples\simple_demo\html2pdf” folder to show you how to use Foxit PDF SDK to convert from html to PDF.
Prepare a HTML2PDF engine directory
Before running the html2pdf demo, you should first extract engine package to a desired directory (for example, extract the package to a directory: “D:/htmltopdf/win/” for Windows), and then pass the engine file path to the API foxit::addon::conversion::Convert::FromHTML to convert html to PDF file.
Configure the demo
For html2pdf demo, you can configure the demo in the “examples\simple_demo\html2pdf\html2pdf.cpp” file, or you can configure the demo with parameters directly in a command prompt or a terminal. Following will configure the demo in “html2pdf.cpp” file on Windows for example. For Linux and Mac platforms, do the same configuration with Windows.
Specify the html2pdf engine directory
In the “html2pdf.cpp” file, add the path of the engine file “fxhtml2pdf.exe” as follows, which will be used to convert html files to PDF files.

(Optional) Specify cookies file path
Add the path of the cookies file exported from the web pages that you want to convert. For example,

Run the demo
Run the demo without parameters
Once you run the demo successfully, the console will print the following by default:

Run the demo with parameters
After building the demo successfully, open a command prompt, navigate to “examples\simple_demo\bin”, type “html2pdf_dbg_x86_vs2010.exe –help” for example to see how to use the parameters to execute the program.
For example, convert the URL web page “www.foxitsoftware.com” into a PDF with setting the page width to 900 points and the page height to 300 points:
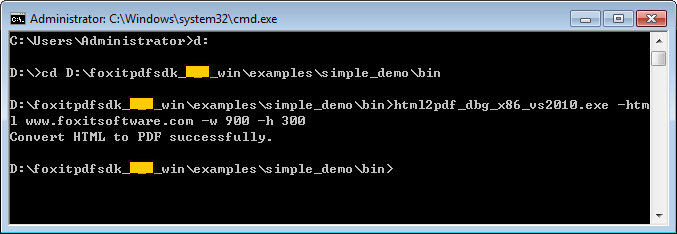
The output file is located in “examples\simple_demo\output_files\html2pdf” folder.
Parameters Description
Basic Syntax:
html2pdf_xxx <-html <The url or html path>> <-o <output pdf path>> <-engine <htmltopdf engine path>>
[-w <page width>] [-h <page height>] [-ml <margin left>] [-mr <margin right>]
[-mt <margin top>] [-mb <margin bottom>] [-r <page rotation degree>] [-mode <page mode>] [-scale <scaling mode>] [-link <whether to convert link>]
[-tag <whether to generate tag>] [-bookmarks <whether to generate bookmarks>]
[-print_background <whether to print background>]
[-optimize_tag <whether to optimize tag tree>] [-media <media style>] [-encoding <HTML encoding format>] [–render_images <Whether to render images>]
[–remove_underline_for_link <Whether to remove underline for link>]
[–headerfooter <Whether to generate headerfooter>] [-headerfooter_title <headerfooter title>] [-headerfooter_url <headerfooter url>] [-bookmark_root_name <bookmark root name>] [–resize_objects <Whether to enable the JavaScripts related resizing of the objects>]
[-cookies <cookies file path>] [-timeout <timeout>] [–help<Parameter usage>]
Note:
<> required
[ ] optional
| Parameters | Description |
| –help | The usage description of the parameters. |
| -html | The url or html file path. For examples ‘-html www.foxitsoftware.com’. |
| -o | The path of the output PDF file. |
| -engine | The path of the engine file “fxhtml2pdf.exe”. |
| -w | The page width of the output PDF file in points. |
| -h | The page height of the output PDF file in points. |
| -r | The page rotation for the output PDF file. 0 : 0 degree. 1 : 90 degree. 2 : 180 degree. 3 : 270 degree. |
| -ml | The left margin of the pages for the output PDF file. |
| -mr | The right margin of the pages for the output PDF file. |
| -mt | The top margin of the pages for the output PDF file. |
| -mb | The bottom margin of the pages for the output PDF file. |
| -mode | The page mode for the output PDF file. 0 : Single page mode. 1 : Multiple pages mode. |
| -scale | The scaling mode. 0 : No need to scale pages. 1 : Scale pages. 2 : Enlarge page. |
| -link | Whether to convert links. ‘yes’ : Convert links. ‘no’ : No need to convert links. |
| -tag | Whether to generate tag. ‘yes’ : Generate tag. ‘no’ : No need to generate tag. |
| -bookmarks | Whether to generate bookmarks. ‘yes’ : Generate bookmarks . ‘no’ : No need to generate bookmarks. |
| -print_background | Whether to print background. ‘yes’ : Print bookmarks . ‘no’ : No need to print bookmarks. |
| -optimize_tag | Whether to optimize tag tree. ‘yes’ : Optimize tag tree . ‘no’ : No need to optimize tag tree. |
| -media | The media style. 0 : Screen media style. 1 : Print media style. |
| -encoding | The HTML encoding format. 0 : Auto encoding . 1-73 : Other encodings. |
| -render_images | Whether to render images. ‘yes’ : Render images. ‘no’ : No need to render images. |
| -remove_underline_for_link | Whether to remove underline for link. ‘yes’ : Remove underline for link. ‘no’ : No need to remove underline for link. |
| -headerfooter | Whether to generate headerfooter. ‘yes’ : Generate headerfooter. ‘no’ : No need to generate headerfooter. |
| -headerfooter_title | The headerfooter title. |
| -headerfooter_url | The headerfooter url. |
| -bookmark_root_name | The bookmark root name. |
| -resize_objects | Whether to enable the JavaScripts related resizing of the objects during rendering process. ‘yes’ : Enable. ‘no’ : Disable. |
| -cookies | The path of the cookies file exported from a URL that you want to convert. |
| -timeout | The timeout of loading webpages. |
How to work with Html2PDF API
#include "include/addon/conversion/fs_convert.h"

foxit::addon::conversion::HTML2PDFSettingData pdf_setting_data;
pdf_setting_data.is_convert_link = true;
pdf_setting_data.is_generate_tag = true;
pdf_setting_data.to_generate_bookmarks = true;
pdf_setting_data.rotate_degrees = foxit::common::e_Rotation0;
pdf_setting_data.page_height = 640;
pdf_setting_data.page_width = 900;
pdf_setting_data.page_mode = foxit::addon::conversion::HTML2PDFSettingData::e_PageModeSinglePage;
pdf_setting_data.scaling_mode = foxit::addon::conversion::HTML2PDFSettingData::e_ScalingModeScale;
pdf_setting_data.to_print_background = true;
pdf_setting_data.to_optimize_tag_tree = false;
pdf_setting_data.media_style = foxit::addon::conversion::HTML2PDFSettingData::e_MediaStyleScreen;
...

foxit::addon::conversion::Convert::FromHTML(url_or_html, engine_path, cookies_path, pdf_setting_data, output_path, time_out);
How to get HTML data from stream and convert it to a PDF file
Defines a FileRead class inherited from ReaderCallback used to get html data from stream or memory. And defines a FileWriter class inherited from WriterCallback used to do file writing. For the implementations of FileRead and FileWriter classes, please refer to the html2pdf demo in the “examples\simple_demo\html2pdf” folder.
Get html data from stream and set resources related to source html.
Call the foxit::addon::conversion::Convert::FromHTML function to convert it to a PDF file.
#include "include/common/fs_common.h"
#include "include/pdf/fs_pdfdoc.h"
#include "include/addon/conversion/fs_convert.h"


// get HTML data from stream
if (isfilestreamload) {
   try {
     foxit::addon::conversion::HTML2PDFSettingData pdf_setting_data;
     pdf_setting_data.page_height = 650;
     pdf_setting_data.page_width = 950;
     pdf_setting_data.is_to_page_scale = false;
     pdf_setting_data.page_margin = RectF(18, 18, 18, 18);
     pdf_setting_data.is_convert_link = true;
     pdf_setting_data.rotate_degrees = foxit::common::e_Rotation0;
     pdf_setting_data.is_generate_tag = true;

     foxit::addon::conversion::HTML2PDFSettingData::HTML2PDFPageMode mode =
     foxit::addon::conversion::HTML2PDFSettingData::e_PageModeSinglePage;
     pdf_setting_data.to_generate_bookmarks = true;
     foxit::addon::conversion::HTML2PDFSettingData::HTML2PDFScalingMode scale =
     foxit::addon::conversion::HTML2PDFSettingData::e_ScalingModeNone;
     pdf_setting_data.encoding_format =
     foxit::addon::conversion::HTML2PDFSettingData::e_EncodingFormatDefault;
     pdf_setting_data.to_render_images = true;
     pdf_setting_data.to_remove_underline_for_link = false;
     pdf_setting_data.to_set_headerfooter = false;
     pdf_setting_data.headerfooter_title = L"";
     pdf_setting_data.headerfooter_url = L"";
     pdf_setting_data.bookmark_root_name = L"abcde";
     pdf_setting_data.to_resize_objects = true;
     pdf_setting_data.to_print_background = false;
     pdf_setting_data.to_optimize_tag_tree = false;
     pdf_setting_data.media_style = foxit::addon::conversion::HTML2PDFSettingData::e_MediaStyleScreen;
     pdf_setting_data.to_load_active_content = false;
     WString cookies = L"";
     WString output_path = output_directory + L"html2pdf_filestream_result.pdf";
     FileWriter* filewrite = new FileWriter();
     filewrite->LoadFile(String::FromUnicode(output_path));
     // "htmlfile" is the path of the html file to be loaded. For example: "C:/aaa.html". The method of "FromHTML" will load this file as a stream.
     WString htmlfile = L"";
     FileReader* filereader = new FileReader();
     filereader->LoadFile(htmlfile);

     foxit::addon::conversion::HTML2PDFRelatedResourceArray html2PDFRelatedResourceArray;
     foxit::addon::conversion::HTML2PDFRelatedResource html2PDFRelatedResource;

     //"htmlfilepng" is the path of the png resource file to be loaded. For example: "C:/aaa.png". set "htmlfilepng" in the related_resource_file of HTML2PDFRelatedResource.
     WString htmlfilepng = L"";
     FileReader* filereader1 = new FileReader();
     filereader1->LoadFile(htmlfilepng);
     html2PDFRelatedResource.related_resource_file = filereader1;
     //"relativefilepath" is  the resource file's relative path. For example: "./aaa.png".
     WString relativefilepath = L"";
     html2PDFRelatedResource.resource_file_relative_path = relativefilepath;
     html2PDFRelatedResourceArray.Add(html2PDFRelatedResource);

     foxit::addon::conversion::Convert::FromHTML(filereader, html2PDFRelatedResourceArray, engine_path,
     NULL, pdf_setting_data, filewrite, 30);
     cout << "Convert HTML to PDF successfully by filestream." << endl;
   } catch (const Exception& e) {
     cout << e.GetMessage() << endl;
     err_ret = 1;
   } catch (...) {
      cout << "Unknown Exception" << endl;
      err_ret = 1;
   }
Office to PDF Conversion with third-party engines
From version 7.3, Foxit PDF SDK provides APIs to convert Microsoft Office documents (Word and Excel) into professional-quality PDF files on Windows platform.
From version 7.4, Foxit PDF SDK also supports to convert PowerPoint documents into PDF files on Windows platform.
From version 8.4, Foxit PDF SDK provides APIs to convert Microsoft Office documents (Word, Excel and PowerPoint) into professional-quality PDF files on Linux platform (x86, x64 and armv8).
For using this feature, please note that:
Make sure that Microsoft Office 2007 version or higher is already installed on your Windows system.
Before converting Excel to PDF, make sure that the default Microsoft virtual printer is already set on your Windows system.
For Linux x86/x64, make sure that LibreOffice is already installed on your Linux system.
Note: When using LibreOffice 7.0 or a higher version, if you encounter an error like “An unknown error has occurred”, you can try to set an environment variable before running the program as follows:
“export URE_BOOTSTRAP=vnd.sun.star.pathname:/opt/libreoffice7.x/program/fundamentalrc”
Where, ‘x’ represents the LibreOffice version.
For Linux armv8, make sure that kingsoft wps-office is already installed on your Linux system.
System requirements
Platform: Windows, Linux (x86, x64 and armv8)
Programming Language: C, C++, Python, Java, C#, Node.js, Go
License Key requirement: ‘Conversion’ module permission in the license key
SDK Version: Word and Excel (Foxit PDF SDK (C++, C#, Java) 7.3 or higher; Foxit PDF SDK (C) 7.4 or higher; Foxit PDF SDK (Python) 8.3 or higher); PowerPoint (Foxit PDF SDK (C, C++, C#, Java) 7.4 or higher; Foxit PDF SDK (Python) 8.3 or higher); Word/Excel/PowerPoint (Foxit PDF SDK (Node.js) 10.0 or higher); Word/Excel/PowerPoint (Foxit PDF SDK (Go) 11.0)
Example:
Note:
For Linux x86 and x64, the parameter “engine_path” in the following sample codes represents the path of LibreOffice engine. To get the installed path of LibreOffice, you can input the command “locate soffice.bin“ in a terminal, then the path will be shown, for example, “/usr/lib/libreoffice/program/soffice.bin“. Then the value of “engine_path” parameter is set to “/usr/lib/libreoffice/program”.
For Linux armv8, the parameter “engine_path” in the following sample code represents the path of WPS engine (librpcwpsapi.so). Find the directory where “librpcwpsapi.so“ is located. For example, the directory is “/opt/kingsoft/wps-office/office6”. Then the value of “engine_path” parameter is set to “/opt/kingsoft/wps-office/office6”.
How to convert Word to PDF
#include "include/addon/conversion/fs_convert.h"
…
// Make sure that SDK has already been initialized successfully.

WString word_file_path = L"test.doc";
WString output_path = L"saved.pdf";

// Use default Word2PDFSettingData values.
foxit::addon::conversion::Word2PDFSettingData word_convert_setting_data;
#if defined(_WIN32) || defined(_WIN64)
foxit::addon::conversion::Convert::FromWord(word_file_path, L"", output_path, word_convert_setting_data);
#else
foxit::addon::conversion::Convert::FromWord(word_file_path, L"", output_path, engine_path, word_convert_setting_data);
#endif
How to convert Excel to PDF
#include "include/addon/conversion/fs_convert.h"
…
// Make sure that SDK has already been initialized successfully.

WString excel_file_path = L"test.xls";
WString output_path = L"saved.pdf";

// Use default Excel2PDFSettingData values.
foxit::addon::conversion::Excel2PDFSettingData excel_convert_setting_data;
#if defined(_WIN32) || defined(_WIN64)
foxit::addon::conversion::Convert::FromExcel(excel_file_path, L"", output_path, excel_convert_setting_data);
#else
foxit::addon::conversion::Convert::FromExcel(excel_file_path, L"", output_path, engine_path, excel_convert_setting_data);
#endif
How to convert PowerPoint to PDF
#include "include/addon/conversion/fs_convert.h"

// Make sure that SDK has already been initialized successfully.

WString ppt_file_path = L"test.ppt";
WString output_path = L"saved.pdf";

// Use default PowerPoint2PDFSettingData values.
foxit::addon::conversion::PowerPoint2PDFSettingData ppt_convert_setting_data;
#if defined(_WIN32) || defined(_WIN64)
foxit::addon::conversion::Convert::FromPowerPoint(ppt_file_path, L"", output_path, ppt_convert_setting_data);
#else
foxit::addon::conversion::Convert::FromPowerPoint(ppt_file_path, L"", output_path, engine_path,  ppt_convert_setting_data);
#endif
Office to PDF Conversion with Foxit’s self-developed engines
From version 10.1, Foxit PDF SDK offers the capability to convert Microsoft Office documents (Word, Excel and PowerPoint) into professional-quality PDF files with Foxit’s self-developed engines. This feature is available through the Foxit PDF Conversion SDK on Windows platform.
From version 11.0, Foxit PDF SDK extends support for Office-to-PDF conversion with Foxit’s self-developed engines to Linux x86/x64 platforms.
System requirements
Platform: Windows, Linux (x86, and x64)
Programming Language: C, C++, Python, Java, C#, Node.js, Go
License Key requirement: ‘Office2PDF’ module permission in the license key
SDK Version: Foxit PDF SDK for Windows 10.1 or higher; Foxit PDF SDK for Linux x86/x64 11.0
Office to PDF resource files (Foxit PDF Conversion SDK )
Please contact Foxit support team or sales team to get the Foxit PDF Conversion SDK (C++).
After getting Foxit PDF Conversion SDK package, extract it to a desired directory, for example, extract the package to a directory: “D:/foxitpdfconversionsdk_*_win/” for Windows, and “/home/user/Desktop/foxitpdfconversionsdk_*_Linux/” for Linux x86/x64.
How to run the office2pdf demo using Foxit PDF Conversion SDK
Before running the office2pdf demo in the “examples\simple_demo\office2pdf” folder using Foxit PDF Conversion SDK, you should first add the Foxit PDF Conversion SDK library in the demo code, for example:
// If you want to convert office files to PDF whitout other third-party engines, you can use the Office2PDF module.
WString library_path = L"D:/foxitpdfconversionsdk_*_win/lib/fpdfconversionsdk_win32.dll";
Then, specify the office2pdf resource data files:
// A valid path of a folder which contains resource data files.
office2pdf_setting_data.resource_folder_path = L"D:/foxitpdfconversionsdk_*_win/res/office2pdf";
Finally, run the demo following the steps as the other demos.
How to convert office files to PDF with Foxit’s self-developed engines
#include "include/common/fs_common.h"
#include "include/addon/conversion/office2pdf/fs_office2pdf.h"
...

// If you want to convert office files to PDF whitout other third-party engines, you can use the Office2PDF module.
WString library_path = L""; // Path of Foxit PDF Conversion SDK library, please ensure the path is valid.
// Initialize the Office2PDF module.
foxit::addon::conversion::office2pdf::Office2PDF::Initialize(library_path);
// Use default Office2PDFSettingData values.
foxit::addon::conversion::office2pdf::Office2PDFSettingData office2pdf_setting_data;
// A valid path of a folder which contains resource data files.
office2pdf_setting_data.resource_folder_path = L"";
// Conver Excel file to PDF file.
output_path = output_directory + L"word2pdf_result_foxit.pdf";
foxit::addon::conversion::office2pdf::Office2PDF::ConvertFromWord(word_file_path, L"", output_path, office2pdf_setting_data);
// Conver Excel file to PDF file.
output_path = output_directory + L"excel2pdf_result_foxit.pdf";
foxit::addon::conversion::office2pdf::Office2PDF::ConvertFromExcel(excel_file_path, L"", output_path, office2pdf_setting_data);
// Conver PowerPoint file to PDF file.
output_path = output_directory + L"ppt2pdf_result_foxit.pdf";
foxit::addon::conversion::office2pdf::Office2PDF::ConvertFromPowerPoint(ppt_file_path, L"", output_path, office2pdf_setting_data);
// Release the Office2PDF module.
foxit::addon::conversion::office2pdf::Office2PDF::Release();
Output Preview
From version 7.4, Foxit PDF SDK supports output preview feature which can preview color separations and test different color profiles.
Note: Currently, the output preview feature is not supported on the Linux ARM platfrom.
System requirements
Platform: Windows, Linux (x86 and x64), Mac (x64)
Programming Language: C, C++, Java, C#, Python, Objective-C, Node.js, Go
License Key requirement: valid license key
SDK Version: Foxit PDF SDK (C, C++, Java, C#, Objective-C) 7.4 or higher; Foxit PDF SDK (Python) 8.3 or higher; Foxit PDF SDK (Node.js) 10.0 or higher; Foxit PDF SDK (Go) 11.0
How to run the output preview demo
Before running the output preview demo in the “examples\simple_demo\output_preview” folder, you should first set the folder path of “res\icc_profile” in the SDK package to the variable default_icc_folder_path. For example:
// "default_icc_folder_path" is the path of the folder which contains default icc profile files. Please refer to Developer Guide for more details.
WString default_icc_folder_path = L"E:/foxitpdfsdk_X_X_win/res/icc_profile";
Then, run the demo following the steps as the other demos.
How to do output preview using Foxit PDF SDK
#include "include/common/fs_common.h"
#include "include/pdf/fs_outputpreview.h"

// Make sure that SDK has already been initialized successfully.

// Set folder path which contains default icc profile files.
Library::SetDefaultICCProfilesPath(default_icc_folder_path);

// Load a PDF document; Get a PDF page and parse it.
// Prepare a Renderer object and the matrix for rendering.

OutputPreview output_preview(pdf_doc);
WString simulation_icc_file_path = input_path + L"icc_profile/USWebCoatedSWOP.icc";
output_preview.SetSimulationProfile(simulation_icc_file_path);
output_preview.SetShowType(OutputPreview::e_ShowAll);
StringArray process_plates = output_preview.GetPlates(OutputPreview::e_ColorantTypeProcess);
StringArray spot_plates = output_preview.GetPlates(OutputPreview::e_ColorantTypeSpot);
// Set check status of process plate to be true, if there's any process plate.
for (int i = 0; i < (int)process_plates.GetSize(); i++) {
    output_preview.SetCheckStatus(process_plates[i], true);
}
// Set check status of spot plate to be true, if there's any spot plate.
for (int i = 0; i < (int)spot_plates.GetSize(); i++) {
    output_preview.SetCheckStatus(spot_plates[i], true);
}

// Generate preview bitmap
Bitmap preview_bitmap = output_preview.GeneratePreviewBitmap(pdf_page, display_matrix, renderer);
Combination
Combination feature is used to combine several PDF files into one PDF file.
How to combine several PDF files into one PDF file
#include "include/common/fs_common.h"
#include "include/pdf/fs_combination.h"

// Make sure that SDK has already been initialized successfully.

CombineDocumentInfoArray info_array;
info_array.Add(CombineDocumentInfo(input_path + L"AboutFoxit.pdf", L""));
info_array.Add(CombineDocumentInfo(input_path + L"Annot_all.pdf", L""));
info_array.Add(CombineDocumentInfo(input_path + L"SamplePDF.pdf", L""));

WString savepath = output_directory + L"Test_Combined.pdf";
uint32 option = Combination::e_CombineDocsOptionBookmark | Combination::e_CombineDocsOptionAcroformRename |
    Combination::e_CombineDocsOptionStructrueTree | Combination::e_CombineDocsOptionOutputIntents |
    Combination::e_CombineDocsOptionOCProperties | Combination::e_CombineDocsOptionMarkInfos |
    Combination::e_CombineDocsOptionPageLabels | Combination::e_CombineDocsOptionNames |
    Combination::e_CombineDocsOptionObjectStream | Combination::e_CombineDocsOptionDuplicateStream;

Progressive progress = Combination::StartCombineDocuments(savepath, info_array, option);
Progressive::State progress_state = Progressive::e_ToBeContinued;
while (Progressive::e_ToBeContinued == progress_state) {
    progress_state = progress.Continue();
}
PDF Portfolio
PDF portfolios are a combination of files with different formats. Portfolio file itself is a PDF document, and files with different formats can be embedded into this kind of PDF document.
System requirements
Platform: Windows, Linux, Mac
Programming Language: C, C++, Java, C#, Python, Objective-C, Node.js, Go
License Key requirement: valid license key
SDK Version: Foxit PDF SDK (C, C++, Java, C#, Objective-C) 7.6 or higher; Foxit PDF SDK (Python) 8.3 or higher; Foxit PDF SDK (Node.js) 10.0 or higher; Foxit PDF SDK (Go) 11.0
Example:
How to create a new and blank PDF portfolio
#include "include/common/fs_common.h"
#include "include/pdf/fs_portfolio.h"
#include "include/pdf/fs_pdfdoc.h"

using namespace foxit;
using namespace foxit::common;
using namespace pdf;
using namespace portfolio;

// Make sure that SDK has already been initialized successfully.

Portfolio new_portfolio = Portfolio::CreatePortfolio();

// Set properties, add file/folder node to the new portfolio.
...

// Get portfolio PDF document object.
PDFDoc portfolio_pdf_doc = new_portfolio.GetPortfolioPDFDoc();
How to create a Portfolio object from a PDF portfolio
#include "include/common/fs_common.h"
#include "include/pdf/fs_portfolio.h"
#include "include/pdf/fs_pdfdoc.h"

using namespace foxit;
using namespace foxit::common;
using namespace pdf;
using namespace portfolio;

// Make sure that SDK has already been initialized successfully.

PDFDoc portfolio_pdf_doc("portfolio.pdf");
ErrorCode error_code = portfolio_pdf_doc.Load();
if (foxit::e_ErrSuccess == error_code) {
    if (portfolio_pdf_doc.IsPortfolio()) {
        Portfolio existed_portfolio = Portfolio::CreatePortfolio(portfolio_pdf_doc);
    }
}
How to get portfolio nodes
#include "include/common/fs_common.h"
#include "include/pdf/fs_portfolio.h"
#include "include/pdf/fs_pdfdoc.h"
#include "include/pdf/fs_filespec.h"

using namespace foxit;
using namespace foxit::common;
using namespace pdf;
using namespace portfolio;

// Make sure that SDK has already been initialized successfully.

// Portfolio object has been created, assume it is named "portfolio".
...

PortfolioNode root_node = portfolio.GetRootNode();
PortfolioFolderNode root_folder(root_node);
PortfolioNodeArray sub_nodes = root_folder.GetSortedSubNodes();
for (size_t index = 0; index < sub_nodes.GetSize(); index++) {
    PortfolioNode node = sub_nodes[index];
    switch (node.GetNodeType()) {
        case PortfolioNode::e_TypeFolder: {
            PortfolioFolderNode folder_node(node);
            // Use PortfolioFolderNode's getting method to get some properties.
            ...
            PortfolioNodeArray sub_nodes_2 = folder_node.GetSortedSubNodes();
            ...
            break;
        }
        case PortfolioNode::e_TypeFile: {
            PortfolioFileNode file_node(node);
            // Get file specification object from this file node, and then get/set information from/to this file specification object.
            FileSpec file_spec = file_node.GetFileSpec();
            ...
            break;
        }
    }
}
How to add file node or folder node
#include "include/common/fs_common.h"
#include "include/pdf/fs_portfolio.h"
#include "include/pdf/fs_pdfdoc.h"
#include "include/pdf/fs_filespec.h"

using namespace foxit;
using namespace foxit::common;
using namespace pdf;
using namespace portfolio;

// Make sure that SDK has already been initialized successfully.

// Portfolio object has been created, and the root folder node has been retrieved, assume it is named "root_folder".
...

// Add file from path.
wchar_t* path_to_a_file = L"directory/Sample.txt";
PortfolioFileNode new_file_node_1 = root_folder.AddFile(path_to_a_file);

// User can update properties of file specification for new_file_node_1 if necessary.
...

// Add file from MyStreamCallback which is inherited from StreamCallback and implemented by user.
MyStreamCallback* my_stream_callback = new MyStreamCallback();
PortfolioFileNode new_file_node_2 = root_folder.AddFile(my_stream_callback, L"file_name");

// Please get file specification of new_file_node_2 and update properties of the file specification by its setting methods.
...

// Add a loaded PDF file.
// Open and load a PDF file, assume it is named "test_pdf_doc".
...

PortfolioFileNode new_file_node_3 = root_folder.AddPDFDoc(test_pdf_doc, L"pdf_file_name");

// User can update properties of file specification for new_file_node_3 if necessary.
...

// Add a sub folder in root_folder.
PortfolioFolderNode new_sub_foldernode = root_folder.AddSubFolder(L"Sub Folder-1");

// User can add file or folder node to new_sub_foldernode.
...
How to remove a node
#include "include/common/fs_common.h"
#include "include/pdf/fs_portfolio.h"
#include "include/pdf/fs_pdfdoc.h"

using namespace foxit;
using namespace foxit::common;
using namespace pdf;
using namespace portfolio;

// Make sure that SDK has already been initialized successfully.

// Remove a child folder node from its parent folder node.
parent_folder_node.RemoveSubNode(child_folder_node);
// Remove a child file node from its parent folder node.
parent_folder_node.RemoveSubNode(child_file_node);
Table Maker
From version 8.4, Foxit PDF SDK supports to add table to PDF files.
System requirements
Platform: Windows, Mac, Linux
Programming Language: C, C++, Java, C#, Python, Objective-C, Node.js, Go
License Key requirement: ‘TableMaker’ module permission in the license key
SDK Version: Foxit PDF SDK (C, C++, C#, Java, Python, Objective-C) 8.4 or higher; Foxit PDF SDK (Node.js) 10.0 or higher; Foxit PDF SDK (Go) 11.0
How to add table to a PDF document
Foxit PDF SDK provides an electronictable demo located in the “examples\simple_demo\electronictable” folder to show you how to use Foxit PDF SDK to add table to PDF document.
#include "include/common/fs_common.h"
#include "include/pdf/annots/fs_annot.h"
#include "include/pdf/fs_pdfdoc.h"
#include "include/pdf/fs_pdfpage.h"
#include "include/addon/tablegenerator/fs_tablegenerator.h"

using namespace foxit;
using namespace foxit::common;
using namespace pdf;
using namespace foxit::addon::tablegenerator;

...
// Add a spreadsheet with 4 rows and 3 columns
int index = 0;
TableCellDataArray cell_array;
for (int row = 0; row < 4; row++) {
  TableCellDataColArray col_array;
  for (int col = 0; col < 3; col++) {
     RichTextStyle style = GetTableTextStyle(index);
     WString cell_text = GetTableCellText(index++);
     TableCellData cell_data(style, cell_text, foxit::common::Image((FS_HANDLE)NULL), RectF());
     col_array.Add(cell_data);
  }
  cell_array.Add(col_array);
}
FX_FLOAT page_width = pdf_page.GetWidth();
FX_FLOAT page_height = pdf_page.GetHeight();

TableBorderInfo outside_border_left;
outside_border_left.line_width = 1;
TableBorderInfo outside_border_right;
outside_border_right.line_width = 1;
TableBorderInfo outside_border_top;
outside_border_top.line_width = 1;
TableBorderInfo outside_border_bottom;
outside_border_bottom.line_width = 1;
TableBorderInfo inside_border_row;
inside_border_row.line_width = 1;
TableBorderInfo inside_border_col;
inside_border_col.line_width = 1;
TableData data(RectF(100, 550, page_width - 100, page_height - 100), 4, 3, outside_border_left, outside_border_right, outside_border_top, outside_border_bottom, inside_border_row, inside_border_col, TableCellIndexArray(), FloatArray(), FloatArray());
TableGenerator::AddTableToPage(pdf_page, data, cell_array);
...
Accessibility
From version 8.4, Foxit PDF SDK supports to tag PDF files.
System requirements
Platform: Windows, Mac, Linux
Programming Language: C, C++, Java, C#, Python, Objective-C, Node.js, Go
License Key requirement: ‘Accessibility’ module permission in the license key
SDK Version: Foxit PDF SDK (C, C++, C#, Java, Python, Objective-C) 8.4 or higher; Foxit PDF SDK (Node.js) 10.0 or higher; Foxit PDF SDK (Go) 11.0
How to tag a PDF document
Foxit PDF SDK provides a taggedpdf demo located in the “examples\simple_demo\taggedpdf” folder to show you how to use Foxit PDF SDK to tag a PDF document.
#include "include/common/fs_common.h"
#include "include/pdf/fs_pdfdoc.h"
#include "include/pdf/fs_pdfpage.h"
#include "include/addon/accessibility/fs_taggedpdf.h"

using namespace std;
using namespace foxit;
using namespace foxit::common;
using foxit::common::Library;
using namespace pdf;
using namespace foxit::addon::accessibility;
...
PDFDoc pdfDoc(input_file);
pdfDoc.Load();
TaggedPDF taggedpdf(pdfDoc);
Progressive progressive = taggedpdf.StartTagDocument(NULL);
Progressive::State progressState = Progressive::e_ToBeContinued;
while (Progressive::e_ToBeContinued == progressState)
 progressState = progressive.Continue();
pdfDoc.SaveAs(output_file_path);
...
PDF to Office Conversion
Foxit PDF SDK provides APIs to convert PDF files to MS office suite formats while maintaining the layout and format of your original documents on Windows and Linux platforms.
System requirements
Platform: Windows, Linux
Programming Language: C, C++, Java, Python, C#, Node.js, Go
License Key requirement: ‘PDF2Office’ module permission in the license key
SDK Version: Foxit PDF SDK for Windows (C, C++, Java, Python, C#) 9.0 or higher; Foxit PDF SDK for Linux (C, C++, Java, Python, C#) 9.1 or higher; Foxit PDF SDK (Node.js) 10.0 or higher; Foxit PDF SDK (Go) 11.0
PDF to Office resource files
Please contact Foxit support team or sales team to get the PDF to Office resource files package naming Foxit PDF Conversion SDK (C++).
The required Foxit PDF Conversion SDK versions for different Foxit PDF SDK versions are shown in the table below.
| Foxit PDF SDK Version | Required Foxit PDF Conversion SDK Version |
| 9.0/9.1 | 1.4 |
| 9.2 | 1.5 |
| 10.0 | 2.0 |
| 10.1 | 2.1 |
| 11.0 | 3.0 |
After getting Foxit PDF Conversion SDK package, extract it to a desired directory (for example, extract the package to a directory: “/foxitpdfconversionsdk_*_win/” for Windows, “/foxitpdfconversionsdk_*_Linux/” for Linux x86/x64, and “/foxitpdfconversionsdk_*_Linux_arm/” for Linux armv7/armv8), and then you can see the resource files for PDF to Office are as follows:
For Windows:
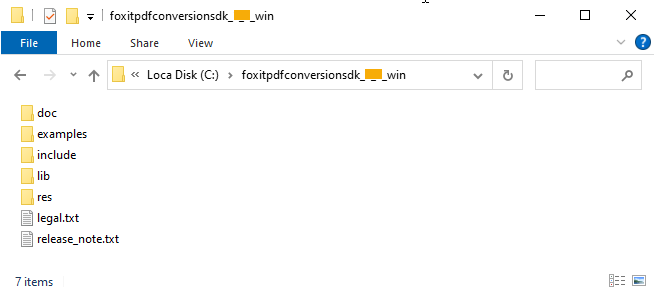
For Linux x86/x64:
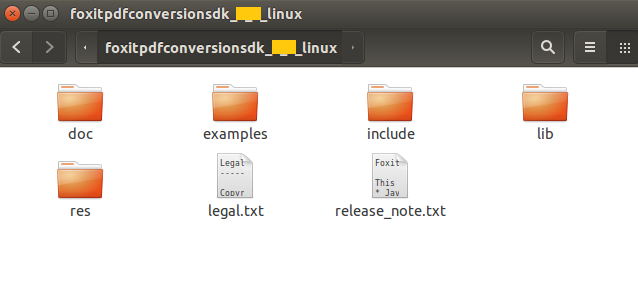
For Linux armv7/armv8:

How to run the pdf2office demo
Foxit PDF SDK provides a pdf2office demo located in the “examples\simple_demo\pdf2office” folder to show you how to use Foxit PDF SDK to convert PDF files to MS office suite formats.
Prepare a PDF2Office resource directory
Before running the pdf2office demo, you should first extract the PDF to Office resource files (Foxit PDF Conversion SDK) package to a desired directory (for example, extract the package to a directory: “C:/foxitpdfconversionsdk_*_win/” for Windows), and then pass the engine file located in “lib” folder to the API PDF2Office::Initialize to initialize PDF2Office engine.
Configure the demo
For pdf2office demo, you can configure the demo in the “examples\simple_demo\pdf2office\pdf2office.cpp” file. Following will configure the demo in “pdf2office.cpp” file on Windows for example. For Linux platform, do the similar configuration with Windows.
Specify the pdf2office engine directory
In the “pdf2office.cpp” file, add the path of the engine file “pdf2office” as follows, which will be used to convert PDF files to office files.
// Please ensure the path is valid.
PDF2Office::Initialize(L"C:/foxitpdfconversionsdk_*_win/lib/fpdfconversionsdk_win32.dll");
(Optional) Specify whether to enable machine learning-based recognition functionality
setting_data.enable_ml_recognition = false;
(Optional) Specify the page range to be converted
setting_data.page_range = Range();
(Optional) Specify whether to convert the comments in the PDF documents
setting_data.include_pdf_comments = true;
(Optional) Specify whether to retain the page layout for PDF to Word conversion
setting_data.word_setting_data.enable_retain_page_layout = false;
Note: Starting from version 10.1, the PDF to Office Conversion engine supports a timeout parameter. This parameter defines the maximum time allowed for the conversion process to complete. If the conversion exceeds the specified time, it will be terminated. The timeout must be a non-negative value. A value of 0 disables the timeout, allowing the conversion to proceed without any time limitation.
Run the demo
Once you run the demo successfully, the console will print the following by default:

The output files are located in “examples\simple_demo\output_files\pdf2office” folder.
How to work with PDF2office API
#include "include/common/fs_common.h"
#include "include/addon/conversion/pdf2office/fs_pdf2office.h"

using namespace std;
using namespace foxit;
using namespace foxit::common;
using namespace foxit::common::file;
using foxit::common::Library;
using namespace addon::conversion::pdf2office;

class CustomConvertCallback : public ConvertCallback {
public:
    CustomConvertCallback() {}
    ~CustomConvertCallback() {}
    virtual bool NeedToPause() {
        return true;
    }

    virtual void ProgressNotify(int converted_count, int total_count) {}
};

CustomConvertCallback callback;
Progressive progressive = PDF2Office::StartConvertToWord(input_path + L"word.pdf", NULL, output_directory + L"pdf2word_result.docx", setting_data, &callback);
if (progressive.GetRateOfProgress() != 100) {
    Progressive::State state = Progressive::e_ToBeContinued;
    while (Progressive::e_ToBeContinued == state) {
        state = progressive.Continue();
    }
}
cout << "Convert PDF file to Word format file with path." << endl;

// Convert PDF file to Excel format file.
progressive = PDF2Office::StartConvertToExcel(input_path + L"excel.pdf", NULL, output_directory + L"pdf2excel_result.xlsx", setting_data);
if (progressive.GetRateOfProgress() != 100) {
    Progressive::State state = Progressive::e_ToBeContinued;
    while (Progressive::e_ToBeContinued == state) {
        state = progressive.Continue();
    }
}
cout << "Convert PDF file to Excel format file with path." << endl;

// Convert PDF file to PowerPoint format file.
progressive = PDF2Office::StartConvertToPowerPoint(input_path + L"powerpoint.pdf", NULL, output_directory + L"pdf2powerpoint_result.pptx", setting_data);
if (progressive.GetRateOfProgress() != 100) {
    Progressive::State state = Progressive::e_ToBeContinued;
    while (Progressive::e_ToBeContinued == state) {
        state = progressive.Continue();
    }
}
cout << "Convert PDF file to PowerPoint format file with path." << endl;
DWG to PDF Conversion
From version 10.0, Foxit PDF SDK supports to convert DWG files to PDF files. If you want to use this feature, you should contact Foxit support team or sales team to get the engine files package.
System requirements
Platform: Windows, Linux (x86 and x64), Mac(x64)
Programming Language: C, C++, Java, C#, Python, Objective-C, Node.js, Go
License Key requirement: ‘DWG2PDF’ module permission in the license key
SDK Version: Foxit PDF SDK (C, C++, Java, C#, Python, Objective-C, Node.js) 10.0 or higher; Foxit PDF SDK (Go) 11.0
DWG To PDF engine files
Please contact Foxit support team or sales team to get the DWG to PDF engine files package.
After getting the package, extract it to the desired directory. For example, extract the package to a directory: “D:/dwgtopdf/win” for Windows, “dwgtopdf/linux” for Linux, and “dwgtopdf/mac” for Mac.
How to run the dwg2pdf demo
Before running the dwg2pdf demo in the “examples\simple_demo\dwg2pdf” folder, you should first add the dwg2pdf engine file in the demo code, for example:
// "engine_path" is the path of the engine file "dwg2pdf" which is used to convert dwg to pdf. Please refer to Developer Guide for more details.
WString engine_path = L"D:/dwgtopdf/win";
Note: For Linux (x86 and x64) and Mac x64, before running the demo, you should configure environment variables.
For Linux x86 and x64, add the path of the dwg2pdf engine file to LD_LIBRARY_PATH environment variable.
export LD_LIBRARY_PATH=/dwgtopdf/linux:$LD_LIBRARY_PATH
For Mac x64, add the path of the dwg2pdf engine file to DWG_ENGINE_PATH environment variable.
export DWG_ENGINE_PATH=/dwgtopdf/mac
Then, run the demo following the steps as the other demos.
How to convert DWG to PDF
#include "include/addon/conversion/fs_convert.h"
…
foxit::addon::conversion::DWG2PDFSettingData pdf_setting_data;
pdf_setting_data.export_flags = foxit::addon::conversion::DWG2PDFSettingData::e_FlagEmbededTTF; pdf_setting_data.export_hatches_type = foxit::addon::conversion::DWG2PDFSettingData:: e_DWG2PDFExportHatchesTypeBitmap;
pdf_setting_data.other_export_hatches_type = foxit::addon::conversion::DWG2PDFSettingData:: e_DWG2PDFExportHatchesTypeBitmap;
pdf_setting_data.gradient_export_hatches_type = foxit::addon::conversion::DWG2PDFSettingData:: e_DWG2PDFExportHatchesTypeBitmap;
pdf_setting_data.searchable_text_type = foxit::addon::conversion::DWG2PDFSettingData:: e_DWG2PDFSearchableTextTypeNoSearch;
pdf_setting_data.is_active_layout = false; pdf_setting_data.paper_width = 640;
pdf_setting_data.paper_heigh = 900;
...
foxit::addon::conversion::Convert::FromDWG(engine_path, dwg_file_path, output_path, pdf_setting_data);
OFD
OFD (Open Fixed-layout Document) is an open layout document standard formulated by the Chinese government. It is mainly used for scenarios such as electronic official documents, archival storage and exchange. Its purpose is to provide a document format that does not depend on specific software or hardware, ensuring the consistency of document display effects across different devices and platforms.
OFD files not only contain structured data but also support rich graphic elements. They can precisely define the layout and content of the document, including text, images, vector graphics, annotations, etc. The characteristics of the XML format make it easy to understand, process and render, greatly enhancing the interoperability of the document.
OFD files have significant advantages in document integrity, security, and interoperability:
Document Authenticity: Supports digital signatures to ensure reliable document sources.
Information Security: Supports encryption to protect sensitive information from unauthorized access.
Interactivity: Supports interactive features such as form fields and digital signatures, enhancing the user experience.
To handle OFD files, you need to use viewer or editor software that supports the OFD standard. These tools can display, edit, convert, and print OFD documents.
In summary, as a domestic document format standard, OFD has been widely used in government agencies and enterprises. Especially in the case of formal documents that need to be preserved for a long time and legally protected, OFD provides a choice that is more suitable for China’s national conditions than traditional PDF. In addition, with the development of technology, OFD is also constantly improving and evolving to meet the growing digital office needs.
System requirements
Platform: Windows, Linux (x64 and armv8)
Programming Language: C, C++, Java, C#, Python, Node.js, Go
License Key requirement: ‘OFD’ module permission in the license key
SDK Version: Foxit PDF SDK (C, C++, Java, C#, Python, Node.js) 10.0 or higher; Foxit PDF SDK (Go) 11.0
OFD engine file
Please contact Foxit support team or sales team to get the OFD engine file package.
After getting the package, extract it to the desired directory. For example, extract the package to a directory: “D:/ofd/win” for Windows, “ofd/linux64” for Linux x64, and “ofd/linuxarm64” for Linux arm64.
How to run the ofd demo
Before running the ofd demo in the “examples\simple_demo\ofd” folder, you should first add the ofd engine file in the demo code, for example:
// Initialize OFD engine. "engine_path" is the path of ofd engine file. Please refer to Developer Guide for more details.
String engine_path = "D:/ofd/win/x64"; // For Windows x64
Then, run the demo following the steps as the other demos.
How to implement the conversion between OFD file and PDF file
#include "include/common/fs_common.h"
#include "include/addon/conversion/fs_convert.h"

using namespace foxit::common;

// Initialize OFD engine.
Library::InitializeOFDEngine(engine_path);
WString src_ofd_path = input_path + L"wm_txttiled.ofd";
WString src_pdf_path = input_path + L"test.pdf";
// Convert PDF document to OFD document, and convert OFD document to PDF document.
{
      foxit::addon::conversion::OFDConvertParam convert_param;
      // Convert OFD document to PDF document.
      foxit::addon::conversion::Convert::FromOFD(src_ofd_path, L"", output_directory + L"ofd2pdf.pdf", convert_param);
      // Convert PDF document to OFD document.
      foxit::addon::conversion::Convert::ToOFD(src_pdf_path, L"", output_directory + L"pdf2ofd.ofd", convert_param);
}
Library::ReleaseOFDEngine();
How to render OFD page
#include "include/common/fs_common.h"
#include "include/addon/ofd/fs_ofddoc.h"
#include "include/addon/ofd/fs_ofdpage.h"
#include "include/addon/ofd/fs_ofdrenderer.h"
using namespace std;
using namespace foxit;
using namespace foxit::common;
using namespace pdf;
using namespace addon::ofd;

// Initialize OFD engine.
Library::InitializeOFDEngine(engine_path);

// Render OFD document to bitmap.
{
      WString render_file_path = input_path + L"content_flag.ofd";
      OFDDoc doc(render_file_path, L"");
      OFDPage ofd_page = doc.GetPage(0);
      // Get the size of the page.
      float w = ofd_page.GetWidth();
      float h = ofd_page.GetHeight();
      Bitmap bitmap = Bitmap(w, h, Bitmap::e_DIBArgb, NULL, 0);
      RectI fRect(0, h, w, 0);
      bitmap.FillRect(0xFFFFFFFF, &fRect);
      // Get the display matrix of the page.
      Matrix matrix_1 = ofd_page.GetDisplayMatrix(0, 0, w, h, CommonDefines::e_Rotation0);

      OFDRenderer ofd_render(bitmap);

      Progressive progressive = ofd_render.StartRender(ofd_page, matrix_1);
      WString sSaveFilePath = output_directory + L"renderBitmap.bmp";
      // Add the bitmap to image and save the image.
      Image image;
      image.AddFrame(bitmap);
      image.SaveAs(sSaveFilePath);
      ofd_render.Release();
      ofd_page.Release();
      doc.Release();
}
Library::ReleaseOFDEngine();
Paragraph Editing
Foxit PDF SDK offers a versatile set of tools for developers to fine-tune and customize text in PDF documents. The paragraph editing module provides complex adjustments, joining, and splitting functions that allow users to have precise control over the content of the document. The features are complemented by an intuitive UI implementation that facilitates efficient editing, ensuring a seamless and customized experience for managing text paragraphs.
The paragraph editing functionality revolves around two core modules, the ParagraphEditing module, and the JoinSplit module.
The ParagraphEditing module is designed to offer a variety of text editing operations, enabling users to easily perform the following actions according to their specific requirements:
Insert Text: Insert new content at specific locations, allowing for customization of the document’s precise layout.
Delete Text: Delicately remove paragraphs or characters, enabling highly customized content trimming.
Modify Text: Adjust existing text, including its content and formatting, to suit different editing styles.
Format Adjustment: Support fine adjustments to paragraph formats and text styles, allowing for more accurate typesetting.
The JoinSplit module contains four vital operation types to support more complex text processing requirements:
Join: Integrate multiple text blocks, enhancing content layout and overall document consistency.
Split: Finely split text blocks, providing flexibility to manage various sections of the document.
Link: Establish connections between text blocks, ensuring consistency in associated content.
Unlink: Disconnect links between text blocks, offering more control over editing.
System requirements
Platform: Windows, Linux, Mac
Programming Language: C, C++, Java, C#, Python, Objective-C, Go
License Key requirement: ‘AdvEdit’ module permission in the license key
SDK Version: Foxit PDF SDK (C, C++, Java, C#, Python, Objective-C) 10.0 or higher; Foxit PDF SDK (Go) 11.0
How to work with paragraph editing
#include "include/common/fs_common.h"
#include "include/pdf/fs_pdfdoc.h"
#include "include/pdf/fs_pdfpage.h"
#include "include/addon/pageeditor/fs_paragraphediting.h"

using namespace foxit;
using namespace foxit::common;
using namespace pdf;
using namespace foxit::addon::pageeditor;

...
class FxParagraphEditingProviderCallback : public foxit::addon::pageeditor::ParagraphEditingProviderCallback {
public:

    FxParagraphEditingProviderCallback(int page_index) {
        this->current_page_index_ = page_index;
    }
    virtual ~FxParagraphEditingProviderCallback() {}

    virtual void Release() { delete this; }

    virtual foxit::Matrix GetRenderMatrix(const pdf::PDFDoc& document, int page_index) {
        PDFPage page = (PDFDoc(document)).GetPage(page_index);
        int width = static_cast<int>(page.GetWidth());
        int height = static_cast<int>(page.GetHeight());
        Matrix matrix = page.GetDisplayMatrix(0, 0, width, height, e_Rotation0);
        return matrix;
    }
    virtual void* GetPageViewHandle(const pdf::PDFDoc& document, int page_index) {
        return NULL;
    }
    virtual foxit::RectF GetClientRect(const pdf::PDFDoc& document) {
        return foxit::RectF();
    }
    virtual float GetScale(const pdf::PDFDoc& document, int page_index) {
        return 1.0f;
    }
    virtual bool GotoPageView(const pdf::PDFDoc& document, int page_index, float left, float top) {
        return true;
    }
    virtual Int32Array GetVisiblePageIndexArray(const pdf::PDFDoc& document) {
        Int32Array page_array;
        int pageindex = this->current_page_index_;
        page_array.Add(pageindex);
        return page_array;
    }
    virtual RectF GetPageVisibleRect(const pdf::PDFDoc& document, int page_index) {
        return foxit::RectF();
    }
    virtual foxit::RectF GetPageRect(const pdf::PDFDoc& document, int page_index) {
        PDFDoc doc = document;
        PDFPage page = doc.GetPage(page_index);
        float width = page.GetWidth();
        float height = page.GetHeight();
        RectF rect;
        rect.left = 0;
        rect.bottom = height;
        rect.right = width;
        rect.top = 0;
        return rect;
    }
    virtual int GetCurrentPageIndex(const pdf::PDFDoc& document) {
        return this->current_page_index_;
    }
    virtual common::Rotation GetRotation(const pdf::PDFDoc& document, int page_index) {
        PDFPage page = (PDFDoc(document)).GetPage(page_index);
        Rotation rotation = page.GetRotation();
        return rotation;
    }
    virtual void InvalidateRect(const pdf::PDFDoc& document, int page_index, const RectFArray& invalid_rects) {

    }
    virtual void AddUndoItem(const ParagraphEditingUndoItem& undo_item) {
    }
    virtual void SetDocChangeMark(const pdf::PDFDoc& document) {
    }
    virtual void NotifyTextInputReachLimit(const pdf::PDFDoc& document, int page_index) {
    }

private:
    int current_page_index_;
};

...

PDFPage page = doc.GetPage(0);
page.StartParse();
float height = page.GetHeight();

FxParagraphEditingProviderCallback* callback = new FxParagraphEditingProviderCallback(page.GetIndex());
ParagraphEditingMgr touchup_mgr = ParagraphEditingMgr(callback, doc);

// Paragraph_editing
{
    ParagraphEditing paragraphEditing = touchup_mgr.GetParagraphEditing();
    paragraphEditing.Activate();
    paragraphEditing.StartEditing(0, PointF(95, height - 728), PointF(95, height - 728));
    paragraphEditing.SetFontSize(24);
    paragraphEditing.SetUnderline(true);
    paragraphEditing.InsertText(L"InsertText_Paragraph_editing");
    paragraphEditing.Deactivate();
    WString save_pdf_path = output_directory + L"Paragraph_editing.pdf";
    doc.SaveAs(save_pdf_path, PDFDoc::e_SaveFlagNoOriginal);
}

// Join&split
{
    JoinSplit joinSplit = touchup_mgr.GetJoinSplit();
    joinSplit.Activate();
    joinSplit.OnLButtonDown(0, PointF(289, 659));
    joinSplit.OnLButtonUp(0, PointF(289, 659));
    joinSplit.SplitBoxes();
    joinSplit.Deactivate();
    WString save_pdf_path = output_directory + L"Split_Boxes.pdf";
    doc.SaveAs(save_pdf_path, PDFDoc::e_SaveFlagNoOriginal);

    joinSplit.Activate();
    joinSplit.OnLButtonDown(0, PointF(307, height - 637));
    joinSplit.OnLButtonUp(0, PointF(307, height - 637));
    joinSplit.OnLButtonDown(0, PointF(307, height - 453));
    joinSplit.OnLButtonUp(0, PointF(307, height - 453));
    joinSplit.JoinBoxes();
    joinSplit.Deactivate();
    save_pdf_path = output_directory + L"Join_Boxes.pdf";
    doc.SaveAs(save_pdf_path, PDFDoc::e_SaveFlagNoOriginal);
}
3D Rendering
3D Rendering in PDFs helps convert 3D models into 2D images or animations, which can be embedded in the document. The 3D models can be created using specialized 3D modeling software or CAD (Computer-Aided Design) software and can then be rendered into a 2D format that can be easily viewed within a PDF.
3D Annotation is a feature that allows users to add contextual information to specific parts of these 3D models within the PDF. The annotations can include text, images, and even links to external resources, providing more detailed information and insights about the model.
System requirements
Platform: Windows
Programming Language: C, C++, Java, C#, Python, Go
License Key requirement: ‘3D’ module permission in the license key
SDK Version: Foxit PDF SDK (C, C++, Java, C#, Python) 10.0 or higher; Foxit PDF SDK (Go) 11.0
How to display the 3D annotation
#include "include/addon/3d/fs_pdf3d.h"

// Load PDF document.
...
PDF3DContext pdf_context = PDF3DContext(pdf_doc);
...

void CXXXView::On3dDisplay3dannot()
{
    // Get the 3d annotation instance array.
    PDF3DAnnotInstanceArray annot_data_arr = pdf_context.GetPage3DAnnotArray(0);
    if (annot_data_arr.GetSize() == 0) return;
    // Class parameter.
    PDF3DAnnotInstance annotData = annot_data_arr.GetAt(0);
    // Activate the canvas to display the 3d annotation. Pass in a window handle to embed canvas.
    annotData.ActivateCanvas(this->GetSafeHwnd());
}
How to set render mode and controller
#include "include/addon/3d/fs_pdf3d.h"

// Rotate to view 3D annotations.
annotData.SetController(PDF3DAnnotInstance::e_ControllerRotate);

// Render 3D annotations as transparent.
annotData.SetRenderMode(PDF3DAnnotInstance::e_RenderModeTransparent);
FAQ
How to fix the “‘xcopy‘ exited with code 9009″ error when building demos in Visual Studio?
When building demos in Visual Studio, if you encounter the error “‘xcopy’ exited with code 9009” as follows:
'xcopy ..\..\..\..\..\..\lib\gsdk_sn.txt ..\..\..\ /y > null
xcopy ..\..\..\..\..\..\lib\gsdk_key.txt ..\..\..\ /y > null
xcopy ..\..\..\..\..\..\lib\$(PlatformName)_vc10\fsdk.dll ..\..\..\ /y > null
xcopy ..\..\..\..\..\..\lib\$(PlatformName)_vc10\fsdk_dotnet.dll ..\..\..\ /y > null' exited with code 9009
Please check the following points:
Check whether the xcopy.exe is in the “%SystemRoot%\System32″ directory, if not, copy one from another machine.
Check whether the system PATH environment variables have been set correctly. It should contain “%SystemRoot%\System32;%SystemRoot%;“, if the environment variables for xcopy is right, but it still reports the error, please put the path of xcopy in front of others. Maybe some other environment variables have spell mistakes, so that cause the subsequent environment variables are invalid. Please check it.
After checking, open a command prompt, type xcopy command, if it can be recognized, close Visual Studio, and restart the demos. The error should be fixed.
How do I get text objects in a specified position of a PDF and change the contents of the text objects?
To get text objects in a specified position of a PDF and change the contents of the text objects using Foxit PDF SDK, you can follow the steps below:
Open a PDF file.
Load PDF pages and get the page objects.
Use PDFPage::GetGraphicsObjectAtPoint to get the text object at a certain position. Note: use the page object to get rectangle to see the position of the text object.
Change the contents of the text objects and save the PDF document.
Following is the sample code:
#include "include/common/fs_common.h"
#include "include/pdf/fs_pdfdoc.h"
#include "include/pdf/graphics/fs_pdfgraphicsobject.h"

using namespace std;
using namespace foxit;
using namespace foxit::common;
using foxit::common::Library;
using namespace pdf;
using namespace graphics;
...

bool ChangeTextObjectContent()
{
    try {
        WString input_file = input_path + L"AboutFoxit.pdf";
        PDFDoc doc(input_file);
    ErrorCode error_code = doc.Load();
        if (error_code != foxit::e_ErrSuccess) {
            printf("The Doc [%s] Error: %d\n", (const char*)String::FromUnicode(input_file), error_code);
            return false;
    }
        // Get original shading objects from the first PDF page.
    PDFPage original_page = doc.GetPage(0);
        original_page.StartParse(PDFPage::e_ParsePageNormal, NULL, false);
    foxit::PointF pointf;
        pointf.x = 92;
        pointf.y = 762;
        GraphicsObjectArray arr = original_page.GetGraphicsObjectsAtPoint (pointf, 10, GraphicsObject::e_TypeText );
        for(int i = 0; i<arr.GetSize(); i++)
    {
            GraphicsObject* graphobj = arr.GetAt(i);
            TextObject * textobj = graphobj->GetTextObject();
            textobj->SetText(L"Foxit Test");
    }
        original_page.GenerateContent();
        WString output_directory = output_path + L"graphics_objects/";
        WString output_file = output_directory + L"After_revise.pdf";
        doc.SaveAs(output_file, PDFDoc::e_SaveFlagNormal);
}catch (const Exception& e) {
        cout << e.GetMessage() << endl;
        return false;
}
    return true;
}
Can I change the DPI of an embedded TIFF image?
No, you cannot change it. The DPI of the images in PDF files is static, so if the images already exist, Foxit PDF SDK does not have functions to change its DPI.
The solution is that you can use third-party library to change the DPI of an image, and then add it to the PDF file.
Note: Foxit PDF SDK provides a function “Image::SetDPIs” which can set the DPI property of an image object. However, it only supports the images that are created by Foxit PDF SDK or created by function “Image::AddFrame“, and it does not support the image formats of JPX, GIF and TIF.
Why do I encounter “Fail to initialize the engine file or cannot load the engine file” for OCR and DWG2PDF modules on Windows 7 when running the corresponding simple demos, even if the engine files have been upgraded to the latest and the simple demos have configured the engine path correctly?
For Windows 7, you need to copy the dll files starting with api–ms-win* and the ucrtbase.dll in the engine directory to the system directory.
If you are using a 32-bit engine and running on a 32-bit system, you need to copy the api-ms-win*.dll files and ucrtbase.dll from the engine directory to “C:/Windows/System32”.
If you are using a 32-bit engine and running on a 64-bit system, you need to copy the api-ms-win*.dll files and ucrtbase.dll from the engine directory to “C:/Windows/SysWOW64”.
If you are using a 64-bit engine, you need to copy the api-ms-win*.dll files and ucrtbase.dll from the engine directory to “C:/Windows/System32”.
How to run the Office2PDF functionality in Windows services?
To run the Office2PDF functionality in Windows services, you need to configure the Office Component Services and permissions.
Take the Word component as an example.
Press Win+R, and then type Dcomcnfg to open Component Services, find [Component Services] -> [Computers] -> [My Computer] -> [DCOM Config] -> [Microsoft Word 97-2003 Document], right-click it and select Properties. Choose [Identity], and set it to “The interactive user“.
Note: if you can’t find [Microsoft Word 97-2003 Document] with Dcomcnfg command, you can try to use the “comexp.msc -32” command.
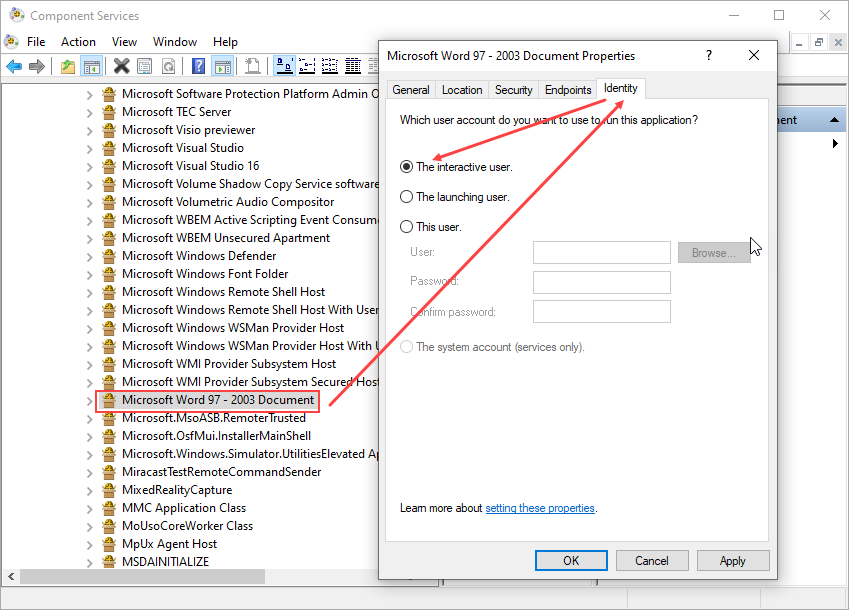
Set permissions. click [Security], set the [Launch and Activation Permissions] and [Access Permissions] to Customize. Click Edit, and add the current login account of the system and enable all permissions.
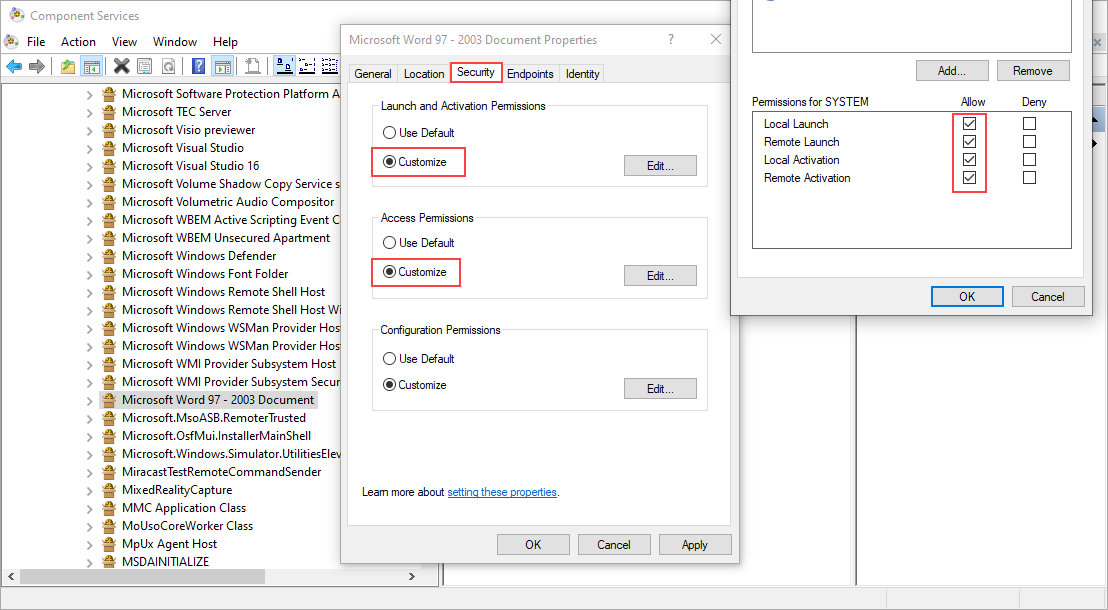
After finishing the above settings, the Word2PDF functionality can be run in the Windows services.
Appendix
Supported JavaScript List
Objects’ property or method
| Object | Properites/Method Names | Minimum Supported SDK Version |
| annotation properties | alignment | V7.0 |
| author | V7.0 | |
| contents | V7.0 | |
| creationDate | V7.0 | |
| fillColor | V7.0 | |
| hidden | V7.0 | |
| modDate | V7.0 | |
| name | V7.0 | |
| opacity | V7.0 | |
| page | V7.0 | |
| readOnly | V7.0 | |
| rect | V7.0 | |
| richContents | V7.1 | |
| rotate | V7.0 | |
| strokeColor | V7.0 | |
| textSize | V7.0 | |
| type | V7.0 | |
| AP | V9.0 | |
| arrowBegin | V9.0 | |
| arrowEnd | V9.0 | |
| attachIcon | V9.0 | |
| attachment | V9.0 | |
| borderEffectIntensity | V9.0 | |
| borderEffectStyle | V9.0 | |
| callout | V9.0 | |
| caretSymbol | V9.0 | |
| dash | V9.0 | |
| delay | V9.0 | |
| doc | V9.0 | |
| doCaption | V9.0 | |
| gestures | V9.0 | |
| inReplyTo | V9.0 | |
| intent | V9.0 | |
| leaderExtend | V9.0 | |
| leaderLength | V9.0 | |
| lineEnding | V9.0 | |
| lock | V9.0 | |
| noteIcon | V9.0 | |
| noView | V9.0 | |
| point | V9.0 | |
| points | V9.0 | |
| popupOpen | V9.0 | |
| popupRect | V9.0 | |
| V9.0 | ||
| quads | V9.0 | |
| refType | V9.0 | |
| richDefaults | V9.0 | |
| seqNum | V9.0 | |
| soundIcon | V9.0 | |
| style | V9.0 | |
| subject | V9.0 | |
| textFont | V9.0 | |
| toggleNoView | V9.0 | |
| vertices | V9.0 | |
| width | V9.0 | |
| annotation method | destroy | V7.0 |
| getProps | V9.0 | |
| setProps | V9.0 | |
| getStateInModel | V9.0 | |
| app properties | activeDocs | V4.0 |
| calculate | V4.0 | |
| formsVersion | V4.0 | |
| fs | V4.0 | |
| fullscreen | V4.0 | |
| language | V4.2 | |
| platform | V4.0 | |
| runtimeHighlight | V4.0 | |
| viewerType | V4.0 | |
| viewerVariation | V4.0 | |
| viewerVersion | V4.0 | |
| printerNames | V8.4 | |
| runtimeHighlightColor | V8.4 | |
| constants | V8.4 | |
| app methods | alert | V4.0 |
| beep | V4.0 | |
| browseForDoc | V4.0 | |
| clearInterval | V4.0 | |
| clearTimeOut | V4.0 | |
| launchURL | V4.0 | |
| mailMsg | V4.0 | |
| response | V4.0 | |
| setInterval | V4.0 | |
| setTimeOut | V4.0 | |
| popUpMenu | V4.0 | |
| execDialog | V8.4 | |
| execMenuItem | V8.4 | |
| newDoc | V8.4 | |
| openDoc | V8.4 | |
| popUpMenuEx | V8.4 | |
| addMenuItem | V8.4 | |
| addSubMenu | V8.4 | |
| addToolButton | V8.4 | |
| removeToolButton | V8.4 | |
| listMenuItems | V8.4 | |
| trustedFunction | V8.4 | |
| beginPriv | V8.4 | |
| endPriv | V8.4 | |
| color properties | black | V4.0 |
| blue | V4.0 | |
| cyan | V4.0 | |
| dkGray | V4.0 | |
| gray | V4.0 | |
| green | V4.0 | |
| ltGray | V4.0 | |
| magenta | V4.0 | |
| red | V4.0 | |
| transparent | V4.0 | |
| white | V4.0 | |
| yellow | V4.0 | |
| color methods | convert | V4.0 |
| equal | V4.0 | |
| document properties | author | V4.0 |
| baseURL | V4.0 | |
| bookmarkRoot | V7.0 | |
| calculate | V4.0 | |
| Collab | V4.0 | |
| creationDate | V4.0 | |
| creator | V4.0 | |
| delay | V4.0 | |
| dirty | V4.0 | |
| documentFileName | V4.0 | |
| external | V4.0 | |
| filesize | V4.0 | |
| icons | V4.0 | |
| info | V4.0 | |
| keywords | V4.0 | |
| modDate | V4.0 | |
| numFields | V4.0 | |
| numPages | V4.0 | |
| pageNum | V4.0 | |
| path | V4.0 | |
| producer | V4.0 | |
| subject | V4.0 | |
| title | V4.0 | |
| URL | V8.4 | |
| dataObjects | V8.4 | |
| hostContainer | V8.4 | |
| templates | V8.4 | |
| media | V8.4 | |
| dynamicXFAForm | V8.4 | |
| mouseX | V8.4 | |
| mouseY | V8.4 | |
| pageWindowRect | V8.4 | |
| securityHandler | V8.4 | |
| zoom | V8.4 | |
| zoomType | V8.4 | |
| layout | V8.4 | |
| xfa | V8.4 | |
| document methods | addAnnot | V7.0 |
| addField | V4.0 | |
| addIcon | V4.0 | |
| calculateNow | V4.0 | |
| deletePages | V4.0 | |
| exportAsFDF | V4.0 | |
| flattenPages | V7.1 | |
| getAnnot | V7.0 | |
| getAnnots | V7.0 | |
| getField | V4.0 | |
| getIcon | V4.0 | |
| getNthFieldName | V4.0 | |
| getOCGs | V4.0 | |
| getPageBox | V4.0 | |
| getPageNthWord | V4.0 | |
| getPageNthWordQuads | V4.0 | |
| getPageNumWords | V4.0 | |
| getPageRotation | V7.0 | |
| getPrintParams | V4.0 | |
| getURL | V4.0 | |
| importAnFDF | V4.0 | |
| insertPages | V6.2 | |
| mailForm | V4.0 | |
| V4.0 | ||
| removeField | V4.0 | |
| replacePages | V6.2 | |
| resetForm | V4.0 | |
| submitForm | V4.0 | |
| mailDoc | V4.0 | |
| addWatermarkFromFile | V8.4 | |
| addWatermarkFromText | V8.4 | |
| getPageLabel | V8.4 | |
| setPageLabels | V8.4 | |
| gotoNamedDest | V8.4 | |
| saveAs | V8.4 | |
| scroll | V8.4 | |
| setPageTabOrder | V8.4 | |
| selectPageNthWord | V8.4 | |
| syncAnnotScan | V8.4 | |
| getAnnot3D | V8.4 | |
| getAnnots3D | V8.4 | |
| addLink | V8.4 | |
| removeLinks | V8.4 | |
| getLinks | V8.4 | |
| importIcon | V8.4 | |
| removeIcon | V8.4 | |
| addWeblinks | V8.4 | |
| removeWeblinks | V8.4 | |
| closeDoc | V8.4 | |
| exportDataObject | V8.4 | |
| importDataObject | V8.4 | |
| removeDataObject | V8.4 | |
| getDataObject | V8.4 | |
| embedDocAsDataObject | V8.4 | |
| createTemplate | V8.4 | |
| removeTemplate | V8.4 | |
| getTemplate | V8.4 | |
| exportAsText | V8.4 | |
| importTextData | V8.4 | |
| exportAsXFDF | V8.4 | |
| importAnXFDF | V8.4 | |
| exportAsXFDFStr | V8.4 | |
| extractPages | V8.4 | |
| movePage | V8.4 | |
| newPage | V8.4 | |
| getOCGOrder | V8.4 | |
| setOCGOrder | V8.4 | |
| setPageBoxes | V8.4 | |
| setPageRotations | V8.4 | |
| setPageTransitions | V9.1 | |
| getPageTransition | V9.1 | |
| event properties | change | V4.0 |
| changeEx | V4.0 | |
| commitKey | V4.0 | |
| fieldFull | V4.0 | |
| keyDown | V4.0 | |
| modifier | V4.0 | |
| name | V4.0 | |
| rc | V4.0 | |
| selEnd | V4.0 | |
| selStart | V4.0 | |
| shift | V4.0 | |
| source | V4.0 | |
| target | V4.0 | |
| targetName | V4.0 | |
| type | V4.0 | |
| value | V4.0 | |
| willCommit | V4.0 | |
| event methods | add | V9.0 |
| field properties | alignment | V4.0 |
| borderStyle | V4.0 | |
| buttonAlignX | V4.0 | |
| buttonAlignY | V4.0 | |
| buttonFitBounds | V4.0 | |
| buttonPosition | V4.0 | |
| buttonScaleHow | V4.0 | |
| buttonScaleWhen | V4.0 | |
| calcOrderIndex | V4.0 | |
| charLimit | V4.0 | |
| comb | V4.0 | |
| commitOnSelChange | V4.0 | |
| currentValueIndices | V4.0 | |
| defaultValue | V4.0 | |
| doNotScroll | V4.0 | |
| doNotSpellCheck | V4.0 | |
| delay | V4.0 | |
| display | V4.0 | |
| doc | V4.0 | |
| editable | V4.0 | |
| exportValues | V4.0 | |
| hidden | V4.0 | |
| fileSelect | V4.0 | |
| fillColor | V4.0 | |
| lineWidth | V4.0 | |
| highlight | V4.0 | |
| multiline | V4.0 | |
| multipleSelection | V4.0 | |
| name | V4.0 | |
| numItems | V4.0 | |
| page | V4.0 | |
| password | V4.0 | |
| V4.0 | ||
| radiosInUnison | V4.0 | |
| readonly | V4.0 | |
| rect | V4.0 | |
| required | V4.0 | |
| richText | V4.0 | |
| rotation | V4.0 | |
| strokeColor | V4.0 | |
| style | V4.0 | |
| textColor | V4.0 | |
| textFont | V4.0 | |
| textSize | V4.0 | |
| type | V4.0 | |
| userName | V4.0 | |
| value | V4.0 | |
| valueAsString | V4.0 | |
| richValue | V9.0 | |
| submitName | V9.0 | |
| field methods | browseForFileToSubmit | V4.0 |
| buttonGetCaption | V4.0 | |
| buttonGetIcon | V4.0 | |
| buttonSetCaption | V4.0 | |
| buttonSetIcon | V4.0 | |
| checkThisBox | V4.0 | |
| clearItems | V4.0 | |
| defaultIsChecked | V4.0 | |
| deleteItemAt | V4.0 | |
| getArray | V4.0 | |
| getItemAt | V4.0 | |
| insertItemAt | V4.0 | |
| isBoxChecked | V4.0 | |
| isDefaultChecked | V4.0 | |
| setAction | V4.0 | |
| setFocus | V4.0 | |
| setItems | V4.0 | |
| buttonImportIcon | V9.0 | |
| getLock | V9.0 | |
| setLock | V9.0 | |
| signatureGetModifications | V9.0 | |
| signatureGetSeedValue | V9.0 | |
| signatureInfo | V9.0 | |
| signatureSetSeedValue | V9.0 | |
| signatureSign | V9.0 | |
| signatureValidate | V9.0 | |
| global methods | setPersistent | V4.0 |
| Icon properties | name | V4.0 |
| util methods | printd | V4.0 |
| printf | V4.0 | |
| printx | V4.0 | |
| scand | V4.0 | |
| iconStreamFromIcon | V9.0 | |
| identity properties | loginName | V4.2 |
| name | V4.2 | |
| corporation | V4.2 | |
| V4.2 | ||
| collab properties | user | V6.2 |
| ocg properties | name | V6.2 |
| ocg methods | setAction | V6.2 |
| bookmark properties | color | V8.4 |
| open | V8.4 | |
| name | V8.4 | |
| parent | V8.4 | |
| children | V8.4 | |
| language | V8.4 | |
| style | V8.4 | |
| platform | V8.4 | |
| bookmark methods | createChild | V8.4 |
| insertChild | V8.4 | |
| execute | V8.4 | |
| setAction | V8.4 | |
| remove | V8.4 | |
| certificate properties | binary | V8.4 |
| issuerDN | V8.4 | |
| keyUsage | V8.4 | |
| MD5Hash | V8.4 | |
| privateKeyValidityEnd | V8.4 | |
| privateKeyValidityStart | V8.4 | |
| SHA1Hash | V8.4 | |
| serialNumber | V8.4 | |
| subjectCN | V8.4 | |
| subjectDN | V8.4 | |
| validityEnd | V8.4 | |
| validityStart | V8.4 | |
| RDN properties | c | V8.4 |
| cn | V8.4 | |
| e | V8.4 | |
| l | V8.4 | |
| o | V8.4 | |
| ou | V8.4 | |
| st | V8.4 | |
| security properties | handlers | V9.0 |
| security methods | getHandler | V9.0 |
| importFromFile | V9.0 | |
| securityHandler properties | appearances | V9.0 |
| isLoggedIn | V9.0 | |
| loginName | V9.0 | |
| loginPath | V9.0 | |
| name | V9.0 | |
| uiName | V9.0 | |
| securityHandler methods | login | V9.0 |
| logout | V9.0 | |
| newUser | V9.0 | |
| signatureInfo properties | objValidity | V9.0 |
| idValidity | V9.0 | |
| idPrivValidity | V9.0 | |
| docValidity | V9.0 | |
| byteRange | V9.0 | |
| verifyHandlerUIName | V9.0 | |
| verifyHandlerName | V9.0 | |
| verifyDate | V9.0 | |
| subFilter | V9.0 | |
| statusText | V9.0 | |
| status | V9.0 | |
| reason | V9.0 | |
| name | V9.0 | |
| mdp | V9.0 | |
| location | V9.0 | |
| handlerUIName | V9.0 | |
| handlerUserName | V9.0 | |
| handlerName | V9.0 | |
| dateTrusted | V9.0 | |
| date | V9.0 | |
| search properties | attachments | V9.0 |
| bookmarks | V9.0 | |
| docText | V9.0 | |
| ignoreAccents | V9.0 | |
| markup | V9.0 | |
| matchCase | V9.0 | |
| matchWholeWord | V9.0 | |
| maxDocs | V9.0 | |
| proximity | V9.0 | |
| stem | V9.0 | |
| wordMatching | V9.0 | |
| ignoreAsianCharacterWidth | V9.0 | |
| search methods | query | V9.0 |
| addIndex | V9.0 | |
| removeIndex | V9.0 | |
| link properties | borderColor | V8.4 |
| borderWidth | V8.4 | |
| highlightMode | V8.4 | |
| rect | V8.4 | |
| link methods | setAction | V8.4 |
| app.media properties | align | V8.4 |
| canResize | V8.4 | |
| ifOffScreen | V8.4 | |
| over | V8.4 | |
| windowType | V8.4 | |
| app.media methods | createPlayer | V8.4 |
| openPlayer | V8.4 | |
| doc.media methods | getOpenPlayers | V8.4 |
| Playerargs properties | doc | V8.4 |
| annot | V8.4 | |
| rendition | V8.4 | |
| URL | V8.4 | |
| mimeType | V8.4 | |
| settings | V8.4 | |
| events | V8.4 | |
| MediaPlayer properties | isOpen | V8.4 |
| isPlaying | V8.4 | |
| settings | V8.4 | |
| visible | V8.4 | |
| MediaPlayer methods | close | V8.4 |
| play | V8.4 | |
| seek | V8.4 | |
| stop | V8.4 | |
| MediaSettings properties | autoPlay | V8.4 |
| baseURL | V8.4 | |
| bgColor | V8.4 | |
| bgOpacity | V8.4 | |
| duration | V8.4 | |
| floating | V8.4 | |
| page | V8.4 | |
| repeat | V8.4 | |
| showUI | V8.4 | |
| visible | V8.4 | |
| volume | V8.4 | |
| windowType | V8.4 | |
| floating properties | align | V8.4 |
| over | V8.4 | |
| canResize | V8.4 | |
| hasClose | V8.4 | |
| hasTitle | V8.4 | |
| title | V8.4 | |
| ifOffScreen | V8.4 | |
| rect | V8.4 | |
| eventListener methods | afterClose | V9.0 |
| afterPlay | V9.0 | |
| afterReady | V9.0 | |
| afterSeek | V9.0 | |
| afterStop | V9.0 | |
| onClose | V9.0 | |
| onPlay | V9.0 | |
| onReady | V9.0 | |
| onSeek | V9.0 | |
| onStop | V9.0 | |
| Template properties | hidden | V9.1 |
| name | V9.1 | |
| Template method | spawn | V9.1 |
| span properties | alignment | V9.1 |
| fontFamily | V9.1 | |
| fontStretch | V9.1 | |
| fontWeight | V9.1 | |
| fontStyle | V9.1 | |
| strikethrough | V9.1 | |
| subscript | V9.1 | |
| superscript | V9.1 | |
| text | V9.1 | |
| textColor | V9.1 | |
| textSize | V9.1 | |
| underline | V9.1 | |
| soap properties | wireDump | V9.1 |
| Soap method | request | V9.1 |
| streamDigest | V9.1 | |
| streamEncode | V9.1 | |
| streamFromString | V9.1 | |
| stringFromStream | V9.1 | |
| hostContainer method | postMessage | V9.2 |
| Fullscreen properties | transitions | V9.2 |
| defaultTransition | V9.2 | |
| loop | V9.2 | |
| timeDelay | V9.2 | |
| useTimer | V9.2 | |
| isFullScreen | V9.2 |
Global methods
| Method Names | Minimum Supported SDK Version |
| AFNumber_Format | V4.0 |
| AFNumber_Keystroke | V4.0 |
| AFPercent_Format | V4.0 |
| AFPercent_Keystroke | V4.0 |
| AFDate_FormatEx | V4.0 |
| AFDate_KeystrokeEx | V4.0 |
| AFDate_Format | V4.0 |
| AFDate_Keystroke | V4.0 |
| AFTime_FormatEx | V4.0 |
| AFTime_KeystrokeEx | V4.0 |
| AFTime_Format | V4.0 |
| AFTime_Keystroke | V4.0 |
| AFSpecial_Format | V4.0 |
| AFSpecial_Keystroke | V4.0 |
| AFSpecial_KeystrokeEx | V4.0 |
| AFSimple | V4.0 |
| AFMakeNumber | V4.0 |
| AFSimple_Calculate | V4.0 |
| AFRange_Validate | V4.0 |
| AFMergeChange | V4.0 |
| AFParseDateEx | V4.0 |
| AFExtractNums | V4.0 |
References
PDF reference 1.7
http://www.iso.org/iso/iso_catalogue/catalogue_tc/catalogue_detail.htm?csnumber=51502
PDF reference 2.0
https://www.iso.org/standard/63534.html
Foxit PDF SDK API reference
sdk_folder/doc/Foxit PDF SDK API Reference.html
Note: sdk_folder is the directory of unzipped package.
Support
Foxit Support
In order to provide you with a more personalized support for a resolution, please log in to your Foxit account and submit a ticket so that we can collect details about your issue. We will work to get your problem solved as quickly as we can once your ticket is routed to our support team.
You can also check out our Support Center, choose Foxit PDF SDK which also has a lot of helpful articles that may help with solving your issue.
Phone Support:
Phone: 1-866-MYFOXIT or 1-866-693-6948
Updated on August 6, 2025